
Red Velvet Cake in a Jar Recipe Tiny Treats Delight
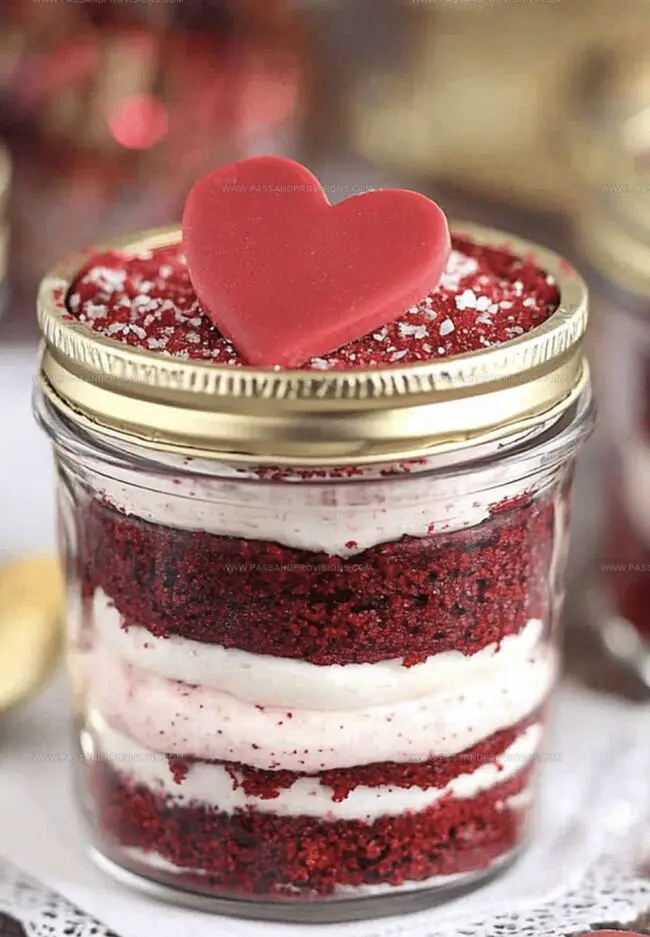
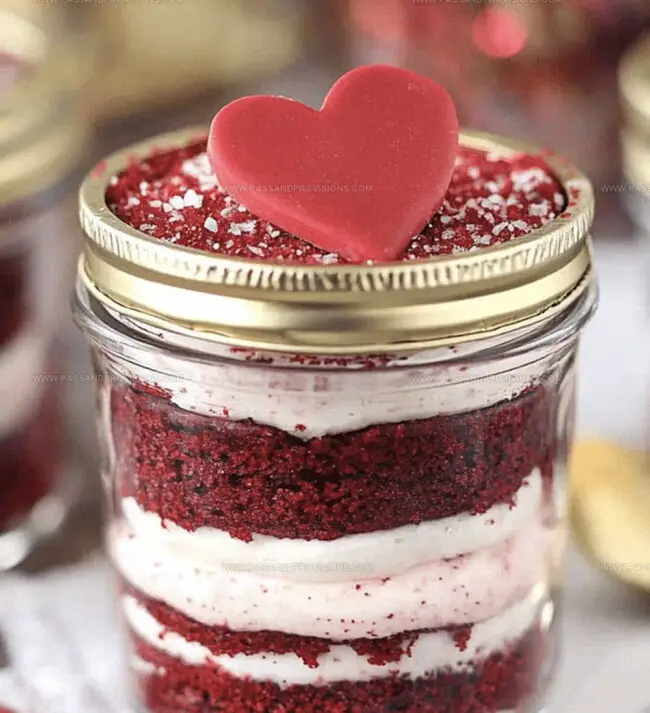
Layers of decadent red velvet cake create a whimsical dessert that captures hearts instantly.
Sweet memories bloom with each carefully crafted spoonful nestled in a charming glass container.
Vibrant crimson crumbs mingle with creamy frosting, promising an indulgent experience.
Compact and portable, this dessert delivers maximum deliciousness in a convenient package.
Dessert enthusiasts will adore the playful presentation that turns classic cake into an irresistible treat.
Minimal effort yields maximum satisfaction with these individually portioned delights.
You’ll want to savor every single luscious bite of this delightful confection.
Reasons to Love Red Velvet Cake in a Jar
Must-Have Ingredients for Red Velvet Jar Cake
Dry Ingredients:Wet Ingredients:Color and Flavor Enhancers:Instructions to Build Red Velvet Cake in a Jar
Step 1: Prepare The Baking Space
Preheat the oven to 350°F (175°C). Grab a 9×13-inch baking pan and coat it with cooking spray or butter. Line the bottom with parchment paper for easy cake removal.
Step 2: Mix Dry Ingredients
Gather these dry ingredients in a large mixing bowl:Whisk everything together until well combined and no lumps remain.
Step 3: Combine Wet Ingredients
In a separate bowl, blend these liquid elements:Whisk until the mixture looks smooth and vibrant red.
Step 4: Create Cake Batter
Pour the wet ingredients into the dry ingredients. Gently fold and mix until just combined. Avoid overmixing to keep the cake tender.
Step 5: Bake The Cake
Transfer the batter into the prepared pan. Spread evenly with a spatula. Place in the preheated oven and bake for 25-30 minutes. Check doneness by inserting a toothpick into the center- it should come out clean.
Step 6: Cool And Prepare
Remove the cake from the oven. Let it cool completely in the pan. Once cooled, you can cut and layer the cake into mason jars for a charming dessert presentation.
Handy Tips for Layering Jar Cakes
Storage Tips for Red Velvet Cake in a Jar
Best Pairings with Red Velvet Jar Cake
Red Velvet Jar Cake Variations to Try
Red Velvet Jar Cake Q&A
Red velvet cake has a unique tangy flavor from buttermilk and vinegar, and its distinctive red color comes from food coloring combined with cocoa powder, giving it a subtle chocolate taste.
Yes, you can create a buttermilk substitute by mixing regular milk with white vinegar or lemon juice. Let the mixture sit for 5 minutes before using it in the recipe.
The combination of vinegar and buttermilk helps activate the baking soda, creating a tender and light cake texture while adding a subtle tangy flavor that’s characteristic of red velvet cakes.
While red food coloring gives the cake its signature color, you can reduce the amount or use natural alternatives like beet juice if you prefer a more natural approach to achieving the red hue.
Print
Red Velvet Cake In A Jar Recipe
- Total Time: 1 hour
- Yield: 6 to 8 1x
Description
Red velvet cake in a jar blends Southern charm with modern dessert creativity, offering a delightful twist on classic comfort. Rich cocoa-infused layers nestled in glass bring elegance and portability, inviting dessert enthusiasts to savor each spoonful of pure indulgence.
Ingredients
Main Ingredients:
- 2 ½ cups (300 grams) all-purpose flour
- 1 ½ cups (300 grams) granulated sugar
- 1 cup (240 milliliters) buttermilk
- 1 cup (240 milliliters) vegetable oil
- 2 large eggs, room temperature
Flavoring and Coloring Ingredients:
- 1 tablespoon (15 milliliters) red food coloring
- 1 teaspoon cocoa powder
- 1 teaspoon white vinegar
- 1 teaspoon vanilla extract
Binding and Seasoning Ingredients:
- 1 teaspoon baking soda
- 1 teaspoon salt
Frosting Ingredients:
- 8 ounces (226 grams) cream cheese, softened
- ½ cup (113 grams) unsalted butter, softened
- 3 cups (360 grams) powdered sugar
- 1 teaspoon vanilla extract
Additional Items:
- 6–8 small mason jars (8 ounces each)
- Crushed red velvet cake crumbs for garnish (optional)
Instructions
- Warm the oven to 350°F (175°C) and prepare a 9×13-inch baking pan by lining it with parchment paper and applying a light coat of oil.
- Combine the dry ingredients in a mixing bowl, thoroughly blending the flour, sugar, baking soda, cocoa powder, and salt using a whisk to eliminate any potential lumps.
- In a separate large mixing vessel, vigorously whisk together the buttermilk, vegetable oil, eggs, vanilla extract, white vinegar, and vibrant red food coloring until the mixture achieves a smooth, uniform consistency.
- Carefully incorporate the dry ingredient mixture into the liquid ingredients, gently folding and stirring until just combined, taking care not to overmix the batter.
- Transfer the crimson-hued batter into the prepared baking pan, ensuring an even distribution across the surface.
- Slide the pan into the preheated oven and bake for 25-30 minutes, monitoring the cake’s progress by inserting a toothpick into the center – it should emerge clean and free of raw batter.
- Once baked, remove the pan from the oven and allow the cake to cool completely on a wire rack, which will help prevent moisture buildup and ensure a perfect texture.
- After the cake has reached room temperature, proceed with assembling the jar dessert by cutting and layering cake pieces with your preferred frosting or cream.
Notes
- Cocoa Powder Matters: Use high-quality unsweetened cocoa powder for a rich, deep chocolate flavor that enhances the red velvet’s signature taste.
- Buttermilk Swap: No buttermilk? Create a quick substitute by adding 1 tablespoon of white vinegar or lemon juice to 1 cup of milk and letting it sit for 5 minutes.
- Food Coloring Alternatives: For a natural red hue, replace artificial food coloring with beet juice or concentrated beet powder, which adds color and subtle earthiness.
- Jar Assembly Tips: Slice cake into clean, even layers and use a round cookie cutter for perfect circular pieces that fit neatly inside mason jars.
- Prep Time: 30 minutes
- Cook Time: 30 minutes
- Category: Desserts
- Method: Baking
- Cuisine: American
Nutrition
- Serving Size: 6 to 8
- Calories: 360
- Sugar: 35 g
- Sodium: 300 mg
- Fat: 20 g
- Saturated Fat: 4 g
- Unsaturated Fat: 16 g
- Trans Fat: 0 g
- Carbohydrates: 42 g
- Fiber: 0 g
- Protein: 3 g
- Cholesterol: 30 mg
Jamie Granger
Recipe Developer & Food Writer
Expertise
Education
Culinary Institute of America
Jamie Granger turns ingredients into memories. With her recipes, she brings a fusion-forward flair to every creation.
Her dishes reflect the places she’s explored, the chefs she’s learned from, and the deep connection she has to food as a form of expression.
At Pass and Provision, Jamie develops recipes that balance flavor, health, and beauty, meals that don’t just satisfy your appetite but speak to your curiosity.