Irresistible Chocolate Poke Cake Recipe for Sweet Cravings
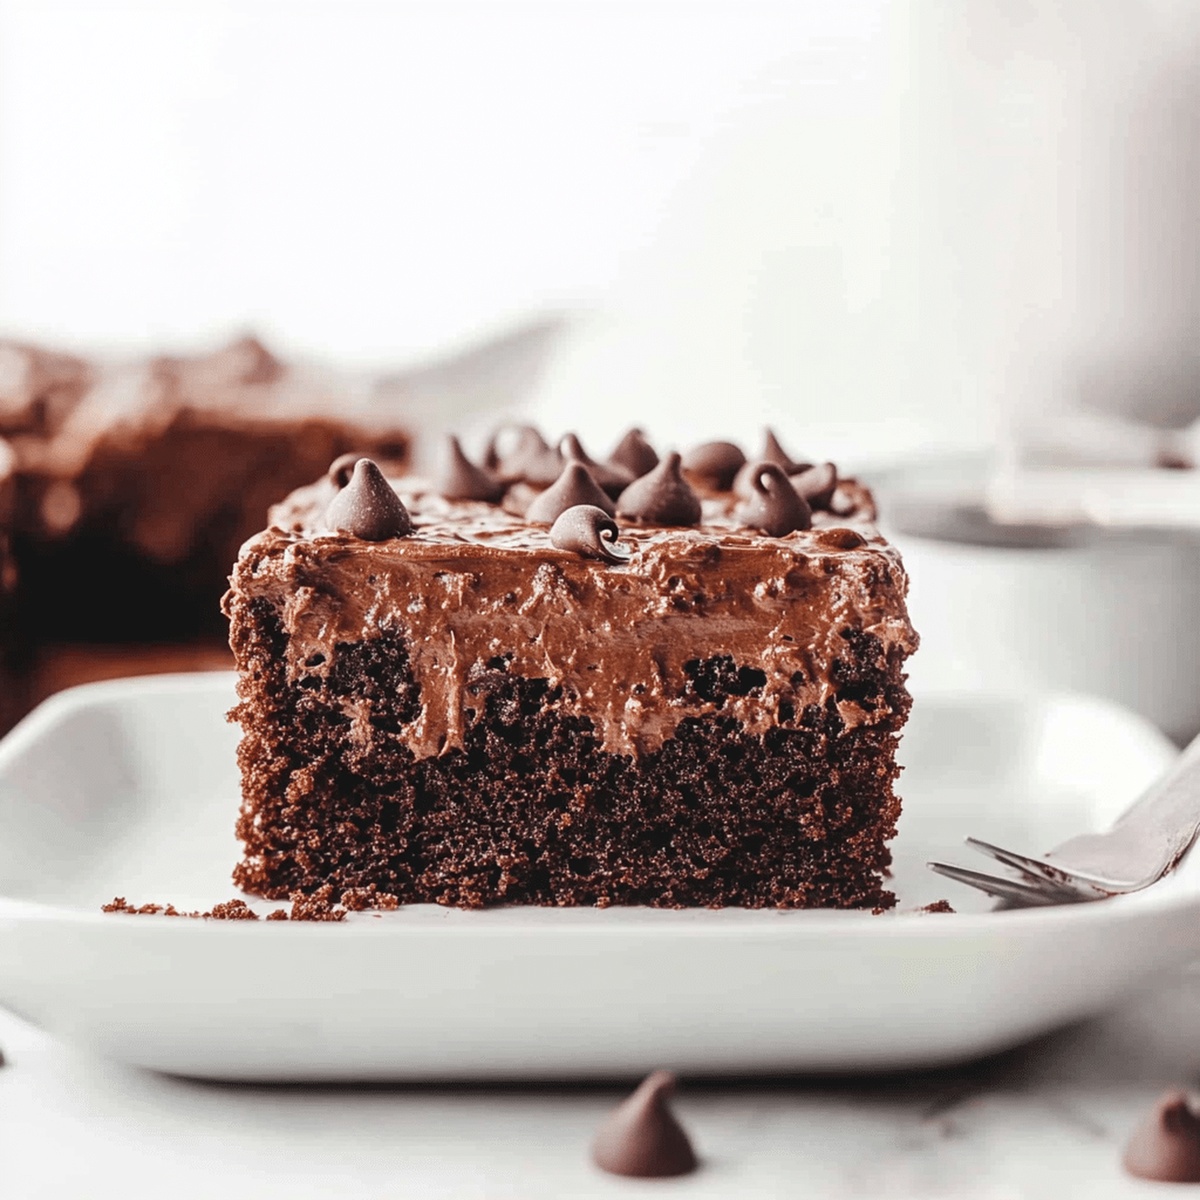
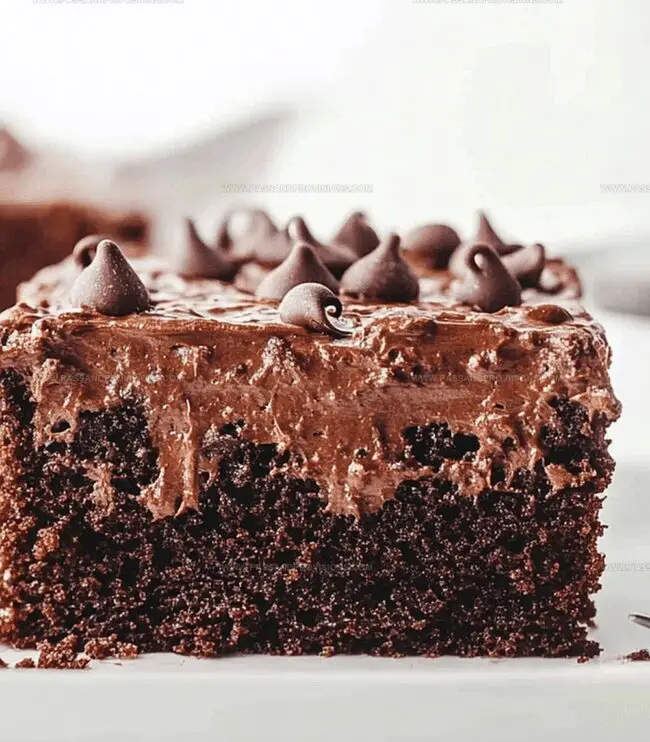
Indulging in a decadent chocolate poke cake creates pure dessert magic for passionate sweet tooths.
Rich layers promise an irresistible experience with unexpected texture surprises.
Creamy filling seeps through delicate cake channels, promising delightful moisture in every bite.
Soft chocolate sponge becomes a canvas for delectable pudding infusion.
Chocolate lovers will appreciate this simple yet impressive dessert technique.
Each forkful delivers a symphony of silky smooth chocolate sensations.
You can master this elegant treat with minimal baking expertise.
Prepare to wow everyone at the next gathering with this showstopping dessert.
Why Everyone’s Talking About Chocolate Poke Cake

What You’ll Need for Chocolate Poke Cake
Cake Base:Pudding Layer:Topping Layer:How to Make Chocolate Poke Cake from Scratch
Step 1: Bake The Chocolate Base
Grab a chocolate cake mix and follow package directions. Use a 9×13-inch baking pan. Once baked, let the cake rest and cool down for about 10 minutes.
Step 2: Create Magical Holes
Take a wooden spoon handle or the back of a thick marker. Gently poke holes across the cake surface. Space these holes about an inch apart, creating little tunnels for deliciousness.
Step 3: Whip Up Chocolate Pudding
In a mixing bowl, combine:Whisk everything together until smooth and slightly thickened. The mixture should look creamy and luscious.
Step 4: Fill The Cake Cavities
Pour the prepared pudding over the cake. Use a spatula to guide the pudding into every single hole. Ensure complete coverage across the entire cake surface.
Step 5: Chill And Set
Cover the cake with plastic wrap. Place in the refrigerator for minimum 2 hours. This allows pudding to seep deeply and set perfectly.
Step 6: Crown With Creamy Topping
Remove cake from refrigerator. Spread thawed whipped cream evenly across the surface. Use gentle sweeping motions for a smooth finish.
Step 7: Final Chocolate Flourish
Drizzle chocolate syrup generously over the whipped topping. Cut into generous squares and serve chilled.
Chocolate Poke Cake Pro Tips
Storage and Reheating for Chocolate Poke Cake
Perfect Matches for Chocolate Poke Cake
Chocolate Poke Cake Swaps and Variants
Chocolate Poke Cake FAQs
The pudding is the secret! When you pour warm pudding over freshly baked cake and let it soak in, it creates incredibly moist and soft texture throughout the entire dessert.
Absolutely! While chocolate is classic, vanilla or cheesecake pudding mixes work wonderfully. You can experiment with different flavors to create unique variations of this cake.
Not at all! This is a super easy recipe perfect for beginners. The boxed cake mix and instant pudding make it almost foolproof, so anyone can create a delicious dessert with minimal baking experience.
Create holes about 1 inch apart across the entire cake surface. The goal is to have enough holes for the pudding to seep in and create that signature moist, rich texture without completely destroying the cake’s structure.
Print
Chocolate Poke Cake Recipe
- Total Time: 45 minutes
- Yield: 12 1x
Description
Chocolate lovers will swoon over this delightful chocolate poke cake, a dessert that marries rich cocoa depths with creamy, indulgent filling. Sweet chocolate pudding seeps into perfectly baked cake, creating a moist, irresistible treat you’ll crave again and again.
Ingredients
Cake Base:
- 1 box devils food chocolate cake mix
- Ingredients called for on the cake mix box
Pudding and Liquid:
- 2 boxes (3.9 ounces / 110 grams) instant chocolate pudding mix
- 4 cups (950 milliliters) milk
Topping and Garnish:
- 1 tub (8 ounces / 226 grams) whipped topping, thawed
- Chocolate syrup, for drizzling
Instructions
- Craft a rich chocolate base by following package instructions for a 9×13-inch cake pan. Allow the cake to slightly cool and settle for approximately 10 minutes after baking.
- Transform the cake’s surface by puncturing uniform holes across the entire landscape using a wooden spoon handle or similar utensil. Maintain consistent spacing of roughly one inch between each perforation.
- Whisk chocolate pudding mix with milk in a medium vessel, creating a smooth, slightly viscous liquid that will penetrate the cake’s interior.
- Gently cascade the prepared pudding across the cake’s perforated terrain, ensuring comprehensive coverage. Use a spatula to distribute the mixture evenly, allowing it to seep into the created channels.
- Transfer the cake to the refrigerator, covering it securely. Enable the pudding to solidify and infuse the cake’s layers for a minimum of two hours.
- Once chilled, delicately spread the thawed whipped topping as a luxurious final layer, creating a pristine, cloud-like surface.
- Enhance the dessert’s visual appeal by drizzling chocolate syrup in an artistic pattern just before serving. Slice and present this decadent chocolate marvel to eager guests.
Notes
- Use a box mix for foolproof chocolate cake with consistent texture and guaranteed moistness.
- Allow cake to cool slightly before poking holes to prevent pudding from becoming too runny or absorbing unevenly.
- Space holes uniformly across cake surface for consistent pudding distribution and balanced flavor in every bite.
- Opt for sugar-free pudding mix and low-fat whipped topping to create a lighter, diet-friendly version of the dessert.
- Prep Time: 15 minutes
- Cook Time: 25-30 minutes
- Category: Desserts
- Method: Baking
- Cuisine: American
Nutrition
- Serving Size: 12
- Calories: 280
- Sugar: 23 g
- Sodium: 320 mg
- Fat: 10 g
- Saturated Fat: 4 g
- Unsaturated Fat: 6 g
- Trans Fat: 0 g
- Carbohydrates: 41 g
- Fiber: 1 g
- Protein: 4 g
- Cholesterol: 15 mg
Jamie Granger
Recipe Developer & Food Writer
Expertise
Education
Culinary Institute of America
Jamie Granger turns ingredients into memories. With her recipes, she brings a fusion-forward flair to every creation.
Her dishes reflect the places she’s explored, the chefs she’s learned from, and the deep connection she has to food as a form of expression.
At Pass and Provision, Jamie develops recipes that balance flavor, health, and beauty, meals that don’t just satisfy your appetite but speak to your curiosity.