
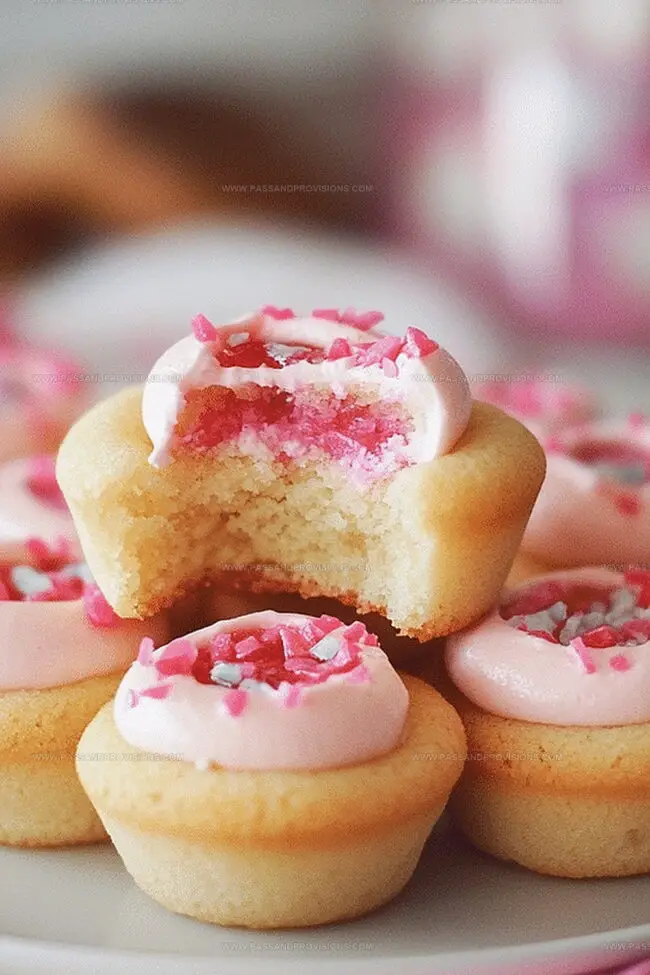
Dreamy Sugar Cookie Cups Recipe: A Sweet Bite-Sized Joy
Sweet memories often spark when crafting a delightful sugar cookie cups that bring joy to every bite.
Childhood nostalgia dances through each perfectly shaped miniature treat.
Soft, buttery dough cradles creamy fillings with playful elegance.
Little edible vessels await your creative touch in the kitchen.
Delicate edges promise a delectable experience that melts effortlessly on your palate.
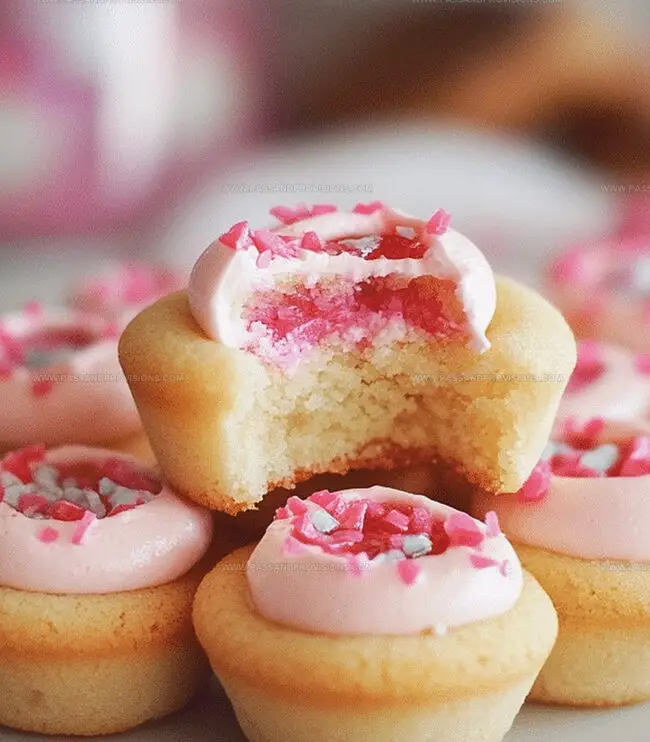
Compact and charming, these bite-sized delights invite pure culinary happiness.
You’ll want to savor every delicious moment of this simple yet magical recipe.
Why Sugar Cookie Cups Make Baking Fun
Ingredients to Build These Edible Cups
Base Ingredients:Leavening and Seasoning:Flavor Enhancers:How to Shape and Bake These Cookie Bases
Step 1: Whip Up the Dough
Mix together these ingredients:Cream butter and sugar until light and fluffy. Add egg and vanilla, blending until smooth. In a separate bowl, combine dry ingredients. Slowly fold dry ingredients into wet mixture, creating a soft dough.
Step 2: Create Cookie Cup Shapes
Grab your mini muffin tin and prep it with non-stick spray. Roll dough into small balls, placing one in each muffin cavity. Use your thumb or measuring spoon to press a deep indent in the center of each ball, forming a cute cup shape. Slide the tin into an oven heated to 350F. Bake until edges turn golden brown, about 10-12 minutes.
Step 3: Perfect the Cookie Cup Form
Pull the tin from the oven. Immediately press down the centers again to reinforce the cup shape. Let cookies rest in the tin for 5 minutes. Transfer to a cooling rack and allow to cool completely.
Step 4: Dress Up Your Treats
Fill each cookie cup with delightful options:Step 5: Add Final Flair
Sprinkle on fun toppings:Step 6: Serve and Enjoy
Present your beautiful sugar cookie cups on a fancy plate. These treats are perfect for parties, afternoon tea, or a sweet personal indulgence.
Tips to Avoid Cracking and Overbaking
Store Cookie Cups for Party Time
Fillings That Match the Cookie Just Right
Cup Variations for Holidays or Birthdays
All You Need to Know About Cookie Cups
Grease the mini muffin tin thoroughly with butter or cooking spray before adding the dough. You can also use non-stick baking spray with flour for extra insurance against sticking.
Make sure to press down the center of the dough balls firmly before and immediately after baking. Use the back of a measuring spoon or your thumb to create a deep well, which helps maintain the cup shape during baking.
Yes, you can prepare the cookie dough and refrigerate it for up to 3 days before baking. Alternatively, you can freeze the dough balls for up to 2 months. Just thaw in the refrigerator before baking.
If the dough is too cold or dry, it might crack. Let the cookie cups cool for 1-2 minutes after initial baking, then gently press down the center. The residual heat will make the dough more pliable and less likely to crack.
Print
Sugar Cookie Cups Recipe
- Total Time: 27 minutes
- Yield: 12 1x
Description
Sweet sugar cookie cups cradle a luscious creamy filling that melts in your mouth. Rich with buttery charm and delicate texture, these mini desserts will become your new favorite indulgence.
Ingredients
Main Ingredients (Cookie Base):
- 1 ½ cups all-purpose flour
- ¾ cup (170 grams) granulated sugar
- ½ cup (113 grams) unsalted butter, softened
Binding Ingredients:
- 1 large egg
- 1 teaspoon vanilla extract
Seasoning and Leavening Ingredients:
- ½ teaspoon baking powder
- ¼ teaspoon salt
Filling Ingredients:
- ½ cup frosting (store-bought or homemade)
Optional Toppings:
- Sprinkles
- Mini chocolate chips
- Fresh fruit
Optional Additional Fillings:
- Chocolate ganache
- Fruit preserves
- Whipped cream
Instructions
- Preheat the oven to 350°F (175°C) and thoroughly coat a mini muffin tin with non-stick spray to ensure effortless cookie removal.
- In a spacious mixing bowl, vigorously cream the butter and sugar until the mixture transforms into a pale, airy consistency, revealing soft peaks and a luxurious texture.
- Incorporate the egg and vanilla extract, whisking until the liquid ingredients merge seamlessly with the butter mixture, creating a silky, uniform blend.
- Sift together the flour, baking powder, and salt in a separate bowl to eliminate potential lumps and ensure even distribution of dry ingredients.
- Gradually fold the dry ingredient mixture into the wet ingredients, stirring gently until a cohesive, tender dough forms without overmixing.
- Divide the dough into uniform 1-inch spheres, carefully placing one ball into each miniature muffin cavity.
- Using your thumb or a rounded measuring spoon, delicately press the center of each dough ball, crafting a gentle indentation that will become the cookie cup’s signature shape.
- Position the muffin tin in the preheated oven and bake for 10-12 minutes, watching for edges to transform into a delicate golden hue.
- Immediately upon removal, gently re-press the centers to reinforce the cup shape while the cookies remain warm and malleable.
- Allow the cookie cups to rest in the tin for 5 minutes, enabling them to set and stabilize before transferring to a wire cooling rack.
- Once completely cooled, embellish the cups with your preferred filling, such as silky frosting, rich ganache, or vibrant fruit preserves.
- Enhance the presentation with decorative elements like colorful sprinkles, miniature chocolate chips, or fresh seasonal fruits.
- Serve immediately or store in an airtight container to preserve their delightful crispness and flavor.
Notes
- Use room temperature butter and egg for a smoother, more evenly mixed dough that creates perfectly textured cookie cups.
- Chill the dough for 30 minutes before shaping to prevent spreading and maintain the cup shape during baking.
- Press the center gently but firmly when creating the cup shape to ensure even walls without tearing the dough.
- Experiment with gluten-free flour blend for a celiac-friendly version that maintains the same delicate texture and sweet flavor.
- Create dairy-free alternatives by substituting butter with coconut oil or vegan butter for a more inclusive dessert option.
- Avoid overmixing the dough to prevent tough, dense cookie cups that lose their delicate, tender crumb.
- Prep Time: 15 minutes
- Cook Time: 12 minutes
- Category: Desserts, Snacks
- Method: Baking
- Cuisine: American
Nutrition
- Serving Size: 12
- Calories: 180
- Sugar: 12 g
- Sodium: 100 mg
- Fat: 8 g
- Saturated Fat: 5 g
- Unsaturated Fat: 3 g
- Trans Fat: 0 g
- Carbohydrates: 25 g
- Fiber: 0 g
- Protein: 2 g
- Cholesterol: 30 mg
Jamie Granger
Recipe Developer & Food Writer
Expertise
Education
Culinary Institute of America
Jamie Granger turns ingredients into memories. With her recipes, she brings a fusion-forward flair to every creation.
Her dishes reflect the places she’s explored, the chefs she’s learned from, and the deep connection she has to food as a form of expression.
At Pass and Provision, Jamie develops recipes that balance flavor, health, and beauty, meals that don’t just satisfy your appetite but speak to your curiosity.