Dreamy No Bake Oreo Cheesecake Recipe: Smooth & Sweet Sensation
Decadent no bake oreo cheesecake promises a creamy escape from traditional dessert boundaries.
Chocolate cookie crusts set the stage for an irresistible sweet experience.
Smooth cream cheese blends seamlessly with crushed oreos, creating a luxurious texture that melts in your mouth.
Cool and refreshing, this dessert requires zero oven time and minimal preparation skills.
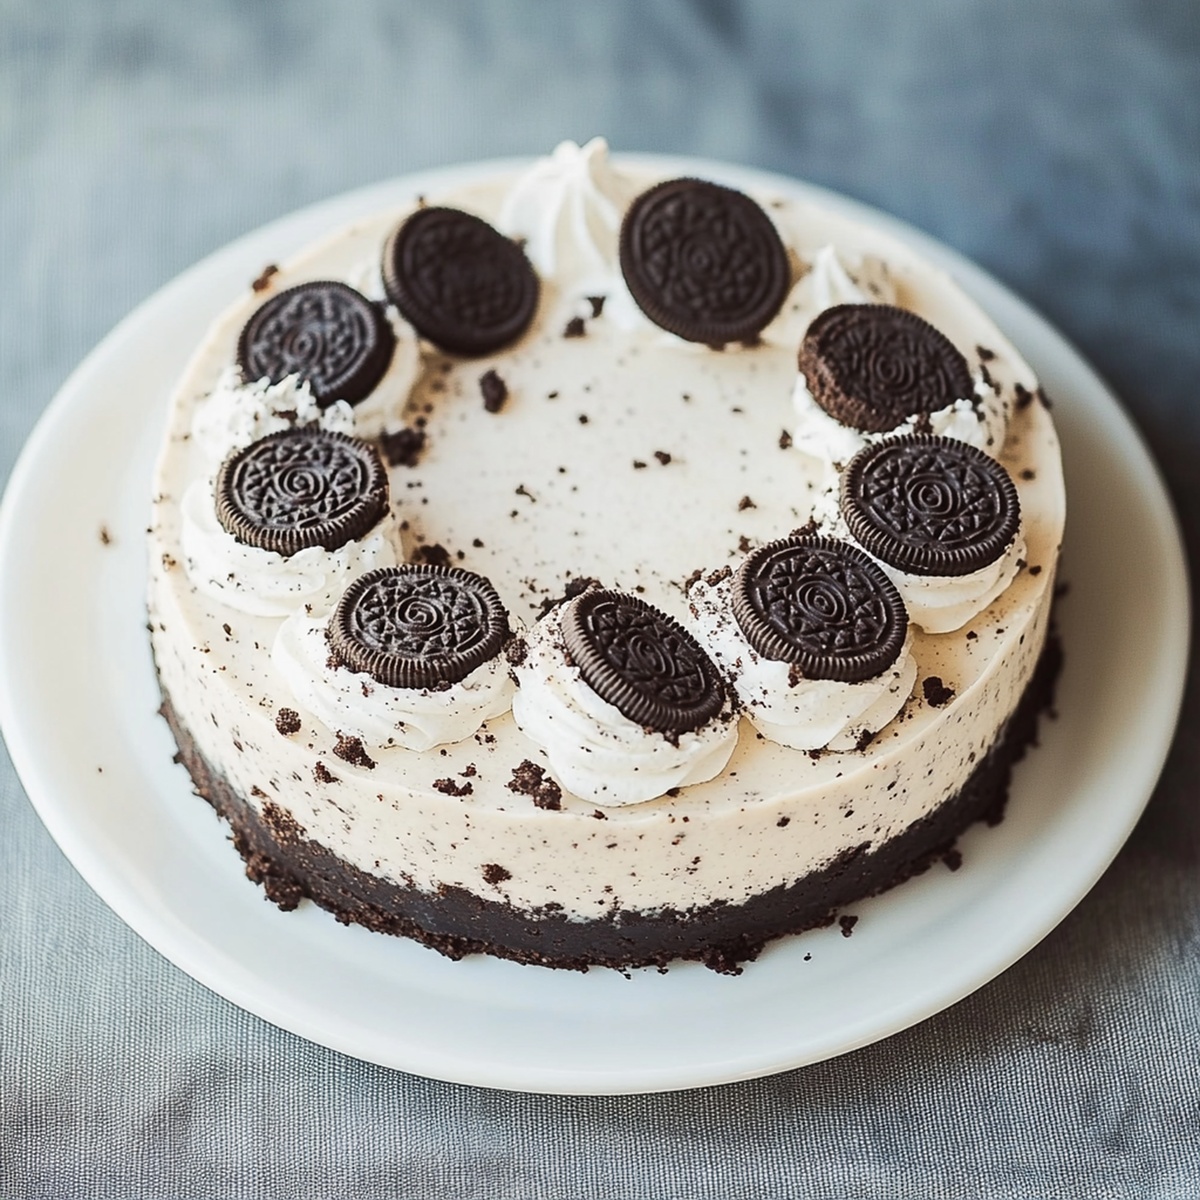
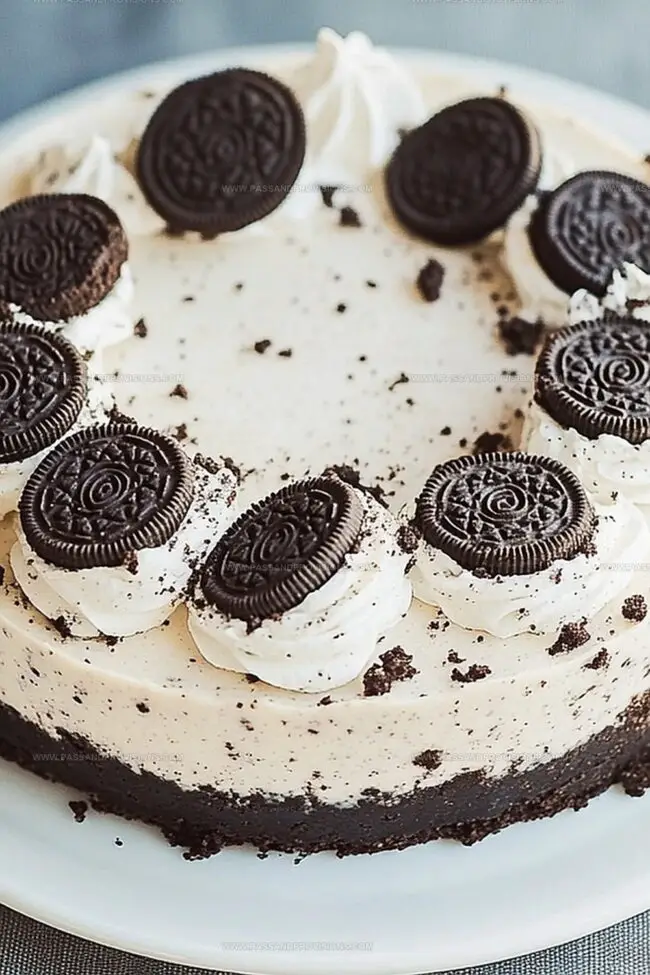
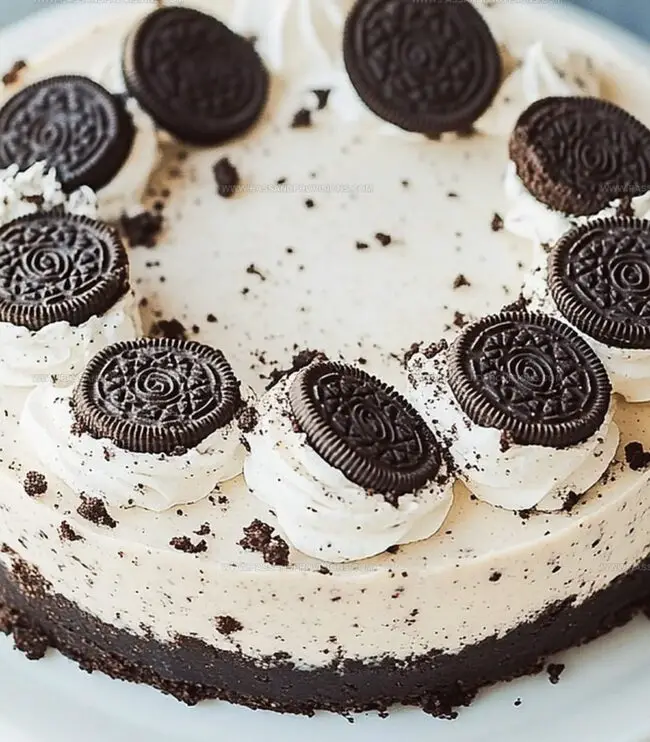
Layers of rich chocolate and velvety filling combine for a stunning visual and flavor profile.
Each bite delivers a perfect balance of crunchy cookie and silky cream cheese.
You’ll be the star of any gathering with this simple yet impressive treat that takes minutes to assemble.
Quick Recipe Overview
No Bake Oreo Cheesecake Ingredients to Stock Up On
For Crust Base:For Creamy Filling:For Topping and Garnish:Tools for Making No Bake Oreo Cheesecake Smooth
How to Layer and Chill No Bake Oreo Cheesecake
Crush cookies into tiny pieces using a food processor or rolling pin. Blend with melted butter and press firmly into a springform pan. Pop into the refrigerator while preparing the next stage.
Beat cream cheese with sugar and vanilla until silky smooth. In another bowl, transform heavy cream into fluffy peaks by whisking vigorously.
Gently fold whipped cream into cream cheese mixture. Sprinkle crushed cookies throughout, creating delectable swirls of chocolate and cream.
Pour the dreamy filling over the cookie foundation. Smooth the surface and seal with plastic wrap. Let it rest in the refrigerator for 4-6 hours until perfectly set.
Before presenting, crown your cheesecake with dollops of whipped cream, scattered cookie crumbs, or a chocolate drizzle. Slice and savor each heavenly bite of this no-bake wonderland.
Toppings That Go Well With No Bake Oreo Cheesecake
Serve No Bake Oreo Cheesecake for Any Celebration
Store No Bake Oreo Cheesecake in the Fridge Just Right
Print
Silky No Bake Oreo Cheesecake Recipe
- Total Time: 4 hours 15 minutes
- Yield: 9 1x
Description
Indulgent No Bake Oreo Cheesecake delivers creamy chocolate bliss with minimal effort and maximum satisfaction. Cool, rich layers of crushed cookies and smooth cream cheese promise delightful sweetness perfect for dessert lovers seeking quick, irresistible pleasure.
Ingredients
- 24 Oreo cookies (about 2 cups crushed)
- 5 tbsps (74 ml) unsalted butter, melted
- 16 ounces (2 blocks) cream cheese, softened
- ½ cup (120 ml) powdered sugar
- 1 tsp vanilla extract
- 1 ¼ cups (300 ml) heavy whipping cream, cold
- 12 Oreo cookies, crushed
- Whipped cream
- Extra crushed Oreos
- Chocolate drizzle
Instructions
- Crust Creation: Pulverize Oreos into fine crumbs using a food processor or manual crushing method. Blend thoroughly with melted butter, then press compactly into the bottom of a springform pan. Refrigerate while preparing subsequent components.
- Filling Fusion: Whisk cream cheese, powdered sugar, and vanilla extract until achieving a silky, uniform consistency. In a separate vessel, whip heavy cream until forming robust, stiff peaks.
- Incorporation Technique: Delicately fold whipped cream into cream cheese mixture, maintaining a light, airy texture. Gently integrate crushed Oreo fragments throughout the blended mixture.
- Structural Assembly: Transfer the creamy mixture onto the chilled crust, meticulously smoothing the surface to create an even layer. Seal with protective covering and allow to rest in refrigerator for a minimum of 4 hours, preferably overnight.
- Presentation & Indulgence: Prior to serving, embellish with additional whipped cream, sprinkled Oreo crumbs, or a luxurious chocolate drizzle. Slice with precision and savor the decadent no-bake dessert.
Notes
- Use a food processor or rolling pin to create fine, even Oreo crumbs for a smooth, compact crust that holds together perfectly.
- Ensure heavy cream is cold and whipped to stiff peaks to create a light, airy texture that gives the cheesecake its signature fluffy consistency.
- Mix whipped cream into cream cheese mixture using a delicate folding technique to maintain the airiness and prevent deflating the whipped cream.
- Refrigerate for at least 4 hours or overnight to allow the cheesecake to set completely, enhancing flavor and achieving the ideal creamy texture.
- Prep Time: 15 minutes
- Cook Time: 4 hours
- Category: Desserts, Snacks
- Method: None
- Cuisine: American
Nutrition
- Serving Size: 9
- Calories: 350
- Sugar: 25 g
- Sodium: 200 mg
- Fat: 22 g
- Saturated Fat: 12 g
- Unsaturated Fat: 8 g
- Trans Fat: 0 g
- Carbohydrates: 30 g
- Fiber: 1 g
- Protein: 4 g
- Cholesterol: 60 mg
William Hawkins
Founder & Culinary Director
Expertise
Education
Sullivan University, Louisville, KY
William Hawkins isn’t just a chef, he’s a storyteller through food. From his hometown of Louisville, KY, he’s spent years refining his craft, turning local ingredients into something extraordinary.
With classical training from Sullivan University and a career marked by innovation, mentorship, and Southern soul, William approaches every recipe with purpose. His kitchen is where old techniques meet fresh ideas, and where comfort food gets a thoughtful, modern twist.
When he’s not building dishes from the ground up, he’s out gathering inspiration from nature, markets, and the stories people share around the table.