Fluffy Cloud-Like Japanese Cheesecake Recipe for Beginners
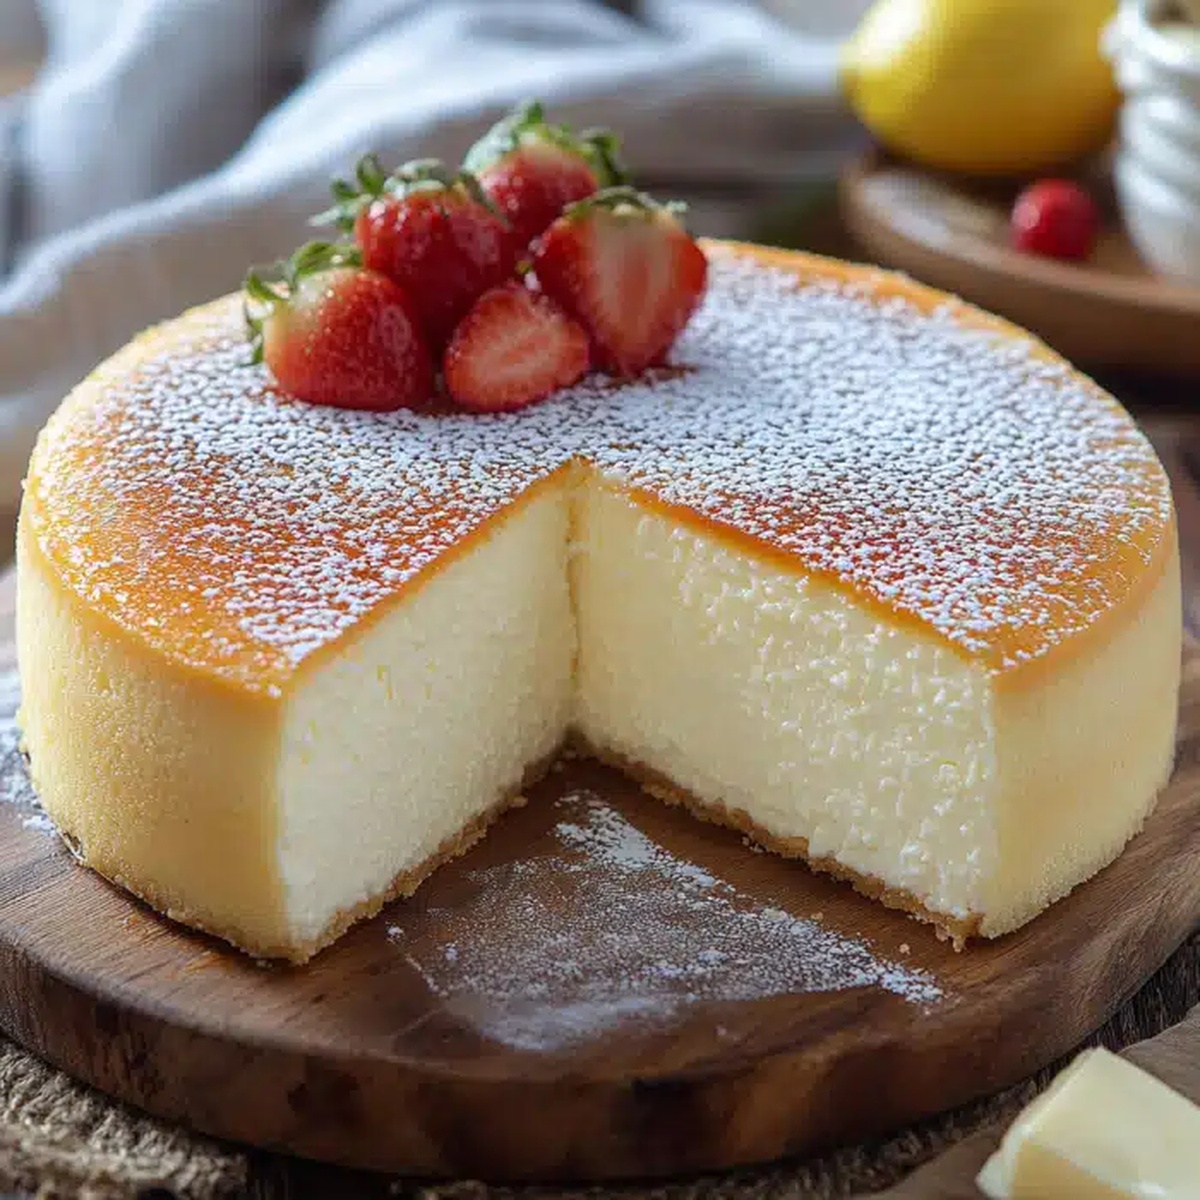
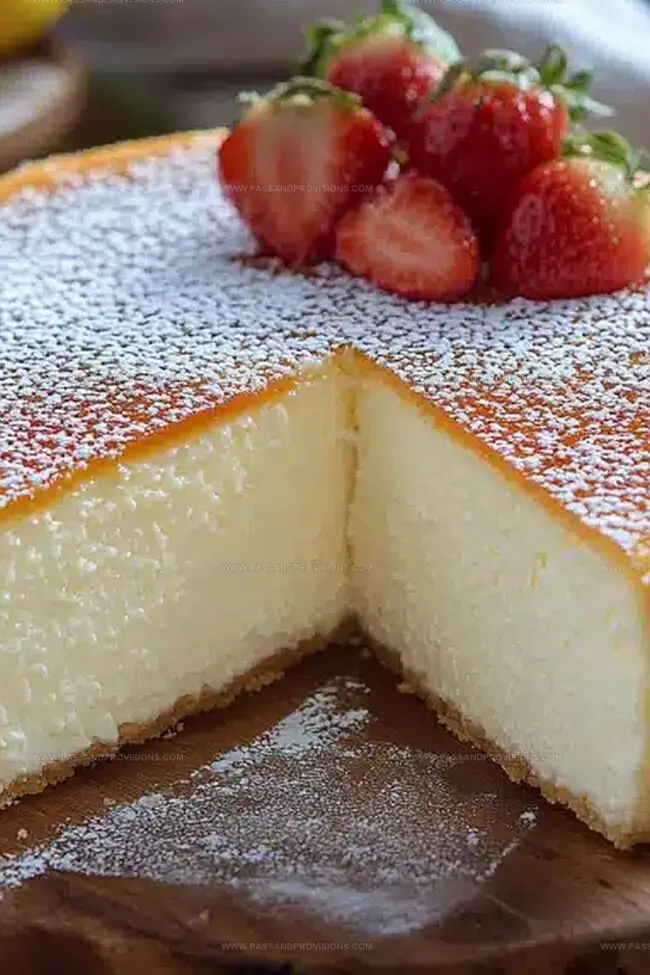
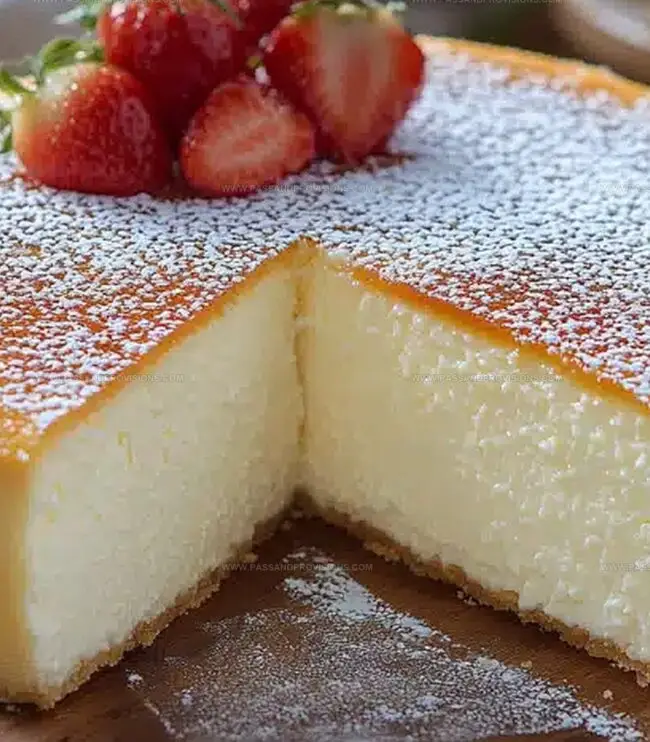
Soft and cloud-like, this delectable japanese cheesecake melts on your tongue with its ethereal texture.
Creamy yet light, the dessert brings a touch of Tokyo’s culinary magic to your kitchen.
Each slice promises a delightful experience that breaks away from traditional dense cheesecake styles.
Bakeries across Japan have perfected this gentle, souffle-like treat that dances between cake and custard.
The recipe requires precision but rewards you with an incredibly smooth, airy result.
Whisked egg whites create the signature pillowy consistency that makes this cheesecake a true sensation.
Prepare to fall in love with this elegant, melt-in-your-mouth delicacy that will impress even the most discerning dessert enthusiasts.
Quick Recipe Overview
What You Need for Japanese Cheesecake
For Base Ingredients:For Dry Ingredients:For Flavor Enhancers and Binding Ingredients:Tools for That Airy Cheesecake Texture
How to Bake a Light Japanese Cheesecake
Warm up your oven to 320F. Grab a round cake pan and give it a light butter massage. Line the bottom with parchment paper and wrap the outside in aluminum foil like a cozy sweater.
Create a steamy double boiler. Melt cream cheese, butter, and milk together until silky smooth. Let the mixture cool slightly. Whisk in sugar, then egg yolks one by one. Sprinkle in flour and cornstarch, stirring until the batter looks like velvet. Add a splash of lemon juice and zest for a zingy twist.
Grab a squeaky clean bowl and beat egg whites until they transform into a fluffy wonderland. Sprinkle in cream of tartar and keep whisking. Slowly rain down sugar while beating until peaks stand tall and proud.
Gently fold the meringue into the cream cheese base like you’re tucking in a delicate blanket. Pour the batter into the prepared pan and give it a gentle tap. Create a warm water bath around the pan and slide into the oven. Bake for 25 minutes at 320F, then lower to 280F for another 55 minutes.
Let the cake rest in the oven with the door cracked open for 15 minutes. Remove and allow to cool completely. Slide onto a serving plate and dust with a snowy layer of powdered sugar if you’re feeling fancy.
Flavor Enhancements for Japanese-Style Desserts
Serve Japanese Cheesecake with Simplicity
Keep It Fluffy with Smart Storage Tricks
Print
Silky Japanese Cheesecake Recipe
- Total Time: 40 minutes
- Yield: 9 1x
Description
Silky Japanese cheesecake whispers elegance with its cloud-like texture and delicate flavor profile. Culinary magic blends cream cheese, eggs, and subtle sweetness into a melt-in-mouth dessert that promises pure indulgence for delighted palates.
Ingredients
- 6 large egg whites
- ½ cup (100 g) granulated sugar
- ¼ tsp cream of tartar
- 10 oz (285 g) cream cheese, softened
- 6 large egg yolks
- ½ cup (100 g) granulated sugar
- ½ cup whole milk
- 2 tbsps unsalted butter
- ⅔ cup cake flour
- 2 tbsps cornstarch
- 1 tbsp lemon juice
- 1 tsp lemon zest
- ½ tsp vanilla extract
Instructions
- Pan Preparation: Coat a 9-inch round cake pan with grease and parchment paper. Encase the exterior with aluminum foil to shield against water infiltration during baking. Adjust oven rack to center position and preheat to 320F (160C).
- Cream Cheese Fusion: Create a silky mixture by melting cream cheese, butter, and milk using a double boiler technique. Gradually incorporate sugar, ensuring smooth integration. Introduce egg yolks individually, blending thoroughly after each addition. Gently sift cake flour and cornstarch, whisking until achieving a velvety consistency. Enhance flavor profile by adding lemon juice, zest, and vanilla extract.
- Meringue Crafting: Using pristine electric mixer, transform egg whites into a frothy texture. Introduce cream of tartar, continuing to whip until soft peaks emerge. Incrementally sprinkle sugar while beating, developing glossy, firm peaks that maintain structural integrity.
- Batter Assembly and Baking: Delicately fold meringue into cream cheese base using a gentle, sweeping motion to preserve airiness. Transfer batter to prepared pan, tapping surface to eliminate potential air pockets. Position pan within a larger water-filled baking dish, ensuring liquid reaches midway up sides. Execute precise baking sequence: 25 minutes at 320F (160C), then reduce temperature to 280F (140C) for additional 55 minutes until golden and set.
- Cooling and Presentation: After baking, leave cake inside oven with door slightly ajar for 15 minutes, allowing gradual temperature equalization. Extract from water bath and permit complete cooling within pan. Carefully unmold, removing parchment paper. Optional: dust surface with powdered sugar before serving for elegant presentation.
Notes
- Ensure cream cheese, eggs, butter, and milk are at room temperature for smooth, lump-free mixing and consistent texture.
- Beat egg whites gradually with cream of tartar to create stable, glossy peaks that won’t collapse during folding, maintaining the cake’s signature light, airy structure.
- Use precise oven temperature changes to prevent cracking and achieve the signature soft, jiggly Japanese cheesecake texture – start at 320F, then reduce to 280F for even, gentle baking.
- Wrap pan exterior with aluminum foil and use water bath method to create humid baking environment, preventing surface cracks and ensuring consistent, delicate cheesecake consistency.
- Prep Time: 20 minutes
- Cook Time: 20 minutes
- Category: Desserts, Snacks
- Method: Baking
- Cuisine: Japanese
Nutrition
- Serving Size: 9
- Calories: 210
- Sugar: 10 g
- Sodium: 150 mg
- Fat: 14 g
- Saturated Fat: 8 g
- Unsaturated Fat: 6 g
- Trans Fat: 0 g
- Carbohydrates: 20 g
- Fiber: 0 g
- Protein: 4 g
- Cholesterol: 75 mg
William Hawkins
Founder & Culinary Director
Expertise
Education
Sullivan University, Louisville, KY
William Hawkins isn’t just a chef, he’s a storyteller through food. From his hometown of Louisville, KY, he’s spent years refining his craft, turning local ingredients into something extraordinary.
With classical training from Sullivan University and a career marked by innovation, mentorship, and Southern soul, William approaches every recipe with purpose. His kitchen is where old techniques meet fresh ideas, and where comfort food gets a thoughtful, modern twist.
When he’s not building dishes from the ground up, he’s out gathering inspiration from nature, markets, and the stories people share around the table.