
Homemade Vanilla Ice Cream Sandwiches Recipe: Sweet Summer Bliss
Cool summer afternoons call for a delightful treat like these homemade vanilla ice cream sandwiches that blend creamy textures with sweet nostalgia.
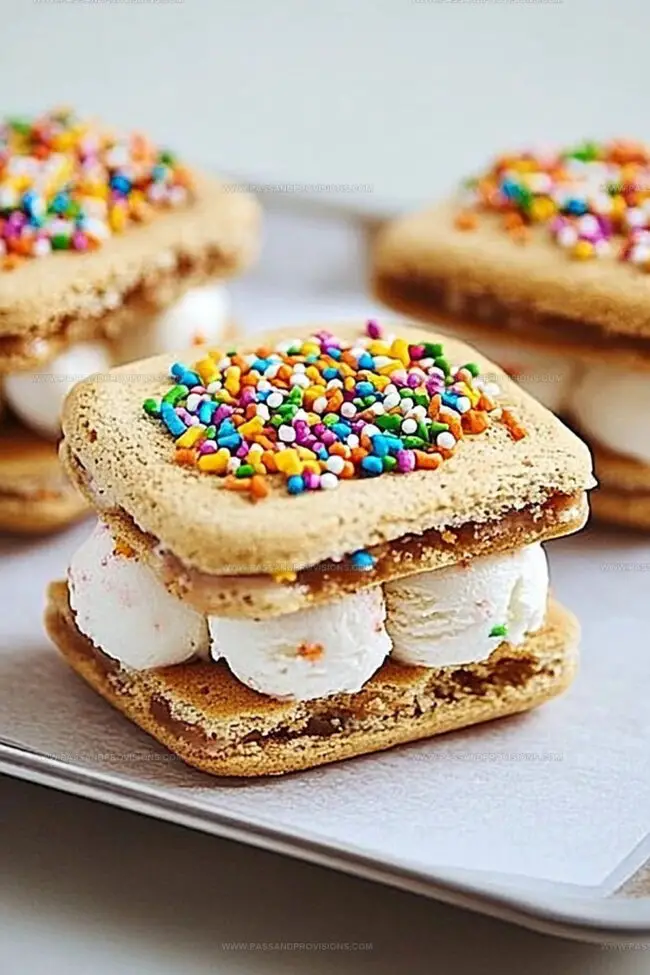
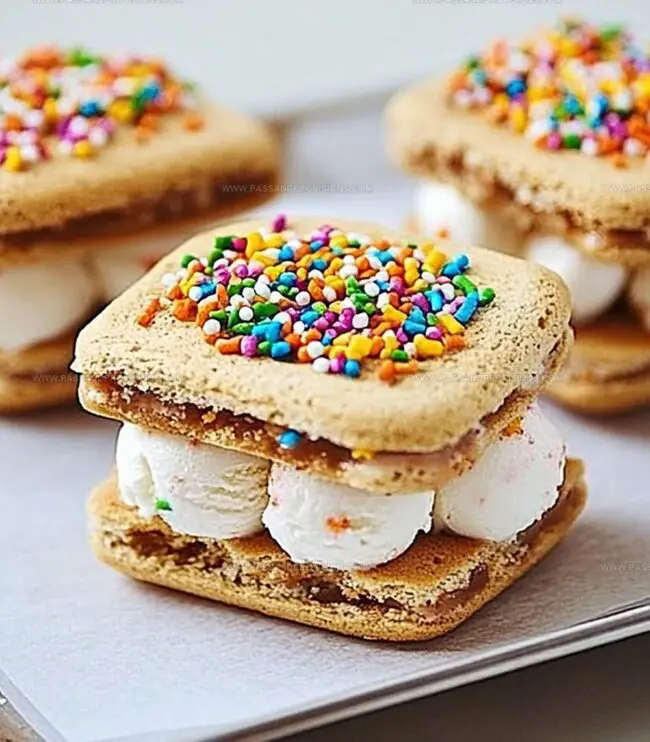
Soft, buttery cookies embrace rich vanilla ice cream in a classic combination that melts hearts and cools taste buds.
Every bite transports you to childhood memories of carefree moments and simple pleasures.
The delicate balance of crisp cookies and smooth ice cream creates a dessert that feels both comforting and indulgent.
Perfectly crafted cookies sandwich luxurious vanilla ice cream, promising a refreshing escape from the heat.
With just a few ingredients and minimal effort, you can craft these irresistible treats that spark joy and delight.
Pack these delectable ice cream sandwiches for picnics, backyard gatherings, or a spontaneous sweet moment of pure happiness.
Quick Recipe Overview
Vanilla Ice Cream Sandwiches: What to Use
For Ice Cream Layer:For Chocolate Wafer Base:For Binding and Finishing:Tools to Build the Best Ice Cream Sandwiches
How to Assemble Ice Cream Sandwiches Neatly
Grab a rectangular pan and line it with parchment paper, letting edges hang over. Spread softened vanilla ice cream smoothly across the surface. Slide into freezer until completely solid, about 2-3 hours.
Warm the oven to a toasty 350°F. Mix dry ingredients like flour and cocoa powder in one bowl. In another, whip butter and sugar until super fluffy. Add eggs and vanilla, blending thoroughly. Fold dry ingredients into wet mixture carefully. Roll dough between parchment sheets until thin. Bake cookies until edges look crisp, roughly 10-12 minutes. Let cool completely.
Pull frozen ice cream from freezer. Slice into neat rectangles matching cookie dimensions. Gently place ice cream between two chocolate wafers. Press lightly to connect layers. Wrap each sandwich in parchment paper. Return to freezer until perfectly firm, approximately one hour. Enjoy your homemade treat!
Sandwich Ideas to Switch Up the Flavors
Serve Vanilla Sandwiches That Stay Firm
Ice Cream Storage Tricks That Actually Work
Print
Heavenly Vanilla Ice Cream Sandwiches Recipe
- Total Time: 40 minutes
- Yield: 13 1x
Description
Cool summer days find sweet solace in homemade vanilla ice cream sandwiches nestled between crisp chocolate cookies. Creamy vanilla meets rich chocolate in this delightful dessert that brings simple pleasure to anyone craving a classic treat.
Ingredients
- 1 cup / 120 g all-purpose flour
- 1 cup / 100 g unsweetened cocoa powder
- ½ tsp / 2.5 ml baking powder
- ½ tsp / 2.5 ml salt
- 2 large eggs
- 1 ¼ cups / 283 g unsalted butter, softened
- 1 ¼ cups / 250 g granulated sugar
- 1 tbsp / 15 ml vanilla extract
- 1 ½ quarts / 6 cups vanilla ice cream, softened
Instructions
- Ice Cream Preparation: Carefully line a 9×13-inch pan with parchment paper, ensuring overhang for easy extraction. Spread softened vanilla ice cream uniformly across the surface, creating a smooth, level layer. Freeze until completely solidified, approximately 2-3 hours.
- Chocolate Wafer Crafting: Heat oven to 350°F (175°C). Whisk flour, cocoa powder, baking powder, and salt in a mixing bowl. In a separate large bowl, cream butter and sugar until airy and pale. Incorporate vanilla extract and eggs, blending thoroughly. Fold dry ingredients into wet mixture, mixing until just combined. Divide dough in half, rolling each portion between parchment sheets to achieve uniform thinness. Transfer to baking sheet and bake for 10-12 minutes until edges are set. Cool completely on wire rack.
- Sandwich Assembly: Trim wafer edges to create precise rectangles. Slice wafer sheets and frozen ice cream into matching rectangular portions. Carefully position ice cream between two chocolate wafers, applying gentle pressure to secure. Individually wrap each sandwich in parchment paper and return to freezer until serving moment. Store in sealed container to maintain optimal texture and flavor.
Notes
- Ensure baking sheets are cold when rolling out cookie dough to prevent spreading and maintain crisp edges.
- Use an offset spatula or the back of a spoon to create a perfectly even ice cream layer without air pockets.
- Let butter and eggs sit at room temperature for better mixing and smoother cookie texture.
- Use a sharp knife or pizza cutter for clean, straight edges when cutting wafers and ice cream layers to create professional-looking sandwiches.
- Prep Time: 10 minutes
- Cook Time: 30 minutes
- Category: Desserts, Snacks
- Method: Baking
- Cuisine: American
Nutrition
- Serving Size: 13
- Calories: 200
- Sugar: 15 g
- Sodium: 150 mg
- Fat: 10 g
- Saturated Fat: 5 g
- Unsaturated Fat: 4 g
- Trans Fat: 0 g
- Carbohydrates: 24 g
- Fiber: 1 g
- Protein: 2 g
- Cholesterol: 30 mg
William Hawkins
Founder & Culinary Director
Expertise
Education
Sullivan University, Louisville, KY
William Hawkins isn’t just a chef, he’s a storyteller through food. From his hometown of Louisville, KY, he’s spent years refining his craft, turning local ingredients into something extraordinary.
With classical training from Sullivan University and a career marked by innovation, mentorship, and Southern soul, William approaches every recipe with purpose. His kitchen is where old techniques meet fresh ideas, and where comfort food gets a thoughtful, modern twist.
When he’s not building dishes from the ground up, he’s out gathering inspiration from nature, markets, and the stories people share around the table.