
Ultimate Gold Glitter Dipped Peanut Butter Oreos Recipe For Wow Factor
Crafting these decadent gold glitter dipped peanut butter oreos can turn an ordinary dessert into a sparkling celebration.
Metallic edges shimmer with unexpected glamour against rich chocolate cookie backgrounds.
Sweet lovers appreciate unexpected twists that make classic treats feel luxurious.
Each cookie becomes a miniature work of edible art when coated in shimmering gold.
Crumbly oreo centers blend perfectly with smooth peanut butter cream, creating irresistible texture combinations.
Simple ingredients transform into something magical with just a few creative touches.
Each bite promises a delightful crunch that will make you the star of any gathering.
You won’t believe how easy it is to create such stunning dessert magic.
Why Gold Glitter Oreos Are a Showstopper
What You’ll Need for Gold Glitter Peanut Butter Oreos
Base Ingredients:Coating and Decoration Ingredients:Optional Serving Ingredients:Make Gold Glitter Oreos in Just Minutes
Step 1: Prepare Oreo Cookie Base
Carefully separate each Oreo cookie by twisting the halves apart. Spread peanut butter onto the cream side of one half and gently press the other half back together, recreating the sandwich cookie. Continue this process with all Oreo cookies.
Step 2: Melt Chocolate Coating
Select a microwave-safe bowl and combine chocolate chips with coconut oil. Microwave the mixture in short 20-30 second intervals, stirring thoroughly between each heating session. Continue until the chocolate transforms into a smooth, fully melted mixture.
Step 3: Dip and Coat Oreos
Use a fork or specialized dipping tool to submerge each peanut butter-filled Oreo into the melted chocolate. Ensure complete coverage by gently rotating the cookie. Tap the utensil against the bowl’s edge to remove excess chocolate. Transfer the coated cookie onto a parchment-lined baking sheet.
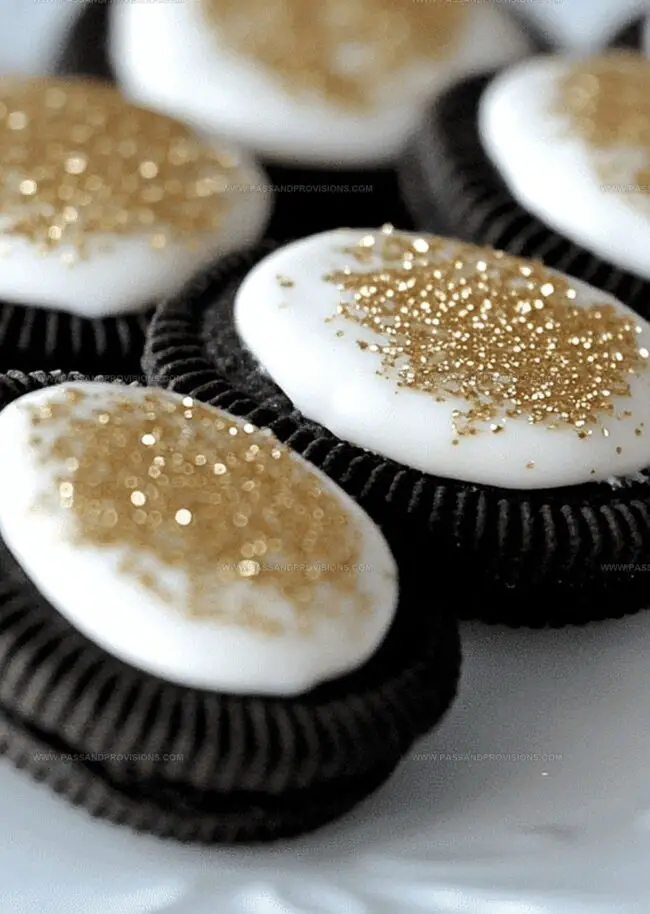
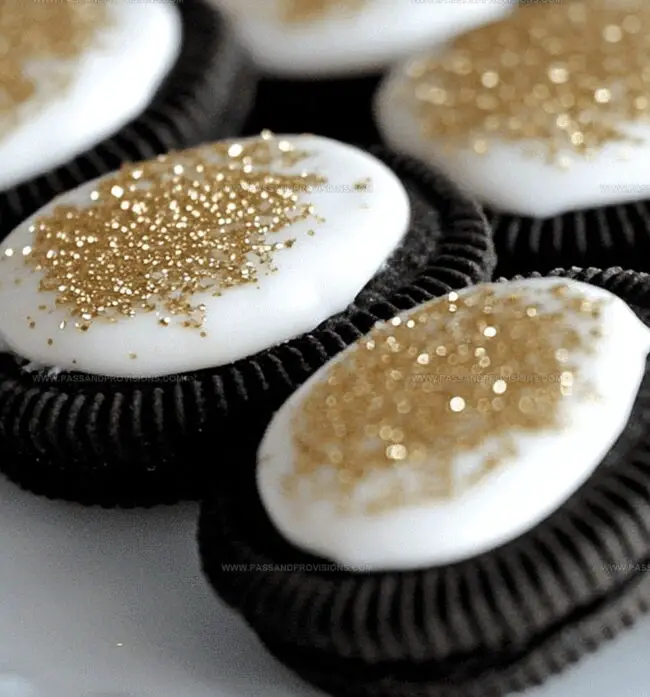
Step 4: Add Sparkling Glamour
While the chocolate coating remains wet, embellish the Oreos with:Lightly sprinkle or brush the shimmering decorations across the surface for a stunning, glamorous finish.
Step 5: Chill and Set
Place the baking sheet containing the decorated Oreos into the refrigerator. Allow 15-20 minutes for the chocolate to completely solidify and set.
Step 6: Serve and Celebrate
Arrange the glistening gold-accented Oreos on an elegant platter or package them in decorative gift boxes. These luxurious treats are perfect for holiday gatherings or special occasions.
Tricks for Dipping and Decorating Gold Glitter Oreos
How to Store Gold Glitter Oreos Without Mess
Best Beverages to Serve with Glittery Oreos
Glitter Oreo Variations to Dazzle Guests
FAQ for Gold Glitter Oreo Fans
Milk, dark, or semi-sweet chocolate chips all work great. Just ensure they melt smoothly and coat the Oreos evenly.
A fork or dipping tool helps coat the Oreos, but you can use regular kitchen utensils if needed. Parchment paper is recommended for easy cleanup.
Craft stores, baking supply shops, and online retailers like Amazon sell edible glitter. Some specialty grocery stores also carry food-grade glitter in the baking section.
Yes, these Oreos can be prepared 23 days in advance. Store them in an airtight container in the refrigerator to maintain their crisp chocolate coating and sparkly finish.
Print
Gold Glitter Dipped Peanut Butter Oreos Recipe
- Total Time: 35 minutes
- Yield: 12 1x
Description
Luxurious gold glitter dipped peanut butter oreos elevate classic cookies with glamorous sparkle. Chocolate, peanut butter, and edible glitter combine for an irresistible dessert that delights your senses and impresses guests.
Ingredients
Main Ingredients:
- 24 Oreo cookies
- 1 cup (250 g) creamy peanut butter
- 2 cups (350 g) white or dark chocolate chips (or candy melts)
Melting/Coating Ingredient:
- 1 tablespoon (15 ml) coconut oil or vegetable shortening (optional, for smoother melting)
Decorative Ingredient:
- Edible gold glitter or luster dust
Instructions
- Disassemble each Oreo cookie with precision, gently separating the chocolate wafers.
- Apply a smooth layer of creamy peanut butter onto one cookie half, then reunite the cookie halves to create a decadent sandwich.
- Melt chocolate chips with coconut oil in a microwave-safe bowl, stirring intermittently until the mixture transforms into a glossy, uniform liquid.
- Submerge each peanut butter-filled Oreo into the molten chocolate, ensuring complete coverage and allowing excess chocolate to drip off using a fork or specialized dipping utensil.
- While the chocolate coating remains glossy, enhance the treats with a dusting of edible gold glitter or a delicate brushing of luster dust to create a luxurious, shimmering effect.
- Transfer the chocolate-enrobed Oreos onto a parchment-lined baking sheet and refrigerate for approximately 15-20 minutes until the chocolate solidifies completely.
- Present the glamorous gold-accented Oreos on an elegant serving platter or package them in decorative gift boxes for a spectacular holiday confection.
Notes
- Use room temperature peanut butter for easier spreading and better cookie adherence without breaking the Oreo wafers.
- Choose high-quality chocolate with at least 60% cocoa content for richer, more luxurious coating that sets beautifully.
- Consider using gluten-free Oreos and dairy-free chocolate for those with dietary restrictions, making these treats more inclusive for everyone.
- Experiment with different glitter colors or swap peanut butter with other spreads like Nutella or almond butter to create unique flavor variations.
- Prep Time: 10 minutes
- Cook Time: 25 minutes
- Category: Desserts, Snacks
- Method: Blending
- Cuisine: American
Nutrition
- Serving Size: 12
- Calories: 200
- Sugar: 10 g
- Sodium: 100 mg
- Fat: 12 g
- Saturated Fat: 3 g
- Unsaturated Fat: 7 g
- Trans Fat: 0 g
- Carbohydrates: 20 g
- Fiber: 1 g
- Protein: 3 g
- Cholesterol: 0 mg
Jamie Granger
Recipe Developer & Food Writer
Expertise
Education
Culinary Institute of America
Jamie Granger turns ingredients into memories. With her recipes, she brings a fusion-forward flair to every creation.
Her dishes reflect the places she’s explored, the chefs she’s learned from, and the deep connection she has to food as a form of expression.
At Pass and Provision, Jamie develops recipes that balance flavor, health, and beauty, meals that don’t just satisfy your appetite but speak to your curiosity.