Colorful Festive Easter Poke Cake Recipe: A Sweet Celebration
Springtime celebrations call for a delightful easter poke cake that promises pure indulgence.
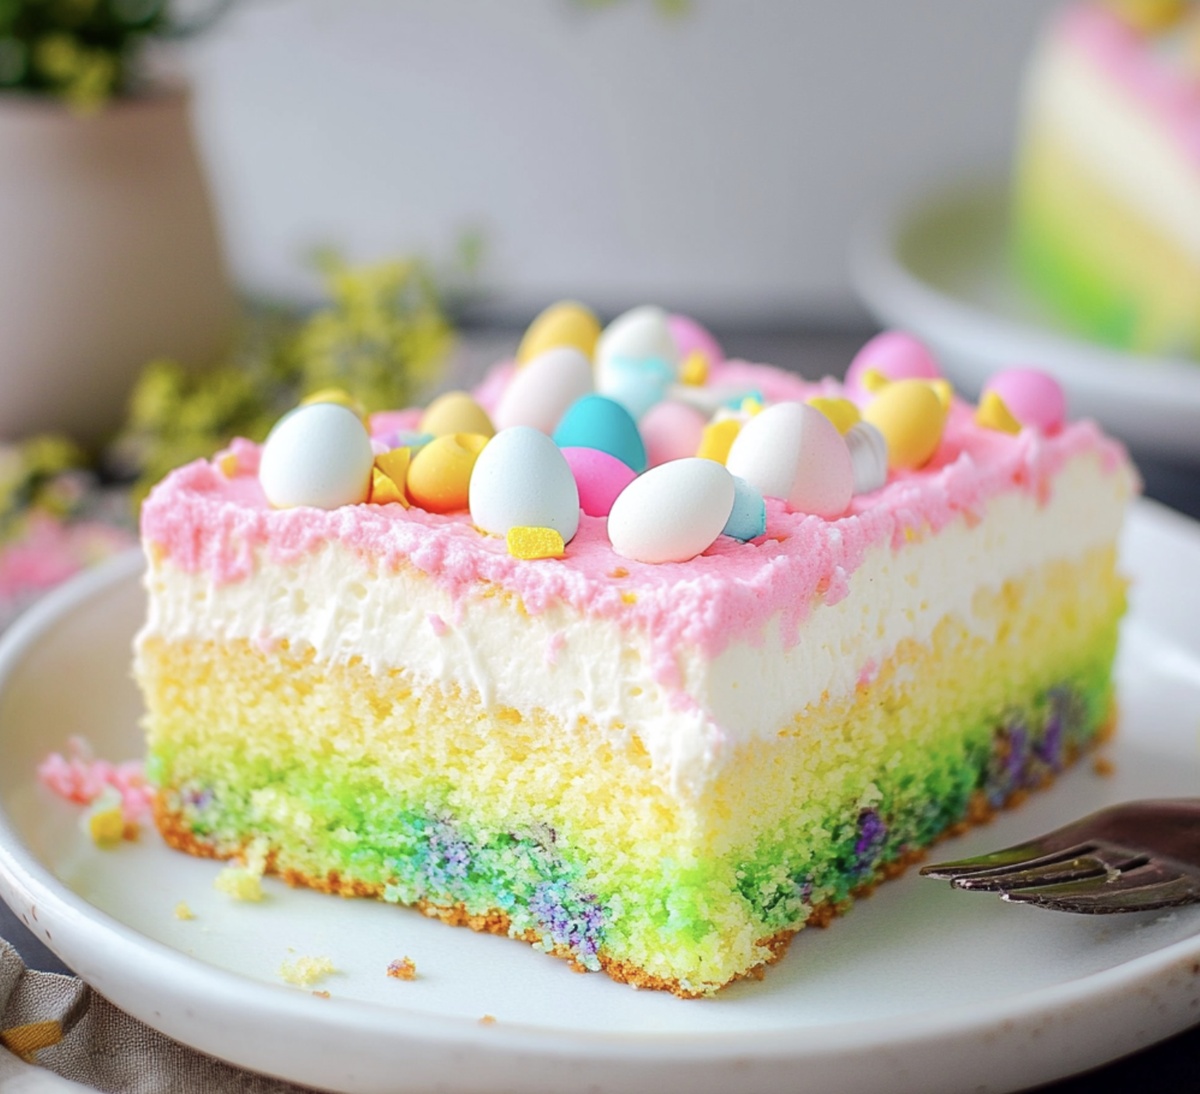
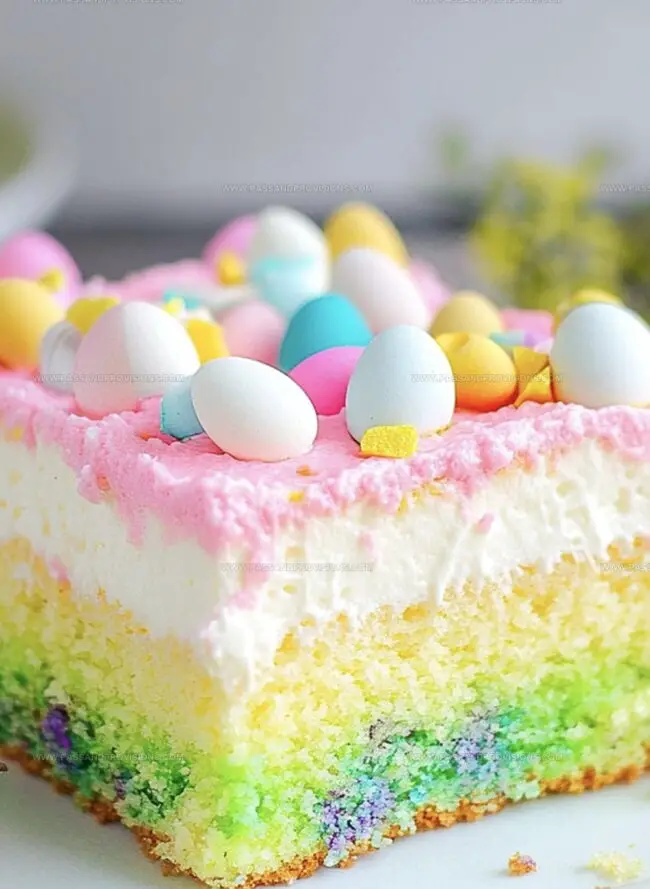
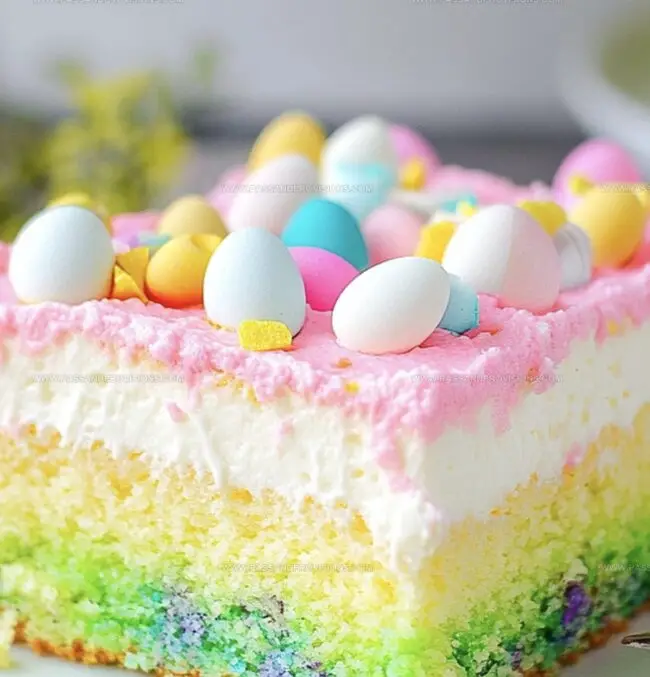
Soft, moist layers bursting with vibrant colors and sweet flavors make this dessert a showstopper.
The creamy texture and delectable filling create a mouthwatering experience that everyone will adore.
Each slice reveals a delightful surprise of pastel hues and rich, creamy goodness.
Simple ingredients and easy preparation make this cake a perfect addition to your holiday table.
Elevate your Easter gathering with this irresistible treat that will have guests asking for seconds.
This dessert is sure to become a cherished tradition that brings smiles and joy to your celebration.
Quick Recipe Overview
What Goes Into Easter Poke Cake
For Cake Base:For Filling and Moisture:For Topping and Decoration:Tools That Help With a Colorful Easter Poke Cake
How to Make an Eye-Catching Easter Poke Cake
Crank the oven to a cozy 350 degrees and give your baking dish a light butter massage to prevent sticking.
Whip up your cake batter with care, adding a splash of vanilla for an extra burst of flavor if you’re feeling adventurous.
Pour the silky batter into the prepared dish and slide it into the oven. Let it dance and rise for about 30 minutes, checking with a toothpick to ensure it’s fully baked.
Allow your beautiful cake to take a little rest, letting it cool down for a short 10-15 minutes. This gives it time to settle and become the perfect canvas for your Easter creation.
Grab a fork and gently poke holes all across the cake’s surface. These little tunnels will help absorb all the delicious flavors you’re about to add.
Pour your vibrant gelatin mixture over the cake, watching it seep into every single hole. The cake will transform into a festive Easter masterpiece.
Pop the cake into the refrigerator and let it hang out for a few hours. This allows all the flavors to mingle and the cake to become wonderfully moist.
Top your cake with fluffy white frosting and sprinkle with festive Easter-themed decorations. Your showstopper is ready to impress!
Fun Twists for Your Easter Poke Cake Layers
Serving Easter Poke Cake at Spring Gatherings
Chill and Store Easter Poke Cake Just Right
Print
Festive Easter Poke Cake Recipe
- Total Time: 45 minutes
- Yield: 13 1x
Description
Springtime sweetness comes alive with this Easter Poke Cake, a delightful dessert that whispers of holiday joy. Pastel-colored layers and creamy filling promise a delectable celebration perfect for your Easter gathering.
Ingredients
- 1 box white cake mix
- 2 cups cold milk
- 1 (3.4 oz) box instant vanilla or white chocolate pudding mix
- 1 (8 oz) tub cool whip
- ½ cup easter sprinkles or pastel-colored candy eggs
- 1 tsp vanilla extract
- gel food coloring (pink, yellow, blue, or pastel colors)
- eggs (as listed on cake mix box)
- oil (as listed on cake mix box)
- water (as listed on cake mix box)
Instructions
- Cake Preparation: Mix cake batter thoroughly according to package instructions, incorporating vanilla extract for enhanced flavor. Transfer mixture into greased 9×13-inch baking dish, ensuring even distribution.
- Baking Process: Place cake in preheated oven at 350°F (175°C), monitoring closely and baking for 25-30 minutes. Test cake’s readiness by inserting a toothpick into center – it should emerge clean and free of raw batter.
- Cooling Stage: Allow cake to rest and cool down for 10-15 minutes, creating a stable temperature environment for subsequent decorating steps. The cake surface should appear slightly firm and uniform.
- Poke Technique: Using the handle of a wooden spoon or similar utensil, carefully create evenly spaced holes across the entire cake surface. These perforations will help absorb additional flavoring and create interesting texture.
- Filling Infusion: Gently pour prepared gelatin or flavored liquid over the cake, ensuring the mixture seeps into the created holes. This step adds moisture and introduces vibrant color throughout the dessert.
- Chilling Phase: Refrigerate the cake for at least 2 hours, allowing flavors to meld and gelatin to set completely. This resting period enhances overall taste and texture.
- Frosting Finale: Spread whipped cream or prepared frosting smoothly across the cake’s surface, creating an elegant and inviting presentation. Optionally, garnish with festive sprinkles or decorative elements.
Notes
- Accuracy ensures the cake’s perfect texture and prevents dense or dry results.
- Use the toothpick test, inserting it in the center to confirm no wet batter remains.
- Allow cake to reach room temperature to prevent frosting from melting or sliding.
- Substitute gluten-free cake mix or use dairy-free whipped topping for alternative diet requirements.
- Prep Time: 15 minutes
- Cook Time: 30 minutes
- Category: Desserts
- Method: Baking
- Cuisine: American
Nutrition
- Serving Size: 13
- Calories: 250
- Sugar: 18 g
- Sodium: 220 mg
- Fat: 8 g
- Saturated Fat: 4 g
- Unsaturated Fat: 2 g
- Trans Fat: 0 g
- Carbohydrates: 38 g
- Fiber: 1 g
- Protein: 3 g
- Cholesterol: 40 mg
William Hawkins
Founder & Culinary Director
Expertise
Education
Sullivan University, Louisville, KY
William Hawkins isn’t just a chef, he’s a storyteller through food. From his hometown of Louisville, KY, he’s spent years refining his craft, turning local ingredients into something extraordinary.
With classical training from Sullivan University and a career marked by innovation, mentorship, and Southern soul, William approaches every recipe with purpose. His kitchen is where old techniques meet fresh ideas, and where comfort food gets a thoughtful, modern twist.
When he’s not building dishes from the ground up, he’s out gathering inspiration from nature, markets, and the stories people share around the table.