Snap-Happy Crispy Button Cookies Recipe for Fun Baking
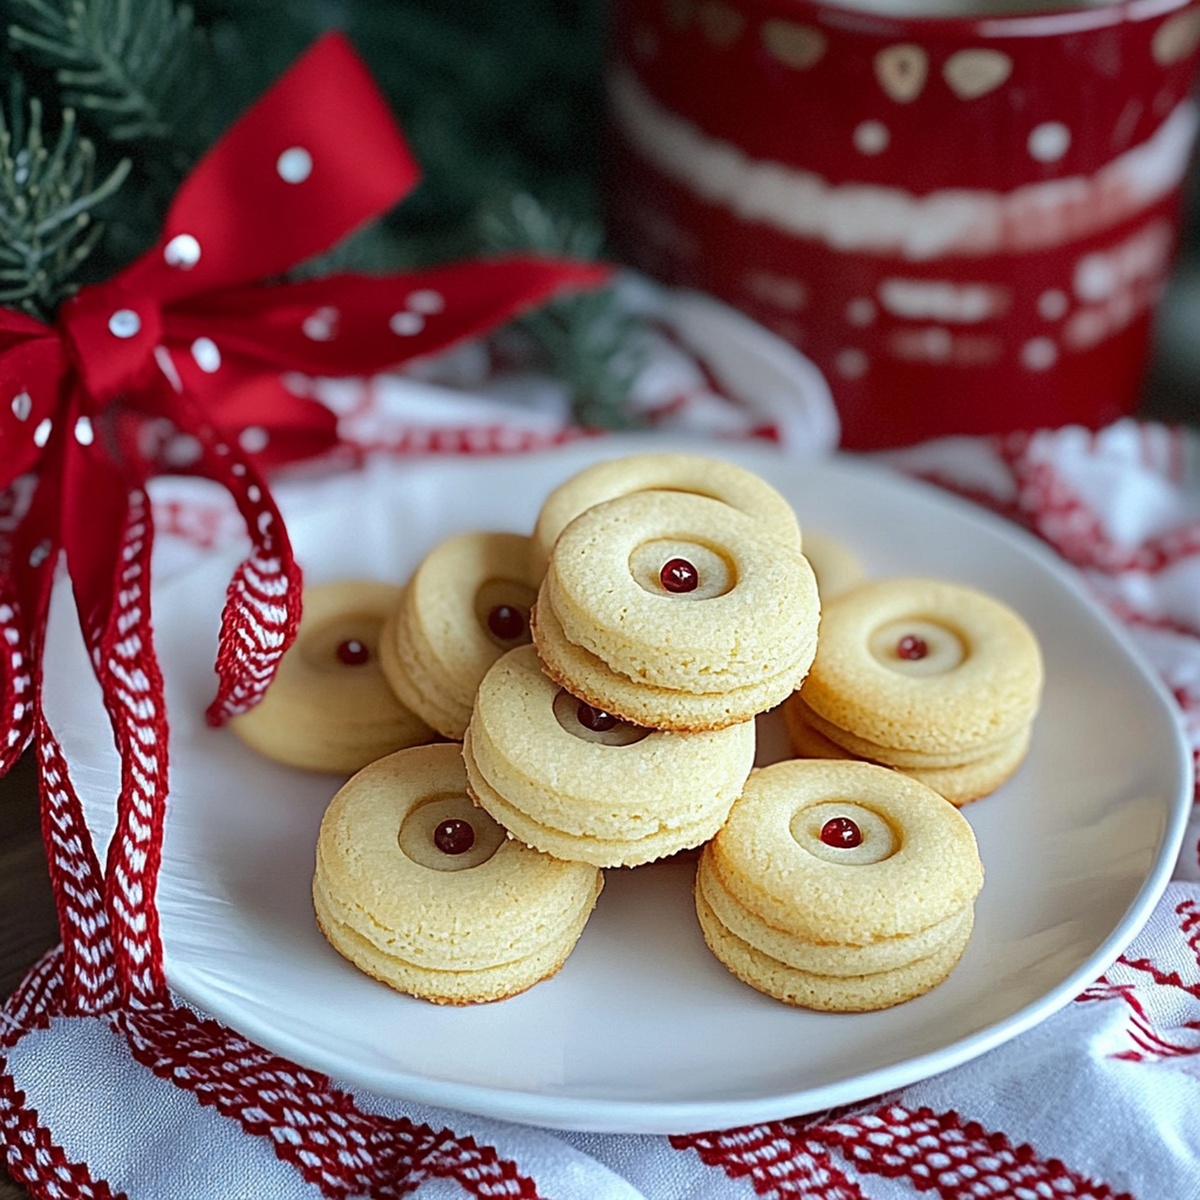
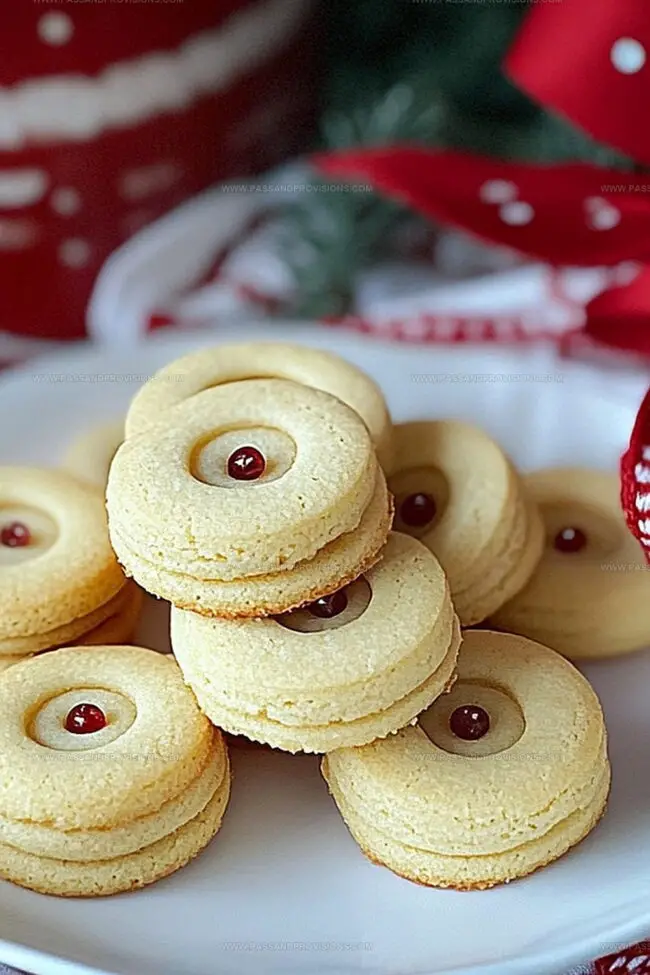
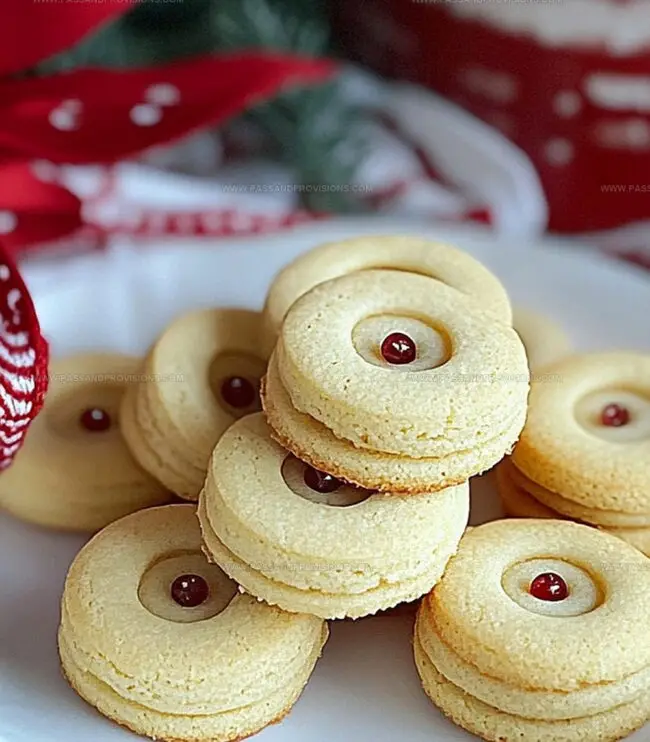
Buttery, golden-brown cookies with a crisp button cookie texture have been delighting dessert enthusiasts for generations.
These delightful treats offer a perfect blend of crunch and sweetness that melts in your mouth.
The simple yet elegant button cookies bring charm to any dessert table or afternoon tea gathering.
Each bite delivers a delicate, crisp sensation that sparks pure joy.
Crafted with basic pantry ingredients, these cookies require minimal effort but promise maximum satisfaction.
Chocolate lovers and classic cookie fans alike will adore this timeless recipe.
Prepare to indulge in a delectable experience that celebrates simplicity and flavor.
Quick Recipe Overview
Button Cookie Ingredient Lineup
For Base Ingredients:For Dry Ingredients:For Optional Moisture:Baking Tools to Craft Cute Button Cookies
How to Bake Button Cookies With Ease
Crank your oven to a toasty 350F and grab a baking sheet lined with parchment paper.
Cream butter and powdered sugar until they’re fluffy and dreamy. Splash in some vanilla for extra magic.
Mix flour, salt, and cornstarch into your creamy mixture. If the dough feels too crumbly, add a splash of milk to bring it together.
Roll out the dough super thin. Grab a small circular cutter and start creating adorable cookie circles.
Use a straw or piping tip to punch tiny holes in the center of each cookie, just like a real button.
Slide your cookie buttons into the oven and let them turn golden around the edges (about 10-12 minutes).
Let the cookies rest on the pan for a few minutes, then transfer to a cooling rack. For extra cuteness, you can thread them together like real buttons!
Add Colorful Twists to Your Button Batch
Display Button Cookies for Maximum Charm
Save These Cookies So They Stay Soft
Print
Crispy Button Cookies Recipe
- Total Time: 27 minutes
- Yield: 25 1x
Description
Button cookies bring whimsy and nostalgia to classic sweet treats. Delicate shortbread circles with charming pressed designs offer a playful twist that delights both children and adults with their adorable shapes and buttery flavor.
Ingredients
- 2 cups all-purpose flour
- 2 tablespoons cornstarch (for extra tenderness)
- ½ cup powdered sugar
- 1 cup (2 sticks/226 g) unsalted butter, softened
- ¼ teaspoon salt
- 1 teaspoon vanilla extract
- 1 tablespoon milk (if needed)
Instructions
- Preparation: Calibrate oven to 350F (175C) and arrange parchment paper on baking tray for optimal cookie performance.
- Dough Formation: Whip butter and powdered sugar into a velvety, aerated mixture, incorporating vanilla extract for aromatic depth.
- Ingredient Integration: Gently fold flour, salt, and cornstarch into the creamy base, creating a supple dough. Adjust consistency with milk if needed for perfect texture.
- Shaping Technique: Elegantly roll dough to delicate 14-inch thickness, utilizing a precision round cutter to craft uniform circular shapes.
- Button Detailing: Puncture central zones of each cookie disc using a straw or piping nozzle, mimicking authentic button characteristics.
- Thermal Transformation: Position cookies on prepared surface and bake for 10-12 minutes, watching for subtle golden edges signaling completion.
- Finishing Touch: Allow cookies to rest momentarily on baking sheet, then transfer to cooling rack. Optional: Thread cookies together for whimsical presentation.
Notes
- Add milk gradually if the dough feels crumbly, ensuring a smooth, workable texture that holds together easily without being too sticky.
- Use a sharp, clean round cutter for uniform button cookies, wiping the cutter between cuts to maintain crisp edges and clean shapes.
- Watch cookies closely during baking, as they can quickly go from perfectly golden to over-browned due to their delicate nature.
- Consider dusting with powdered sugar, adding food coloring to the dough, or using colored sanding sugar for a playful, customized button cookie appearance.
- Prep Time: 15 minutes
- Cook Time: 12 minutes
- Category: Desserts, Snacks
- Method: Baking
- Cuisine: American
Nutrition
- Serving Size: 25
- Calories: 110
- Sugar: 6 g
- Sodium: 50 mg
- Fat: 5 g
- Saturated Fat: 3 g
- Unsaturated Fat: 2 g
- Trans Fat: 0 g
- Carbohydrates: 15 g
- Fiber: 0 g
- Protein: 1 g
- Cholesterol: 20 mg
William Hawkins
Founder & Culinary Director
Expertise
Education
Sullivan University, Louisville, KY
William Hawkins isn’t just a chef, he’s a storyteller through food. From his hometown of Louisville, KY, he’s spent years refining his craft, turning local ingredients into something extraordinary.
With classical training from Sullivan University and a career marked by innovation, mentorship, and Southern soul, William approaches every recipe with purpose. His kitchen is where old techniques meet fresh ideas, and where comfort food gets a thoughtful, modern twist.
When he’s not building dishes from the ground up, he’s out gathering inspiration from nature, markets, and the stories people share around the table.