Tie Dye Cookies Recipe for Rainbow Fun
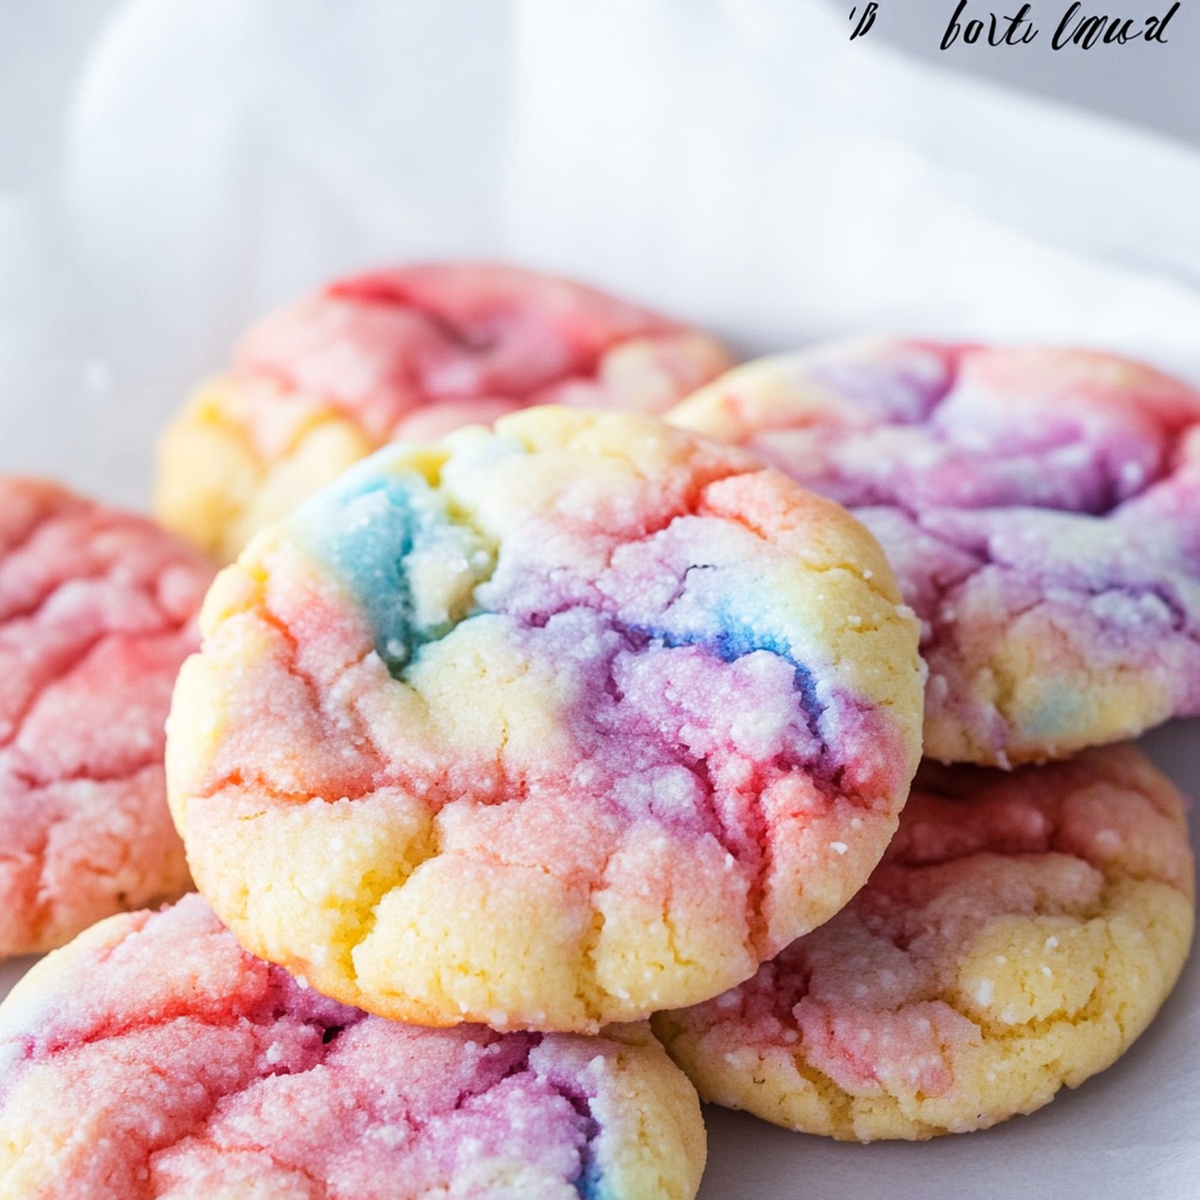
Wild colors swirl through these delightful tie dye cookies like a vibrant dance party on a plate.
Sugary magic happens when simple ingredients blend into an eye-catching treat that sparks joy.
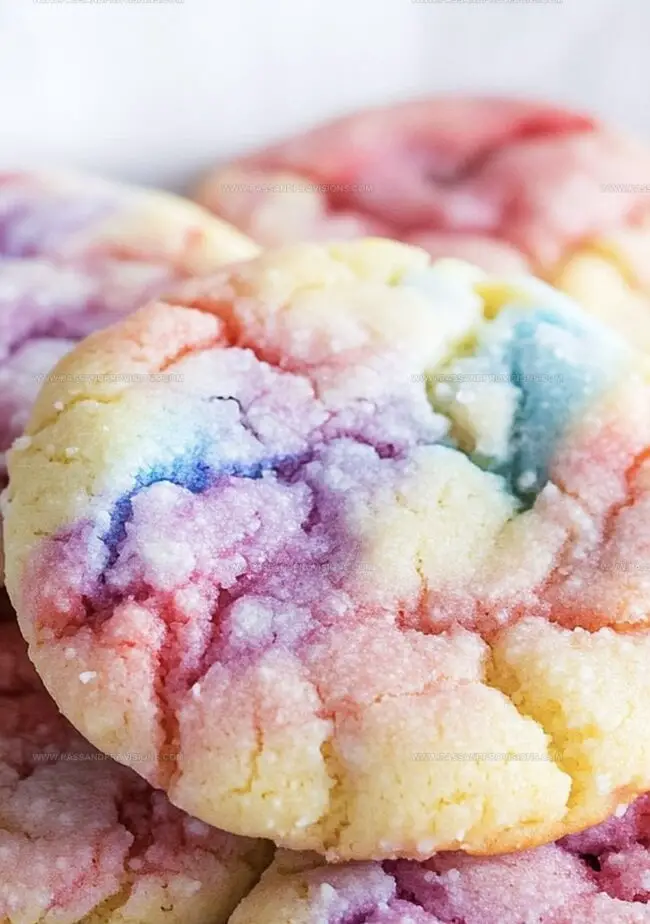
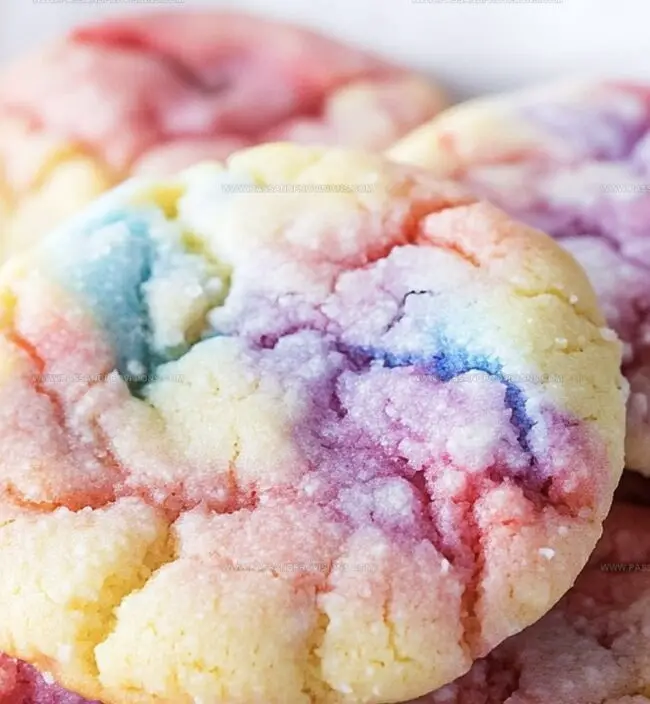
Soft and chewy textures complement the playful rainbow patterns emerging from each sweet bite.
Kids absolutely adore creating these colorful confections that look like edible art.
Mixing food coloring into cookie dough becomes an exciting creative adventure for bakers of all skill levels.
Kitchen counters transform into canvas spaces where culinary creativity knows no boundaries.
You can totally rock this fun baking project and impress everyone with your spectacular colorful cookie masterpiece.
Tie Dye Cookies That Brighten Any Table
Ingredients to Create Colorful Tie Dye Cookies
Main Ingredients:
Flour Mixture:- Flour, Baking Powder, Salt: Essential dry ingredients that provide structure and rise to the cookies, with all-purpose flour recommended for best texture.
Butter and Sweetener:- Butter, Sugar: Crucial for creating a rich, sweet base that gives cookies their classic tender crumb and delightful flavor.
Binding Ingredients:- Egg, Vanilla Extract: Helps bind the dough together and adds depth of flavor, with pure vanilla extract offering the best taste.
Coloring Ingredients:
Color Components:- Gel Food Coloring: Vibrant and concentrated color that allows for intense tie-dye effect without altering cookie dough consistency, paste-style colors work best.
Finishing Ingredients:
Glaze Ingredients:- Powdered Sugar, Milk, Vanilla Extract: Optional topping that adds sweetness and shine, with ability to create additional color variations for decorative finish.
How to Swirl and Bake Tie Dye Cookies
Step 1: Mix Dry Ingredients
Whisk flour, baking powder, and salt in a medium bowl until well combined.
Step 2: Cream Butter and Sugar
Beat butter and sugar in a large bowl until the mixture becomes light and fluffy, continuing to mix for several minutes.
Step 3: Add Wet Ingredients
Incorporate egg and vanilla extract into the butter mixture, stirring until everything blends smoothly.
Step 4: Combine Dough
Gradually add dry ingredients to wet ingredients, mixing until a soft, cohesive dough forms.
Step 5: Separate and Color Dough
Divide the dough into multiple portions depending on your desired color palette.
Ingredients for coloring:Knead a small amount of gel food coloring into each dough portion until the color spreads evenly.
Step 6: Create Swirled Pattern
Pinch small pieces of different colored doughs and press them together randomly.
Gently roll the combined dough into a ball, then roll out to swirl colors without overmixing.
Step 7: Shape Cookies
Use cookie cutters or a knife to create shapes or leave as swirled rounds.
Step 8: Prepare for Baking
Preheat oven to 350°F (175°C).
Line baking sheets with parchment paper.
Step 9: Bake Cookies
Place shaped cookies on prepared baking sheets, spacing them about 2 inches apart.
Bake for 10-12 minutes until edges are set but not browned.
Step 10: Cool and Finish
Transfer cookies to a wire rack and let cool completely.
Optional Glaze Ingredients:Whisk powdered sugar, milk, and vanilla extract until smooth.
Divide glaze into small bowls and add gel food coloring as desired.
Drizzle or brush colored glaze over cooled cookies for extra vibrancy.
Tips for Vibrant and Even Tie Dye Cookies
Keep Tie Dye Cookies Fresh and Picture-Perfect
What to Pair with Your Tie Dye Cookie Batch
Colorful Variations for Tie Dye Cookie Creators
Tie Dye Cookie Questions Solved
You’ll need flour, baking powder, salt, butter, sugar, egg, vanilla extract, and gel food coloring. Optional glaze ingredients include powdered sugar, milk, and more food coloring.
Avoid overmixing the dough when combining colors. Gently press and roll the colored dough pieces together, creating a swirled effect without completely blending the colors.
Gel food coloring is recommended because it provides more vibrant colors and doesn’t add extra moisture to the dough. Liquid food coloring might make the dough too wet and affect the cookie texture.
You’ll need basic baking tools like mixing bowls, a mixer or whisk, baking sheets, parchment paper, and optional cookie cutters. Gel food coloring and a wire cooling rack are helpful but not absolutely essential.
Print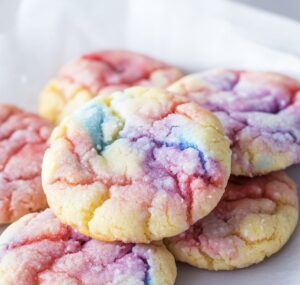
Tie Dye Cookies Recipe
- Total Time: 32 minutes
- Yield: 24 1x
Description
Colorful tie dye cookies bring playful art into sweet baking, creating edible masterpieces that dance with rainbow swirls. Whimsical decorations and simple ingredients make these treats a delightful canvas for bakers who love unexpected culinary creativity.
Ingredients
Main Ingredients:
- 2 ¾ cups (660 ml) all-purpose flour
- 1 cup (227 g) unsalted butter, softened
- 1 cup (200 g) granulated sugar
- 1 large egg
Dry Ingredients:
- 1 teaspoon baking powder
- ½ teaspoon salt
Color and Flavor Ingredients:
- 1 teaspoon vanilla extract
- Gel food coloring (assorted colors: red, blue, yellow, green, etc.)
Optional Glaze Ingredients:
- 1 cup (120 g) powdered sugar
- 2 ¾ tablespoons (41 ml) milk
- ½ teaspoon vanilla extract
- Gel food coloring (optional for a colorful drizzle)
Instructions
- Craft a uniform mixture by whisking flour, baking powder, and salt in a medium mixing vessel.
- Cream butter and sugar in a spacious bowl until the texture becomes airy and voluminous, approximately 23 minutes.
- Incorporate egg and vanilla extract, blending until thoroughly integrated.
- Gradually fold dry ingredients into the wet mixture, creating a supple dough consistency.
- Segment the dough into 46 roughly equivalent portions, accommodating desired color variations.
- Massage gel food coloring into each dough segment, ensuring uniform pigmentation throughout.
- Create a dynamic visual pattern by randomly pinching and pressing colored dough fragments together.
- Gently roll the combined dough into spherical shapes, delicately swirling colors without excessive manipulation.
- Utilize cookie cutters or precision knife techniques to shape cookies, preserving the vibrant marbled aesthetic.
- Warm the oven to 350F (175C) and line baking sheets with parchment paper for optimal cookie preparation.
- Arrange cookie shapes on prepared sheets, maintaining approximately two inches of separation between each.
- Bake for 1012 minutes, monitoring until edges solidify without excessive browning.
- Transfer cookies to wire cooling rack, allowing complete temperature reduction.
- Optional embellishment: Whisk powdered sugar, milk, and vanilla extract into a silky glaze.
- Partition glaze into smaller containers, introducing complementary gel food colorings for decorative drizzling.
- Embellish cooled cookies with colorful glaze, enhancing their whimsical tie dye presentation.
Notes
- Prevent dough from sticking by chilling it in the refrigerator for 30 minutes before shaping, ensuring cleaner color blending and easier handling.
- Mix colors gradually and gently to maintain distinct swirls, avoiding overworking the dough which can muddy the vibrant tie-dye effect.
- Experiment with complementary color combinations like purple and blue, pink and yellow, or green and orange for visually striking cookie designs.
- Use gel food coloring instead of liquid for more intense, concentrated colors that won’t alter the cookie dough’s consistency or texture.
- Prep Time: 20 minutes
- Cook Time: 12 minutes
- Category: Desserts, Snacks
- Method: Baking
- Cuisine: American
Nutrition
- Serving Size: 24
- Calories: 192
- Sugar: 10 g
- Sodium: 103 mg
- Fat: 9 g
- Saturated Fat: 5 g
- Unsaturated Fat: 3 g
- Trans Fat: 0 g
- Carbohydrates: 26 g
- Fiber: 0.5 g
- Protein: 2 g
- Cholesterol: 25 mg
Jamie Granger
Recipe Developer & Food Writer
Expertise
Education
Culinary Institute of America
Jamie Granger turns ingredients into memories. With her recipes, she brings a fusion-forward flair to every creation.
Her dishes reflect the places she’s explored, the chefs she’s learned from, and the deep connection she has to food as a form of expression.
At Pass and Provision, Jamie develops recipes that balance flavor, health, and beauty, meals that don’t just satisfy your appetite but speak to your curiosity.