
Dreamy Homemade Starbucks Cake Pops Recipe for Sweet Bliss
Sweet dreams come true with these delectable starbucks cake pops that burst with creamy, nostalgic flavor.
My bakery friends swear by this simple technique for creating irresistible treats.
Baking enthusiasts can whip up these bite-sized delights in just minutes.
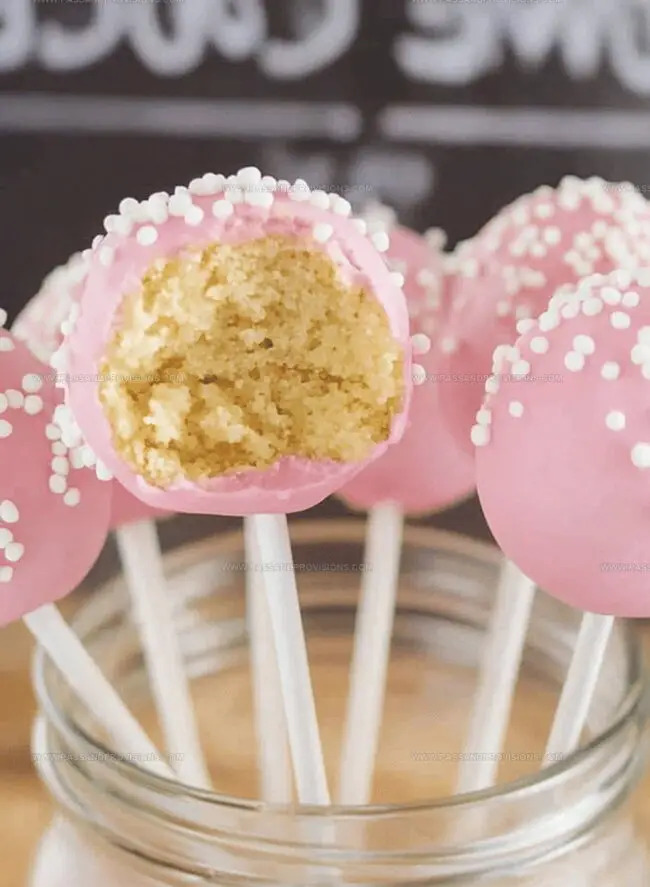
Colorful sprinkles and smooth chocolate coating make these miniature desserts absolutely magical.
Kids and adults go crazy for these adorable little confections.
Compact and cute, these cake pops deliver maximum taste in one perfect bite.
You’ll want to make a double batch because they disappear faster than you can imagine.
Why Starbucks Cake Pops Are Fun to Make at Home
What You’ll Need to Create These Colorful Treats
Main Cake Base:Coating and Decorative Elements:Structural and Support Ingredients:How to Roll and Dip Cake Pops Without the Mess

Step 1: Bake The Magical Cake Base
Whip up cake batter using your favorite boxed mix or homemade recipe. Pour into a rectangular baking dish and bake according to instructions. Let the cake cool completely until it reaches room temperature.
Step 2: Transform Cake Into Crumbly Goodness
Break the cooled cake into tiny, uniform crumbs using:Transfer crumbs into a spacious mixing bowl.
Step 3: Bind Cake Crumbs With Frosting
Mix cake crumbs with frosting until the mixture:Step 4: Shape Perfect Cake Balls
Roll cake mixture into smooth, consistent spheres using:Place cake balls on parchment-lined tray. Chill in freezer for 15-20 minutes.
Step 5: Prepare Smooth Candy Coating
Melt candy melts in microwave-safe bowl. Stir frequently to prevent burning. Add vegetable or coconut oil for smoother consistency.
Step 6: Attach Cake Pop Sticks
Dip stick tips into melted coating. Insert halfway into each cake ball. Freeze again for 10 minutes.
Step 7: Dunk And Decorate
Submerge each cake ball into coating. Twirl gently to ensure even coverage. Remove excess coating by tapping. Sprinkle with decorations before coating hardens.
Step 8: Display And Serve
Stand cake pops upright in foam block or special holder. Allow coating to completely set. Enjoy your homemade treats!
Tips That Help with Structure and Coating
Store Pops Without Making Them Sticky
What to Pair With These Dessert Bites
Decorating Options for All Occasions
Cake Pop FAQs You Should Know
Ensure you add enough frosting to bind the crumbs together. The mixture should hold its shape when pressed. Start with 1/4 cup of frosting and gradually add more until the cake crumbs stick together without being too sticky.
Chocolate or vanilla candy melts are ideal. Choose high-quality brands that melt smoothly and provide a clean, professional finish. Wilton and Merckens are popular brands that work well for cake pops.
Yes, you can prepare cake pops 23 days in advance. After coating and decorating, store them in an airtight container in the refrigerator. Let them come to room temperature before serving for the best texture and flavor.
If the candy coating is too thick, add a tablespoon of vegetable oil or coconut oil to thin it out. Stir well and heat in short intervals to maintain a smooth, dippable consistency.
Print
Starbucks Cake Pops Recipe
- Total Time: 50 minutes
- Yield: 12 1x
Description
Sweet Starbucks cake pops bring bakery magic right into home kitchens with minimal effort. Crumbly cake, creamy frosting, and chocolate coating create delightful bite-sized treats you can enjoy anytime without waiting in line.
Ingredients
Main Ingredients:
- 1 box vanilla or chocolate cake mix
- ⅓ cup (75 g) frosting
- 2 cups (340 g) candy melts
Supporting Ingredients:
- 2 eggs (from cake mix box)
- ⅓ cup (80 ml) vegetable oil (from cake mix box)
- ½ cup (120 ml) water (from cake mix box)
- 1 tablespoon vegetable oil or coconut oil
Decoration Ingredients:
- Sprinkles or nonpareils
- Cake pop sticks
Instructions
- Transform a freshly baked cake into fine, delicate crumbs by gently breaking it apart using your fingertips or a fork, ensuring no large chunks remain.
- Incorporate frosting gradually into the cake crumbs, blending meticulously until the mixture achieves a cohesive, moldable consistency that holds together when pressed.
- Craft uniform spherical shapes by carefully rolling small portions of the cake mixture between your palms, creating smooth, compact cake balls approximately the size of a golf ball.
- Stabilize the cake balls by placing them on a parchment-lined tray and chilling in the freezer for approximately 15 minutes to enhance their structural integrity.
- Prepare the candy coating by gently melting in a microwave-safe container, stirring at regular intervals to prevent scorching and achieve a silky smooth texture.
- Prepare cake pop sticks by dipping their tips into the melted coating, then carefully inserting them halfway into each chilled cake ball, creating a secure anchor.
- Submerge each cake pop into the warm candy coating, allowing excess to drip off by gentle tapping, ensuring an even, glossy exterior.
- Embellish the coated cake pops with decorative sprinkles or additional toppings immediately after dipping to ensure maximum adherence.
- Allow the cake pops to set completely by positioning them vertically in a specialized cake pop stand or foam block until the coating hardens completely.
Notes
- Adjust cake texture by using a fresh, slightly underbaked cake for more moisture and easier crumbling.
- Control cake pop consistency by gradually adding frosting, ensuring the mixture holds together without being too wet or dry.
- Choose high-quality candy melts or chocolate for smoother coating and more professional appearance.
- Experiment with flavor combinations by mixing different cake and frosting types for unique taste profiles.
- Prep Time: 30 minutes
- Cook Time: 20 minutes
- Category: Desserts, Snacks
- Method: Baking
- Cuisine: American
Nutrition
- Serving Size: 12
- Calories: 200
- Sugar: 18 g
- Sodium: 150 mg
- Fat: 9 g
- Saturated Fat: 3 g
- Unsaturated Fat: 4 g
- Trans Fat: 0 g
- Carbohydrates: 29 g
- Fiber: 1 g
- Protein: 2 g
- Cholesterol: 20 mg
Jamie Granger
Recipe Developer & Food Writer
Expertise
Education
Culinary Institute of America
Jamie Granger turns ingredients into memories. With her recipes, she brings a fusion-forward flair to every creation.
Her dishes reflect the places she’s explored, the chefs she’s learned from, and the deep connection she has to food as a form of expression.
At Pass and Provision, Jamie develops recipes that balance flavor, health, and beauty, meals that don’t just satisfy your appetite but speak to your curiosity.