Irresistibly Flaky Sour Cherry Hand Pies Recipe
Crafting delightful sour cherry hand pies brings pure magic to your kitchen adventure.
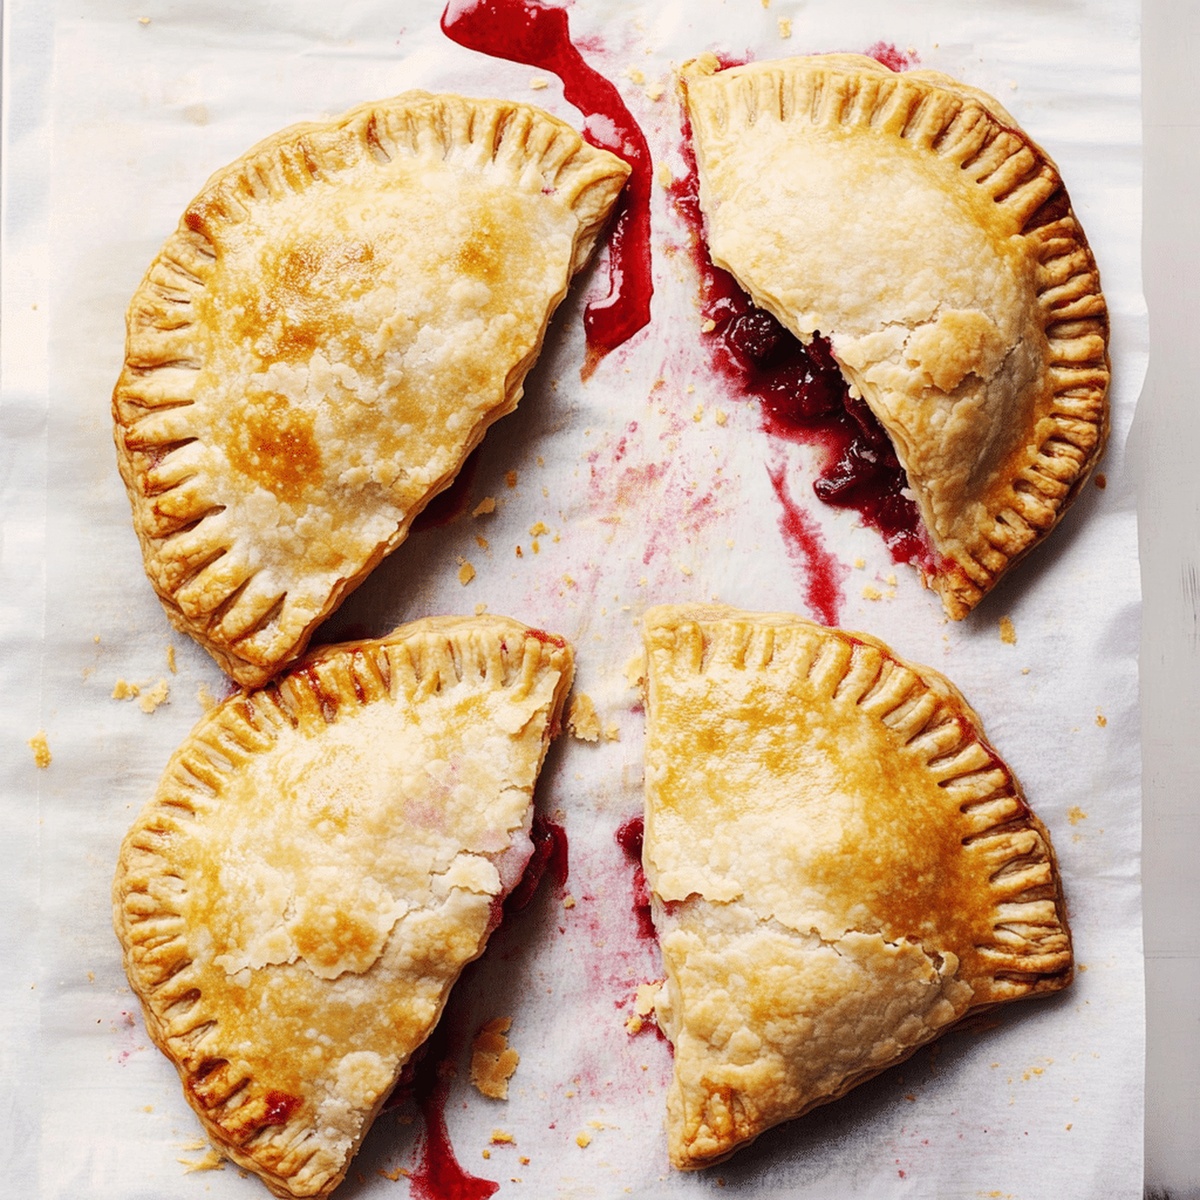
Summer’s sweetest treasures peek from buttery pastry folds.
Compact and portable, these little pastries pack intense fruity flavor into every bite.
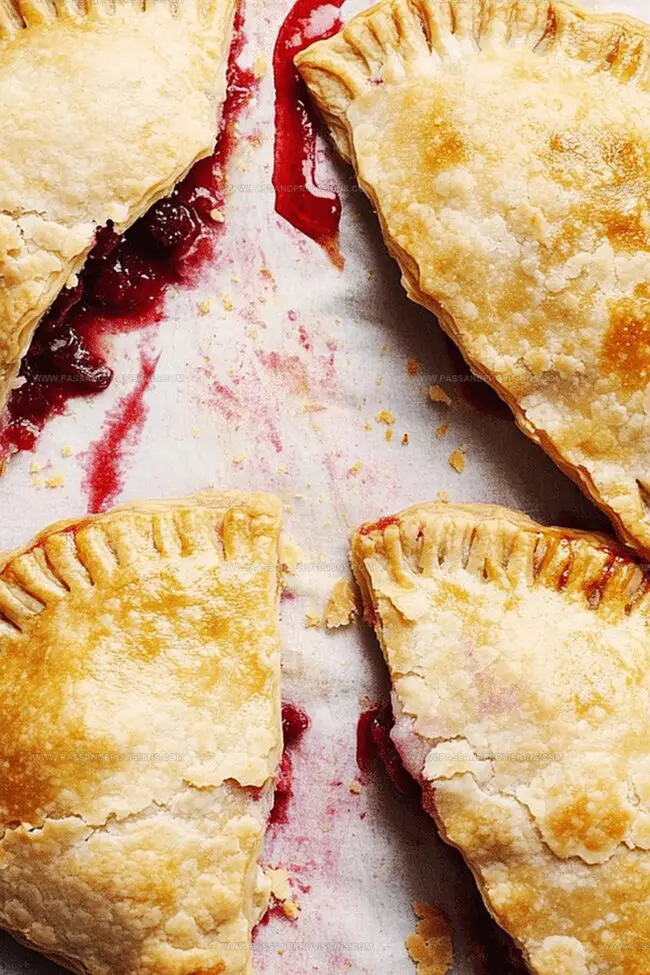
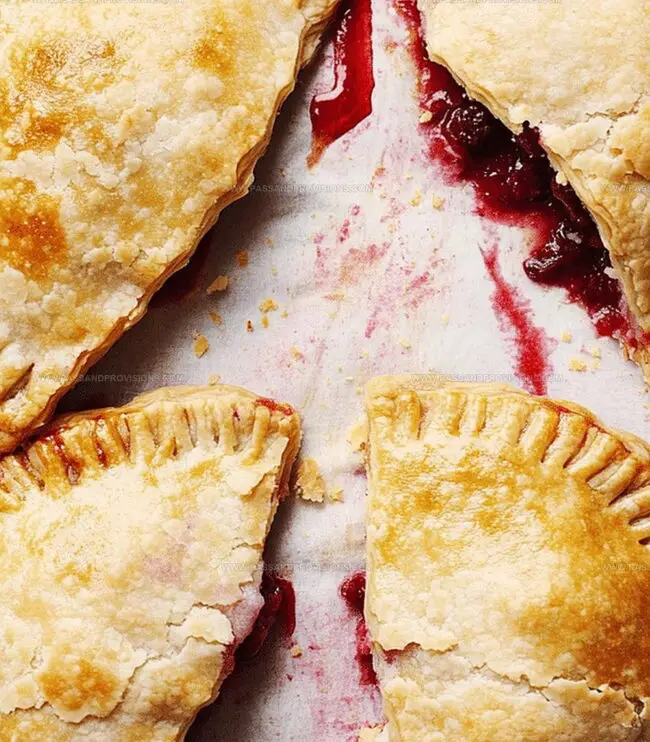
Small pockets of tart cherries mingle with delicate, flaky crusts that crumble perfectly.
Each hand pie promises a personal dessert experience bursting with homemade charm.
Precision matters when creating these miniature treats, so gather your ingredients with care.
Baking these pies will transport you to a world of pure culinary joy.
Why Sour Cherry Hand Pies Hit the Spot
Ingredient List for Sour Cherry Hand Pies
Pastry Ingredients:Filling Ingredients:Finishing Ingredients:How to Bake Hand Pies with Tangy Cherry Filling
Step 1: Prepare Magical Pie Dough
Mix dry ingredients in a large bowl:Slice cold butter into tiny pieces and work into flour mixture using fingertips until it looks like coarse sand. Gradually add ice water, blending until dough forms soft clumps. Divide dough into two round discs, wrap in plastic, and refrigerate for half an hour.
Step 2: Create Luscious Cherry Filling
In a saucepan, combine:Cook on medium heat, stirring occasionally. After 5 minutes, cherries will release beautiful ruby juices. Mix cornstarch with water, then stir into cherry mixture. Cook for additional 2-3 minutes until thickened. Remove from heat, fold in vanilla extract, and let cool completely.
Step 3: Shape Delightful Hand Pies
Dust work surface with flour. Roll chilled dough to thin consistency. Cut into circles or rectangles using round cutter or knife. Chill cut shapes for 10 minutes.
Step 4: Assemble Tasty Pockets
Place cherry filling in center of dough pieces. Brush edges with egg wash. Fold and seal edges using fork tines. Cut small venting slits on top. Brush with additional egg wash and sprinkle with coarse sugar.
Step 5: Baking Brilliance
Preheat oven to 375F. Bake pies for 18-22 minutes until golden brown.
Step 6: Optional Crispy Variation
Heat oil to 350F. Carefully fry pies 1-2 minutes per side until extra crispy. Drain on paper towels.
Step 7: Final Flourish
Let pies cool slightly. Optional: Drizzle with powdered sugar glaze for ultimate decadence.
Tips for Golden Crust and Juicy Centers
Storage and Reheat Tips for Cherry Hand Pies
Drinks and Dips That Pair Perfectly
Sour Cherry Pie Variations You’ll Enjoy
FAQs About Hand Pies You Should Know
Yes, you can use frozen cherries. Thaw and drain them completely before cooking to prevent excess moisture in the filling.
Seal the edges firmly with a fork, don’t overfill the pies, and make sure to cut small venting slits to release steam during baking.
Absolutely! You can prepare the dough and filling up to 2 days in advance. Store the dough wrapped in plastic in the refrigerator and keep the filling in an airtight container.
No, it’s optional. You can either bake them until golden brown or fry them for a crispier texture. Choose the method you prefer or that suits your cooking style.
Print
Sour Cherry Hand Pies Recipe
- Total Time: 50 minutes
- Yield: 8 1x
Description
Buttery, flaky pastry hugs luscious sour cherry hand pies, inviting sweet-tart indulgence with each bite. Crisp edges and ruby-red filling promise a delightful dessert you’ll savor to the last crumb.
Ingredients
Main Ingredients:
- 2 ½ cups (300 grams) all-purpose flour
- 2 cups pitted sour cherries (fresh or frozen)
- 1 cup (226 grams) unsalted butter, cold and cubed
- 1 large egg
Filling Ingredients:
- ½ cup granulated sugar
- 1 tablespoon cornstarch
- 1 tablespoon lemon juice
- ½ teaspoon vanilla extract
Seasoning and Topping Ingredients:
- 1 tablespoon granulated sugar
- 1 teaspoon salt
- 6 tablespoons ice water
- 1 tablespoon milk
- 2 tablespoons coarse sugar (for sprinkling)
Instructions
- Craft a delicate pastry dough by whisking flour, sugar, and salt together in a spacious mixing bowl.
- Incorporate cold butter into the dry ingredients using a pastry cutter or fingertips until the mixture resembles sandy crumbs.
- Gradually introduce ice water, blending carefully until the dough forms a cohesive mass.
- Partition the dough into two equal portions, shape into flat discs, encase in plastic wrap, and refrigerate for half an hour to firm up.
- Prepare the cherry filling by combining cherries, sugar, and lemon juice in a saucepan over medium heat.
- Simmer the mixture, stirring intermittently, allowing cherries to release their natural juices for approximately 5 minutes.
- Create a cornstarch slurry by mixing cornstarch with water, then fold into the cherry mixture to enhance thickness.
- Continue cooking for an additional 2-3 minutes until the filling reaches a luscious, jam-like consistency.
- Remove from heat, infuse with vanilla extract, and allow the filling to cool completely.
- Roll out the chilled dough on a flour-dusted surface to a uniform thin layer.
- Use a circular or rectangular cutter to shape precise dough portions, arranging them on a parchment-lined baking sheet.
- Briefly return the cut dough to the refrigerator to maintain its structure.
- Delicately spoon cherry filling onto one half of each dough round, leaving a small border around the edges.
- Brush the edges with an egg wash mixture to help seal the pies.
- Carefully overlay a second dough round atop the filled portion, pressing edges with a fork to create a secure seal.
- Craft small ventilation slits on the pie tops to allow steam escape.
- Enhance the pies’ appearance by brushing with additional egg wash and sprinkling with coarse sugar.
- Preheat the oven to 375F (190C), creating an ideal baking environment.
- Bake the hand pies until they transform into a golden, crisp delicacy, approximately 18-22 minutes.
- Optionally, for an alternative preparation, heat oil to 350F (175C) and briefly fry the pies until achieving a crispy exterior.
- Allow the hand pies to cool slightly before serving, optionally drizzling with a delicate powdered sugar glaze for added indulgence.
Notes
- Chill dough thoroughly to ensure flaky, tender pastry that separates into delicate layers when baked.
- Adjust cherry filling sweetness by tasting before adding sugar, allowing natural fruit tartness to shine through.
- Use frozen or fresh sour cherries interchangeably, thawing and draining frozen cherries completely to prevent excess moisture.
- Create gluten-free version by substituting all-purpose flour with a reliable 1:1 gluten-free baking blend, maintaining similar texture and structure.
- Prep Time: 20 minutes
- Cook Time: 30 minutes
- Category: Desserts, Snacks
- Method: Frying
- Cuisine: American
Nutrition
- Serving Size: 8
- Calories: 450
- Sugar: 18 g
- Sodium: 180 mg
- Fat: 30 g
- Saturated Fat: 19 g
- Unsaturated Fat: 10 g
- Trans Fat: 1 g
- Carbohydrates: 40 g
- Fiber: 2 g
- Protein: 4 g
- Cholesterol: 60 mg
Jamie Granger
Recipe Developer & Food Writer
Expertise
Education
Culinary Institute of America
Jamie Granger turns ingredients into memories. With her recipes, she brings a fusion-forward flair to every creation.
Her dishes reflect the places she’s explored, the chefs she’s learned from, and the deep connection she has to food as a form of expression.
At Pass and Provision, Jamie develops recipes that balance flavor, health, and beauty, meals that don’t just satisfy your appetite but speak to your curiosity.