
Red Velvet Cake Roll Recipe Divine Indulgence
Indulging in a red velvet cake roll sparks pure culinary magic that dances between decadence and artistry.
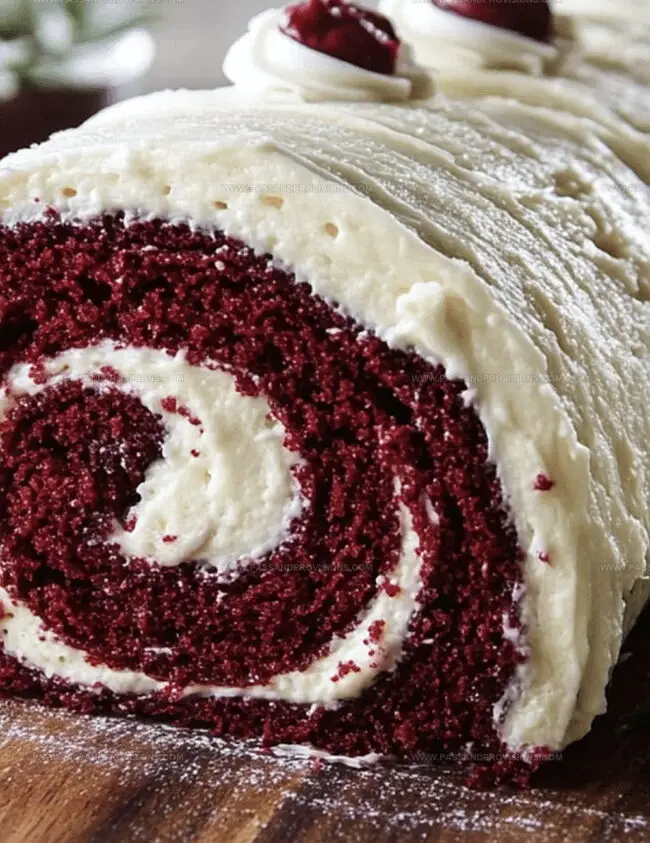
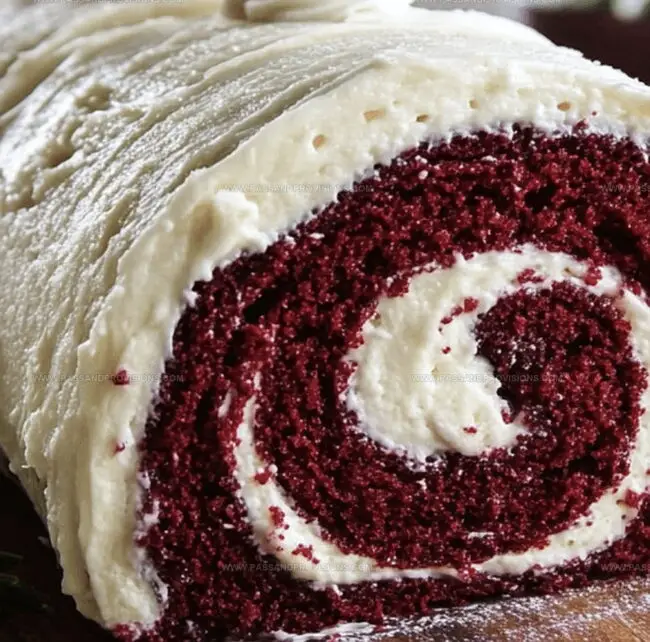
Soft crimson swirls promise an elegant dessert experience waiting to unfold.
Sweet cocoa nuances blend seamlessly with cream cheese frosting, creating a harmonious symphony of flavors.
Rich texture and vibrant color make this treat a showstopper at any gathering.
Delicate yet impressive, this dessert requires minimal baking expertise but delivers maximum visual appeal.
Smooth rolling techniques ensure a picture-perfect presentation that will amaze everyone at the table.
You’ll want to savor each delightful bite of this classic Southern-inspired delicacy.
Why Everyone Loves a Red Velvet Cake Roll
What You’ll Need to Make Red Velvet Cake Roll
Cake Base Ingredients:Wet Ingredients:Color and Flavor Ingredients:Cream Cheese Filling Ingredients:Finishing Ingredients:Directions for Rolling Up a Red Velvet Cake
Step 1: Prepare Baking Surface
Preheat oven to 350F. Line a jelly roll pan with parchment paper and coat with cooking spray. Ensure the entire surface is well-greased for easy cake removal.
Step 2: Create Dry Mixture
Combine in a bowl:Sift ingredients together thoroughly to remove any lumps.
Step 3: Whip Egg Base
Use an electric mixer to beat eggs on high speed until they become fluffy and pale. Slowly incorporate granulated sugar while continuing to mix. The mixture should become thick and ribbon-like.
Step 4: Blend Liquid Ingredients
Gently mix into egg mixture:Stir until ingredients are just combined.
Step 5: Merge Mixtures
Fold dry ingredients into wet mixture carefully. Use gentle circular motions to prevent deflating the batter. Stop mixing once no flour streaks remain.
Step 6: Bake Cake Layer
Pour batter into prepared pan. Spread evenly to all edges. Bake for 12-15 minutes until cake surface springs back when lightly touched.
Step 7: Initial Cake Rolling
Dust a clean kitchen towel with powdered sugar. Immediately after baking, flip cake onto towel. Remove parchment paper. Roll cake with towel from short end, creating a spiral shape. Allow to cool completely.
Step 8: Create Cream Cheese Filling
Beat together:Gradually add powdered sugar and vanilla extract. Mix until smooth and creamy.
Step 9: Final Assembly
Unroll cooled cake carefully. Spread cream cheese filling evenly, leaving small edges uncovered. Gently re-roll cake without towel. Wrap in plastic and refrigerate for one hour.
Step 10: Serve and Garnish
Dust with additional powdered sugar. Slice into elegant portions. Serve chilled and enjoy!
Pro Tips for the Perfect Cake Roll Texture
Red Velvet Cake Roll Storage and Reheat Guide
Flavors That Complement a Red Velvet Cake Roll
How to Add a Twist to Red Velvet Cake Roll
Questions on Red Velvet Cake Roll? Get Answers
No, it’s surprisingly straightforward! With careful following of steps and some patience, even beginner bakers can successfully create this elegant dessert.
Rolling the cake immediately after baking prevents cracking and helps create the smooth, flexible texture needed for a perfect cake roll. The warm cake is more pliable and will hold its shape better.
Absolutely! You can prepare the cake roll up to 2-3 days in advance. After assembling, wrap it tightly in plastic wrap and store in the refrigerator until you’re ready to serve.
The combination of beaten eggs, oil, and buttermilk creates a light, soft, and moist cake that’s perfect for rolling without breaking. The technique of beating eggs until thick and pale is key to achieving the right texture.
Print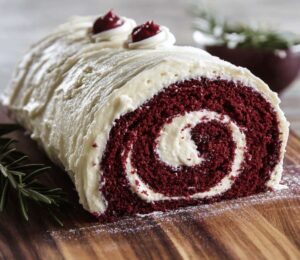
Red Velvet Cake Roll Recipe
- Total Time: 30 minutes
- Yield: 8 1x
Description
Indulgent red velvet cake roll brings Southern charm to dessert tables with its crimson swirl and creamy filling. Cream cheese frosting nestled inside this elegant Swiss roll promises a delightful experience that will charm guests and satisfy sweet cravings.
Ingredients
Main Ingredients:
- 4 large eggs, at room temperature
- ¾ cup (150g) granulated sugar
- 1 cup (125g) all-purpose flour
Cake Dry Ingredients:
- 3 tablespoons (15g) unsweetened cocoa powder
- 1 teaspoon baking powder
- ¼ teaspoon salt
- 1 tablespoon red food coloring
Cake Liquid Ingredients:
- 2 tablespoons (30ml) vegetable oil
- 2 tablespoons (30ml) buttermilk
- 1 teaspoon white vinegar
- 1 teaspoon vanilla extract
- Powdered sugar, for dusting
Cream Cheese Filling Ingredients:
- 8 ounces (226g) cream cheese, softened to room temperature
- ¼ cup (60g) unsalted butter, softened to room temperature
- 1 ¾ cups (210g) powdered sugar
- 1 teaspoon vanilla extract
Instructions
- Meticulously prepare a jelly roll pan by heating the oven to 350F (175C). Coat the pan with grease, layer with parchment paper, and apply additional grease to ensure effortless cake release.
- Sift dry ingredients in a medium bowl, combining flour, cocoa powder, baking powder, and salt. Reserve the mixture to the side.
- Utilize an electric mixer to whip eggs on high velocity for approximately 5 minutes until achieving a thick, pale consistency. Introduce granulated sugar gradually while continuing to beat until thoroughly integrated.
- Transition mixer to low speed, incorporating vegetable oil, buttermilk, vinegar, red food coloring, and vanilla extract. Mix until ingredients are harmoniously blended.
- Delicately fold dry ingredients into wet mixture, ensuring no flour streaks remain. Exercise caution to prevent overmixing.
- Transfer batter into prepared pan, distributing evenly to reach all edges. Bake for 12-15 minutes until the cake’s center responds with resilience when gently pressed.
- Simultaneously, arrange a thin kitchen towel on a flat surface, generously dusting with powdered sugar. Upon cake completion, swiftly loosen edges with a knife and invert onto prepared towel. Carefully remove parchment paper.
- Initiate rolling from a short end, tightly spiraling cake with towel. Position rolled cake on a wire rack for complete cooling.
- Craft cream cheese filling by whipping softened cream cheese and butter until achieving a silky texture. Gradually integrate powdered sugar and vanilla extract, beating until smooth and spreadable.
- After cake reaches room temperature, carefully unroll and spread cream cheese filling evenly, maintaining a small perimeter. Gently re-roll into a compact spiral without the towel.
- Encase cake roll in plastic wrap and refrigerate for minimal one hour to solidify. Prior to serving, optionally dust with powdered sugar and slice into delicate 1-inch portions.
Notes
- Preserve cake’s moisture by rolling while warm, preventing cracking and ensuring a soft, pliable texture.
- Dust towel generously with powdered sugar to prevent sticking and create a clean, smooth cake surface.
- Use room temperature ingredients for smoother batter and more consistent mixing, especially eggs and cream cheese.
- Adapt recipe for dietary needs by substituting gluten-free flour, using dairy-free cream cheese, or reducing sugar content.
- Prep Time: 10 minutes
- Cook Time: 20 minutes
- Category: Desserts
- Method: Baking
- Cuisine: American
Nutrition
- Serving Size: 8
- Calories: 263
- Sugar: 22g
- Sodium: 210mg
- Fat: 14g
- Saturated Fat: 8g
- Unsaturated Fat: 4g
- Trans Fat: 0g
- Carbohydrates: 31g
- Fiber: 0g
- Protein: 4g
- Cholesterol: 97mg
Jamie Granger
Recipe Developer & Food Writer
Expertise
Education
Culinary Institute of America
Jamie Granger turns ingredients into memories. With her recipes, she brings a fusion-forward flair to every creation.
Her dishes reflect the places she’s explored, the chefs she’s learned from, and the deep connection she has to food as a form of expression.
At Pass and Provision, Jamie develops recipes that balance flavor, health, and beauty, meals that don’t just satisfy your appetite but speak to your curiosity.