
Dreamy Nutter Butter Pie Recipe: A Sweet Slice of Paradise
Creamy desserts have a special way of bringing people together, and this decadent nutter butter pie captures pure indulgence.
Chocolate and peanut butter lovers will swoon over this rich, velvety treat that combines classic flavors into one irresistible dessert.
The no-bake nutter butter pie delivers a perfect balance of sweet and salty notes that dance across your palate.
Crushed cookies form a delightful base, while the silky filling creates layers of delectable texture.
Each bite promises a luxurious experience that feels both comforting and extraordinary.
Crumbled cookies, smooth cream, and a hint of chocolate elevate this pie from simple to spectacular.
Quick Recipe Overview

What You Need to Make Nutter Butter Pie
For Crust:For Filling:For Topping:Pie Tools That Simplify Dessert Making
How to Whip Up a Nutter Butter Cream Pie
Pulverize Nutter Butter cookies in a food processor until they become fine, sandy crumbs that will create a delicious base for your pie.
Blend cookie crumbs with melted butter and press firmly into a pie dish, ensuring an even, compact layer that will hold the filling perfectly.
Pop the crust into the refrigerator for 15-20 minutes to set and firm up while you prepare the creamy filling.
Blend cream cheese, peanut butter, powdered sugar, and vanilla extract in a large bowl until the mixture becomes silky smooth and fully incorporated.
Gently incorporate whipped heavy cream into the peanut butter mixture, creating a luxurious, airy texture that will make your pie irresistibly creamy.
Spread the peanut butter filling evenly over the chilled crust, then return the pie to the refrigerator for at least 4 hours or overnight to set completely.
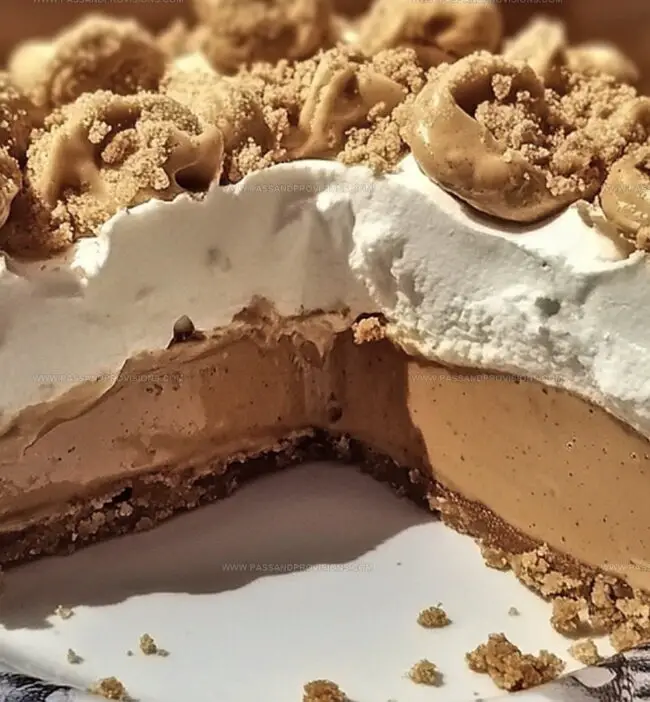
Top the pie with a generous dollop of whipped cream, sprinkle with crushed Nutter Butter cookies, add some chopped peanuts, and drizzle with chocolate or caramel for a stunning finale.
Peanut Butter Variations You’ll Want to Try
Serve This Pie for Sweet, No-Bake Moments
Chill and Store Pie the Smart Way
Print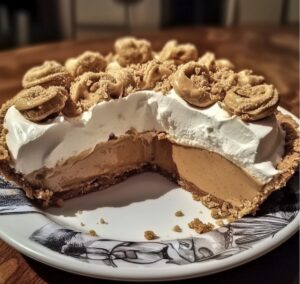
Heavenly Nutter Butter Pie Recipe
- Total Time: 4 hours 20 minutes
- Yield: 9 1x
Description
Creamy nutter butter pie delivers a nostalgic dessert experience that blends classic peanut butter cookie charm with silky smooth filling. Layers of indulgence promise sweet comfort and pure delight for anyone craving a rich, memorable treat.
Ingredients
- 1 cup creamy peanut butter
- 1 (8 oz) package cream cheese (softened)
- 1 ½ cups heavy whipping cream (whipped to stiff peaks)
- 24 Nutter Butter cookies (crushed)
- 5 tbsps unsalted butter (melted)
- ¾ cup powdered sugar
- 1 tsp vanilla extract
- ½ cup whipped cream or Cool Whip
- 2 Nutter Butter cookies (crushed, for garnish)
- ¼ cup chopped peanuts
- ¼ cup chocolate or caramel drizzle
Instructions
- Crust Preparation: Pulverize Nutter Butter cookies into fine granules using a food processor, then blend with melted butter and firmly compact into a 9-inch pie dish, creating a uniform base.
- Chilling Base: Refrigerate the prepared crust for 15-20 minutes to solidify and enhance structural integrity.
- Filling Creation: Whip cream cheese, peanut butter, powdered sugar, and vanilla extract in a large mixing bowl until achieving a silky, homogeneous texture.
- Cream Integration: Delicately incorporate whipped heavy cream into the peanut butter mixture, ensuring a light, airy consistency without deflating the volume.
- Filling Distribution: Carefully spread the peanut butter cream evenly across the chilled crust, creating a smooth, level surface.
- Final Chilling: Refrigerate the pie for a minimum of 4 hours, preferably overnight, to allow flavors to meld and filling to set completely.
- Garnishing: Crown the chilled pie with a generous layer of whipped cream, sprinkle crushed Nutter Butter cookies and chopped peanuts, then elegantly drizzle chocolate or caramel sauce for a decadent finish.
Notes
- Pulse Nutter Butter cookies into fine, even crumbs to ensure a stable, compact crust that holds together perfectly.
- Refrigerate the cookie crust for at least 15-20 minutes to prevent crumbling and create a firm base for the creamy filling.
- Fold whipped cream gently into the peanut butter mixture to maintain its light, airy texture and prevent deflating the mixture.
- Prepare the pie a day in advance for best flavor development and allow at least 4 hours of chilling time for optimal set and texture.
- Prep Time: 20 minutes
- Cook Time: 4 hours
- Category: Desserts, Snacks
- Method: None
- Cuisine: American
Nutrition
- Serving Size: 9
- Calories: 350
- Sugar: 25 g
- Sodium: 180 mg
- Fat: 22 g
- Saturated Fat: 10 g
- Unsaturated Fat: 12 g
- Trans Fat: 0 g
- Carbohydrates: 30 g
- Fiber: 1 g
- Protein: 5 g
- Cholesterol: 30 mg
William Hawkins
Founder & Culinary Director
Expertise
Education
Sullivan University, Louisville, KY
William Hawkins isn’t just a chef, he’s a storyteller through food. From his hometown of Louisville, KY, he’s spent years refining his craft, turning local ingredients into something extraordinary.
With classical training from Sullivan University and a career marked by innovation, mentorship, and Southern soul, William approaches every recipe with purpose. His kitchen is where old techniques meet fresh ideas, and where comfort food gets a thoughtful, modern twist.
When he’s not building dishes from the ground up, he’s out gathering inspiration from nature, markets, and the stories people share around the table.