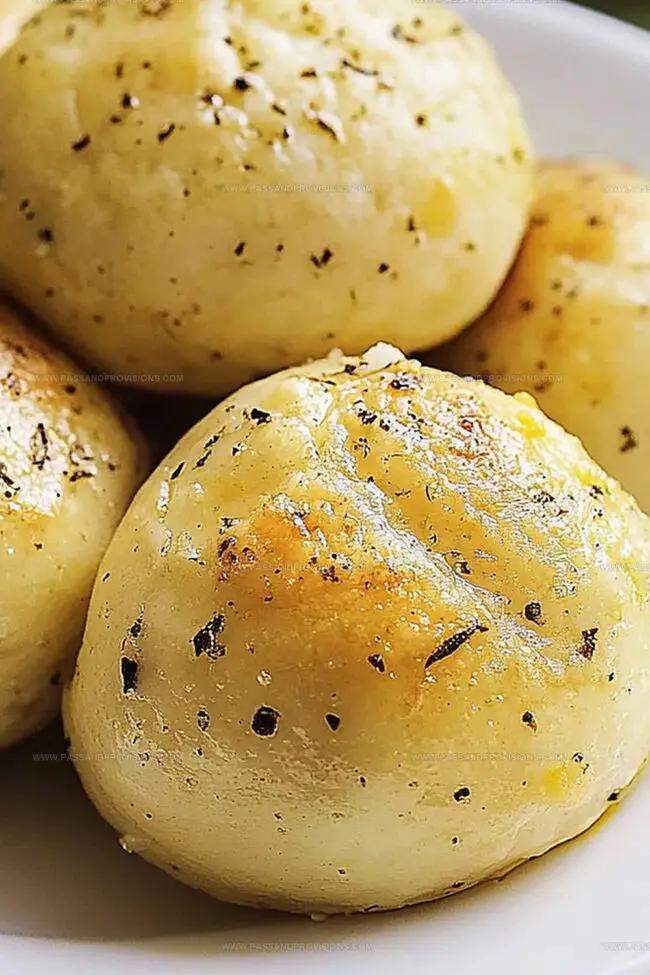
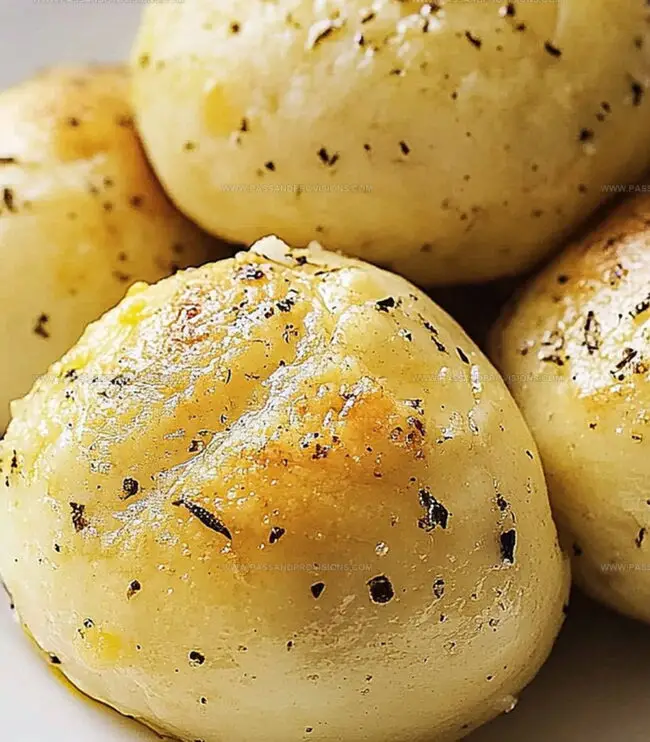
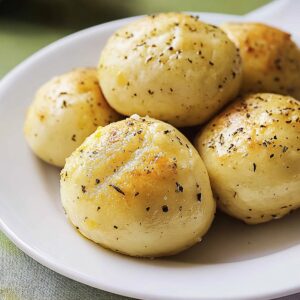
Bubbling with golden-brown potential, these garlic parmesan cheese bombs deliver an explosion of savory goodness that’ll make taste buds dance.
Crispy on the outside and molten with cheesy warmth inside, these little flavor grenades pack an irresistible punch.
Each bite unveils layers of rich parmesan melting perfectly through garlic-infused dough.
The delicate balance of herbs, cheese, and buttery crust creates a mouthwatering experience that transforms ordinary appetizers into extraordinary delights.
Warm, comforting, and utterly addictive, these cheese bombs are the ultimate crowd-pleaser for any gathering.
Prepare to be swept away by their irresistible charm and decadent flavor profile that promises to steal the spotlight at your next meal.
Quick Recipe Overview
Prep Time: 10 minutes
Cook Time: 15 minutes
Total Time: 25 minutes
Calories: 210 kcal
Servings: 8
Garlic Parmesan Cheese Bombs Ingredient Breakdown
For Dough Base:
Refrigerated Biscuit Dough: Provides quick and easy foundation for cheesy pockets, perfect for fast preparation.
All-Purpose Flour: Helps prevent sticking when handling dough, ensures smooth rolling and shaping.
For Cheese Filling:
Mozzarella Cheese: Creates gooey, stretchy center that melts beautifully, select fresh block for best flavor.
Parmesan Cheese: Adds sharp, nutty depth to final seasoning, choose freshly grated for maximum taste.
For Flavor and Topping:
Butter: Delivers rich, golden coating that enhances overall taste and creates glossy exterior.
Italian Seasoning: Blends herbs that provide aromatic Mediterranean profile, elevates simple dish.
Salt: Balances and intensifies other seasonings, use sparingly for perfect taste.
Fresh Parsley: Offers bright green color and fresh herbaceous note, chop finely for elegant garnish.
Marinara Sauce: Provides classic dipping companion that complements cheesy bombs, select high-quality jarred or homemade sauce.
Tools for Making Cheese Bombs with Ease
Baking Sheet: Essential for evenly cooking the cheese bombs and preventing sticking.
Parchment Paper: Ensures easy release and clean-up after baking.
Small Bowl: Perfect for mixing the garlic butter topping.
Pastry Brush: Helps evenly coat the hot cheese bombs with seasoned butter.
Cutting Board: Great for working with dough and preparing ingredients.
Measuring Spoons: Precise for measuring seasonings and salt.
Instructions for Baking Garlic Parmesan Cheese Bombs
Warm Up the Oven Crank your oven to a toasty 375°F, getting ready for some cheesy magic.
Prepare the Baking Surface Line a baking sheet with parchment paper, creating a perfect landing spot for your soon-to-be-delicious treats.
Shape the Dough Gently flatten each biscuit piece on a lightly floured surface, transforming them into delicate canvas for your cheesy adventure.
Create Cheese Pockets Nestle a mozzarella cube into the center of each biscuit, then lovingly wrap and pinch the dough, sealing the cheesy treasure inside.
Arrange and Bake Place the sealed dough balls seam-side down on the prepared baking sheet, then slide into the oven for 12-15 minutes until they turn a gorgeous golden brown.
Craft the Flavor Blast Mix melted butter with garlic powder, Italian seasoning, salt, and Parmesan to create a mouth-watering glaze.
Finish and Serve Brush the hot cheese bombs with the flavor-packed mixture, sprinkle with fresh parsley, and serve alongside marinara sauce for the ultimate dipping experience.
Tips to Customize Garlic Cheese Bombs
Perfect Cheese Seal: Pinch the edges of the biscuit dough extra firmly to prevent cheese from leaking during baking, ensuring every bomb stays intact and cheesy.
Freezer-Friendly Prep: Assemble cheese bombs ahead of time, freeze them on a baking sheet, then transfer to a freezer bag for quick future cooking – they’ll bake perfectly straight from frozen with just a few extra minutes of cook time.
Low-Carb Alternative: Replace biscuit dough with fathead dough or almond flour-based dough for a keto-friendly version that maintains the same delicious cheesy essence.
Herb Transformation: Experiment with different dried herbs like rosemary, thyme, or oregano in the butter mixture to create unique flavor profiles that match your meal or personal taste preferences.
Dairy-Free Option: Swap mozzarella for dairy-free cheese alternatives and use plant-based butter to accommodate lactose-intolerant or vegan dietary needs while keeping the bomb’s core crispy texture and savory appeal.
Serving Up Cheese Bombs That Wow
Party Platter Paradise: Arrange these golden cheese bombs on a rustic wooden board with marinara sauce in a cute dipping bowl for an impressive appetizer spread that’ll wow guests.
Game Night Delight: Serve these cheesy treats during movie nights or sports events as a crowd-pleasing snack that everyone can grab and enjoy quickly between plays or scenes.
Kiddie Crowd-Pleaser: Cut the cheese bombs into smaller bite-sized pieces for children’s parties, making them easy for little hands to handle and perfect for picky eaters who love cheesy goodness.
Brunch Brilliance: Pair these warm, garlicky bombs with a light garden salad and some crisp white wine for a casual weekend brunch that feels both indulgent and fresh.
Storage Tips for Cheese Bombs After Baking
Quick Refrigeration Strategy: Store leftover cheese bombs in an airtight container inside the refrigerator, keeping them fresh for 3-4 days. Cool them completely before sealing to prevent condensation.
Make-Ahead Magic: Prepare unbaked cheese bombs up to 24 hours in advance. Arrange on a baking sheet, cover with plastic wrap, and refrigerate until ready to bake. Add 2-3 extra minutes to cooking time when baking directly from cold.
Freezer-Friendly Option: Wrap individual unbaked cheese bombs tightly in plastic wrap, then place in freezer bags. Freeze up to 2 months. Thaw overnight in refrigerator and bake as directed, adding 3-4 minutes to cooking time.
Reheating Perfection: Warm refrigerated or thawed cheese bombs in a preheated 350F oven for 5-7 minutes. Avoid microwave to maintain crispy exterior. Brush with extra melted garlic butter before reheating to refresh flavors and restore moisture.
These mouthwatering garlic parmesan cheese bombs deliver an irresistible explosion of flavor from Italian culinary traditions. Crispy exterior and melted cheese center make these appetizers an instant crowd-pleaser you won’t be able to resist.
8–10 mozzarella cheese cubes (1.27 cm / 0.5 inches each)
2 tbsps grated Parmesan cheese
1 tsp garlic powder
½ tsp Italian seasoning
½ tsp salt
1 tbsp flour (for dusting, optional)
3 tbsps butter, melted
1 tbsp chopped fresh parsley
Marinara sauce for dipping
Instructions
Oven Preparation: Preheat oven to 375F (190C), creating an ideal baking environment for cheesy delicacies.
Surface Setup: Line baking sheet with parchment paper and dust work surface with flour for seamless dough handling.
Dough Transformation: Separate biscuits and gently flatten each into a wider circular shape, creating a perfect canvas for cheese pouches.
Cheese Encapsulation: Center a mozzarella cube on each dough round, carefully folding and pinching edges to create a secure, leak-proof seal with the cheese nestled inside.
Baking Process: Arrange cheese bombs seam-side down on prepared baking sheet, then bake for 12-15 minutes until achieving a rich golden-brown exterior.
Flavor Enhancement: While baking, whisk together melted butter, garlic powder, Italian seasoning, salt, and Parmesan to create a robust coating.
Final Touches: Immediately after removing from oven, generously brush bombs with seasoned butter mixture and sprinkle with fresh parsley for a burst of color and flavor.
Serving Suggestion: Present piping hot with marinara sauce, inviting an irresistible dipping experience that complements the crispy, cheese-filled pouches.
Notes
Seal Edges Carefully: Press dough edges firmly to prevent cheese from oozing out during baking, ensuring a perfect cheese-filled pouch.
Room Temperature Matters: Let biscuit dough sit at room temperature for 10-15 minutes before preparing, making it easier to manipulate and flatten.
Cheese Selection Flexibility: Swap mozzarella with cheddar, pepper jack, or gouda for different flavor profiles and exciting taste variations.
Gluten-Free Adaptation: Use gluten-free biscuit dough and ensure all seasonings are certified gluten-free to make the recipe suitable for those with dietary restrictions.
Focus: Focused on mastering culinary methods and food science, immersive externships, hands‑on training in industry‑standard kitchen labs, and equipping graduates for roles in restaurant operations.
William Hawkins isn’t just a chef, he’s a storyteller through food. From his hometown of Louisville, KY, he’s spent years refining his craft, turning local ingredients into something extraordinary.
With classical training from Sullivan University and a career marked by innovation, mentorship, and Southern soul, William approaches every recipe with purpose. His kitchen is where old techniques meet fresh ideas, and where comfort food gets a thoughtful, modern twist.
When he’s not building dishes from the ground up, he’s out gathering inspiration from nature, markets, and the stories people share around the table.

William Hawkins
Founder & Culinary Director
Expertise
Education
Sullivan University, Louisville, KY
William Hawkins isn’t just a chef, he’s a storyteller through food. From his hometown of Louisville, KY, he’s spent years refining his craft, turning local ingredients into something extraordinary.
With classical training from Sullivan University and a career marked by innovation, mentorship, and Southern soul, William approaches every recipe with purpose. His kitchen is where old techniques meet fresh ideas, and where comfort food gets a thoughtful, modern twist.
When he’s not building dishes from the ground up, he’s out gathering inspiration from nature, markets, and the stories people share around the table.