
Fluffy Homemade Yeast Rolls Recipe: Bakery-Fresh Goodness
Soft, pillowy yeast rolls have been my weekend comfort since childhood.
Memories of grandma’s kitchen flood back with each batch I knead.
Warm bread aromas fill the house, promising deliciousness ahead.
Simple ingredients come together like magic, creating tender, fluffy clouds of delectable goodness.
No complicated techniques stand between you and bakery-worthy rolls right from your own oven.
Salt, flour, and a touch of love make these rolls irresistible.
Each bite promises pure, comforting satisfaction that will have everyone asking for seconds.
What Makes Yeast Rolls So Pillowy
Ingredients for Soft and Fluffy Yeast Rolls
Yeast and Activation Ingredients:Base Dough Ingredients:Enriching Ingredients:How to Make Yeast Rolls from Scratch

Activate the Yeast Magic
In a cozy small bowl, combine warm milk, sugar, and yeast. Gently stir the ingredients together, then allow the mixture to rest peacefully for 5-10 minutes. Watch as the yeast comes to life, creating a delightful foamy surface that signals it’s ready for action.
Prepare the Dough Base
In a large mixing bowl, blend:Create a welcoming nest in the center of the dry ingredients. Pour the activated yeast mixture into this flour crater and begin mixing with a wooden spoon or your hands until a shaggy dough forms.
Knead to Perfection
Transfer the dough to a lightly floured surface. Roll up your sleeves and knead the dough for 8-10 minutes. Push, fold, and turn the dough with enthusiasm. The goal is a smooth, elastic texture that springs back when gently pressed.
First Rise of Deliciousness
Place the kneaded dough in a lightly oiled bowl. Cover with a clean kitchen towel or plastic wrap. Let the dough rest in a warm, draft-free spot for about 1 hour or until it doubles in size.
Shape the Rolls
Punch down the risen dough to release air bubbles. Divide the dough into equal portions. Roll each portion into smooth, round balls. Arrange the rolls on a greased baking sheet, leaving a little space between each roll.
Second Rise and Preparation
Cover the shaped rolls with a kitchen towel. Allow them to rise again for 30-45 minutes. Preheat the oven to 375°F during the final rise.
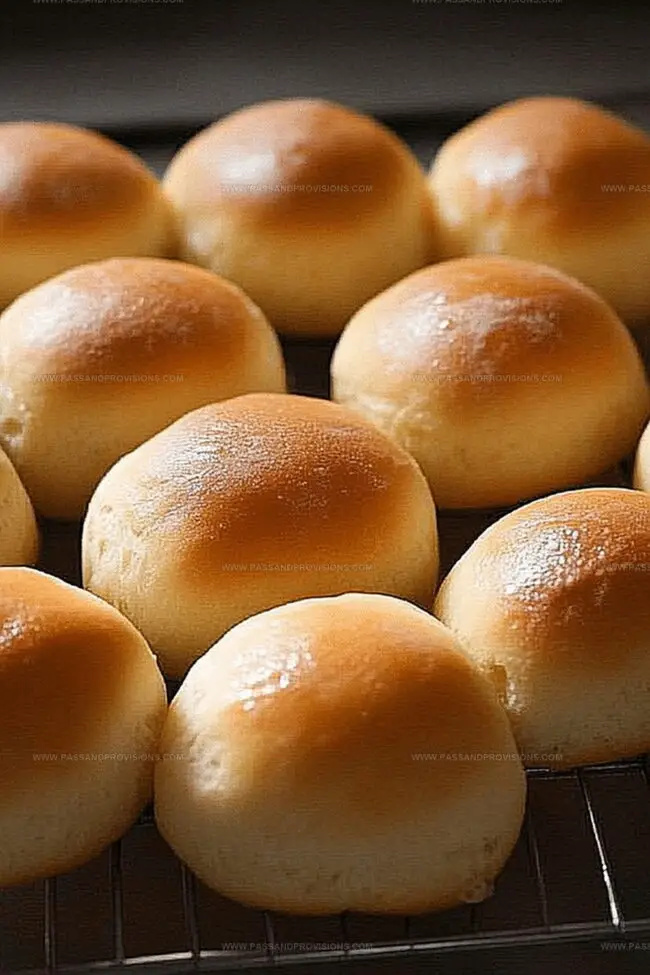
Bake to Golden Perfection
Brush the rolls with:Slide the baking sheet into the preheated oven. Bake for 15-20 minutes until the rolls turn a beautiful golden brown color.
Cool and Enjoy
Remove the rolls from the oven. Let them cool on a wire rack for a few minutes. Serve warm with a pat of butter or your favorite spread.
Baking Tips for Light, Airy Rolls
Storing Yeast Rolls After Baking
What to Eat with Homemade Yeast Rolls
Flavor Swaps for Classic Yeast Rolls
Yeast Roll FAQs Answered
Check for foaming when mixed with warm milk and sugar. If no foam develops after 10 minutes, the yeast is likely dead and you’ll need fresh yeast.
No, warm milk is crucial for activating the yeast. The temperature should be around 110°F (43°C) to help yeast bloom properly.
This means the yeast is inactive. Possible reasons include expired yeast, water too hot or too cold, or old yeast that has lost its potency. Always check expiration dates and use fresh yeast.
Yes, sugar provides food for the yeast and helps it activate and multiply. Without sugar, the yeast may not properly bloom and rise.
Print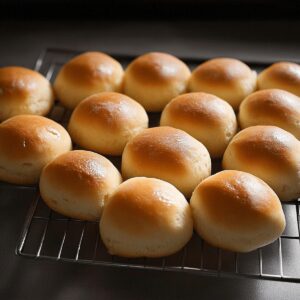
Yeast Rolls Recipe
- Total Time: 30 minutes
- Yield: 12 1x
Description
Pillowy golden yeast rolls emerge as comfort wrapped in a warm, buttery embrace. Southern kitchens sparkle with these tender bread treasures that welcome friends and family around any table.
Ingredients
Primary Ingredients:
- 3 ½ cups all-purpose flour
- 2 ¼ teaspoons (1 packet) active dry yeast
- 1 egg
Liquid Ingredients:
- ¾ cup warm milk (110°F/45°C)
- ¼ cup unsalted butter, melted
Seasoning and Sweeteners:
- ¼ cup granulated sugar
- 1 teaspoon salt
Finishing Ingredient:
- 1 tablespoon butter, melted (for brushing after baking)
Instructions
- Activate the yeast mixture by combining warm milk, sugar, and yeast in a small container, allowing the blend to rest and become frothy, which typically takes 5-10 minutes.
- In a spacious mixing bowl, combine flour, salt, and softened butter, creating a preliminary dough foundation.
- Pour the activated yeast mixture into the flour blend, stirring gradually to form a cohesive, slightly sticky dough.
- Transfer the dough onto a lightly floured surface and knead methodically for 6-8 minutes, developing gluten and achieving a smooth, elastic texture.
- Place the kneaded dough in a greased bowl, covering it with a damp cloth to create a warm, draft-free environment for rising.
- Allow the dough to rise in a warm location for approximately 1 hour, or until it doubles in volume and appears puffy.
- Punch down the expanded dough to release trapped air, then divide and shape into individual rolls on a prepared baking surface.
- Cover the shaped rolls and permit a second rise for 30-45 minutes, enabling them to become light and airy.
- Preheat the oven to the specified temperature, then bake the rolls until they transform into a golden-brown, appetizing color.
- Remove from the oven and brush with melted butter for enhanced flavor and a glossy finish.
Notes
- Choose lukewarm milk between 100-110°F to activate yeast perfectly without killing it.
- Proof yeast carefully by watching for a foamy, bubbly surface which indicates active fermentation.
- Knead dough thoroughly for 6-8 minutes to develop gluten and create soft, fluffy texture.
- Store leftover rolls in airtight container and reheat gently in oven wrapped in foil to maintain moisture and freshness.
- Prep Time: 15 minutes
- Cook Time: 15 minutes
- Category: Dinner, Snacks
- Method: Baking
- Cuisine: American
Nutrition
- Serving Size: 12
- Calories: 180
- Sugar: 4 g
- Sodium: 150 mg
- Fat: 7 g
- Saturated Fat: 4 g
- Unsaturated Fat: 2 g
- Trans Fat: 0 g
- Carbohydrates: 25 g
- Fiber: 1 g
- Protein: 4 g
- Cholesterol: 30 mg
Jamie Granger
Recipe Developer & Food Writer
Expertise
Education
Culinary Institute of America
Jamie Granger turns ingredients into memories. With her recipes, she brings a fusion-forward flair to every creation.
Her dishes reflect the places she’s explored, the chefs she’s learned from, and the deep connection she has to food as a form of expression.
At Pass and Provision, Jamie develops recipes that balance flavor, health, and beauty, meals that don’t just satisfy your appetite but speak to your curiosity.