Creamy Salty Peanut Banana Pudding Recipe: Sweet-Savory Joy!
Creamy banana pudding takes an unexpected turn with this salty peanut twist that challenges traditional dessert expectations.
Nutty undertones dance across each spoonful, creating a surprising flavor profile.
Smooth custard layers mingle with crunchy peanut bits, offering delightful textural contrasts.
Sweet bananas provide a mellow backdrop against the sharp saltiness.
Comfort meets innovation in this playful reimagining of a classic treat.
Crumbled peanuts scattered throughout promise a delightful crunch in every bite.
You’ll want to savor each spoonful of this delectable dessert that defies ordinary pudding conventions.
Banana Pudding That’s Sweet and Salty
Ingredients for This Unique Pudding
Pudding Base:Whipped Cream Components:Layering and Topping Ingredients:How to Layer Peanut, Banana, and Cream
Step 1: Whip Creamy Pudding Base
Grab a medium bowl and whisk pudding mix with milk vigorously for two minutes until mixture transforms into a smooth, thick consistency.
Step 2: Create Fluffy Whipped Cream
Using an electric mixer, beat ingredients until stiff, cloud-like peaks emerge.
Step 3: Blend Pudding Mixture
Gently fold whipped cream into pudding, creating a luxurious, silky texture. Chill mixture in refrigerator for 20-30 minutes.
Step 4: Build First Pudding Layer
Spread a generous pudding base across bottom of serving dish or individual cups.
Step 5: Add Banana Slices
Arrange fresh banana slices evenly over pudding layer.
Step 6: Sprinkle Crunchy Wafer Pieces
Distribute vanilla wafer fragments across banana layer.
Step 7: Scatter Salty Peanuts
Sprinkle chopped salted peanuts for delightful crunch.
Step 8: Repeat Layering
Continue alternating pudding, bananas, wafers, and peanuts until dish is nearly full.
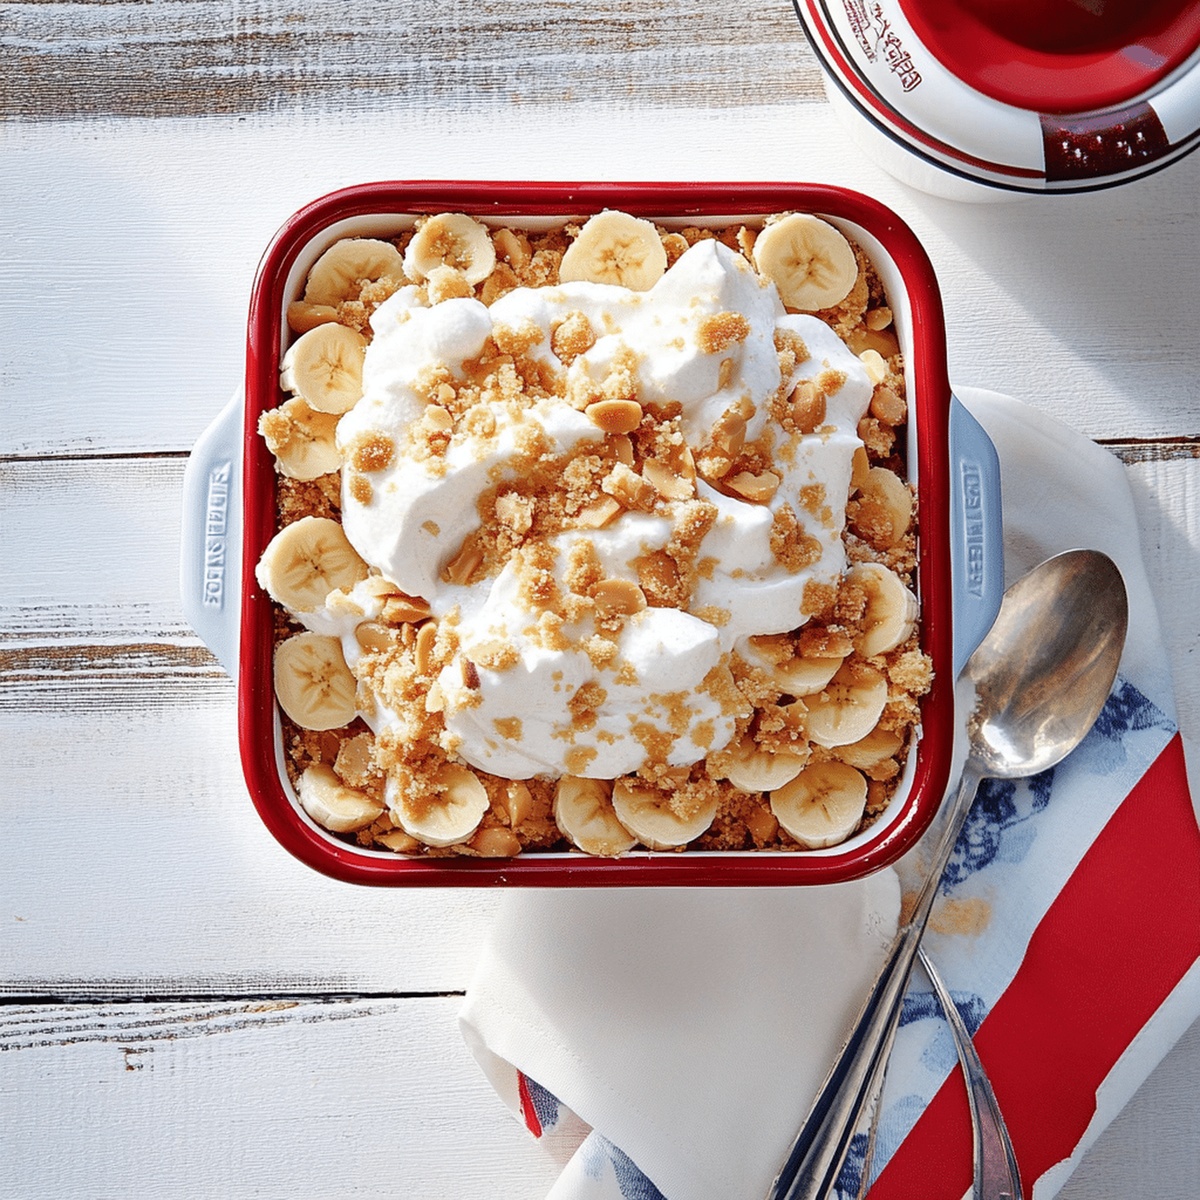
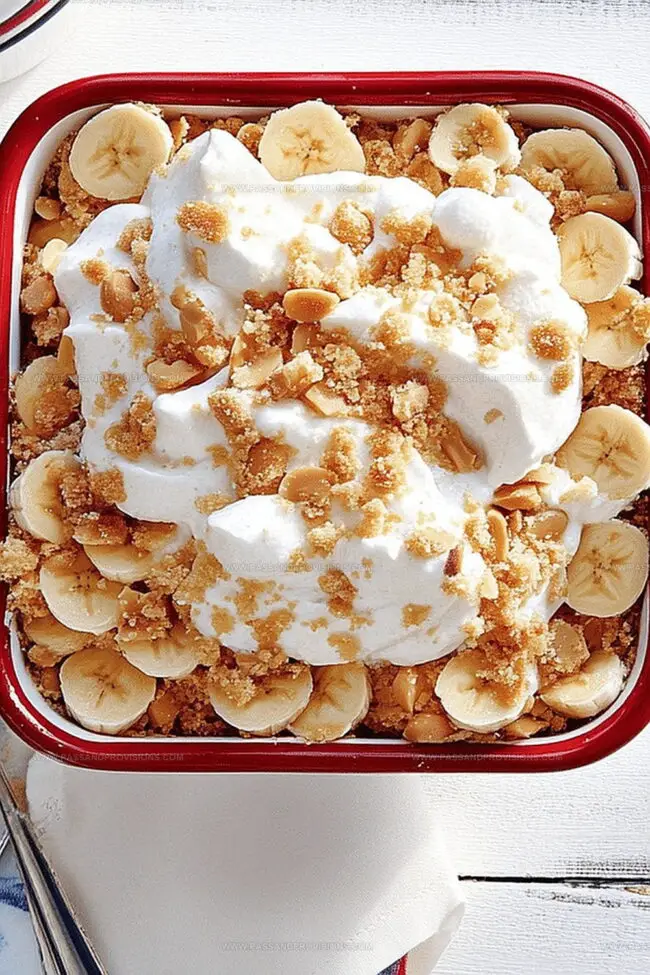
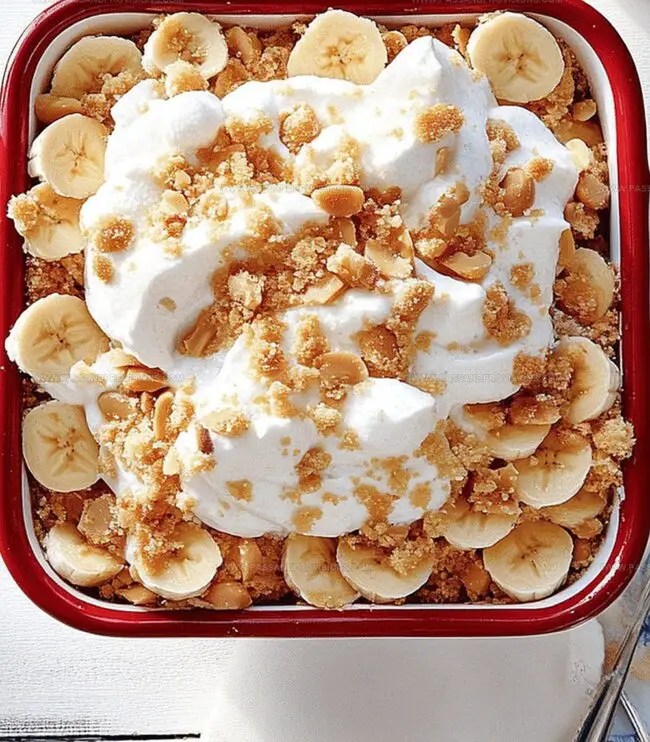
Step 9: Final Decorative Touch
Top final layer with additional crushed peanuts, banana slices, and optional whipped cream dollop.
Step 10: Chill and Develop Flavors
Refrigerate dessert for minimum two hours, allowing ingredients to harmonize and texture to set perfectly.
Tips to Balance Crunch and Creaminess
Store Your Pudding to Keep It Fresh
Pair with These Sweet and Salty Treats
Peanut Banana Pudding Variations to Explore
Dairy-Free Delight: Replace milk and heavy cream with coconut milk and coconut whipped cream for a creamy, lactose-free version.
Vegan Adventure: Swap instant pudding mix with chia seed pudding, use plant-based milk, and substitute vanilla wafers with graham crackers or vegan cookies.
Gluten-Free Option: Use gluten-free vanilla wafers or almond flour cookies instead of traditional wafers to make the dessert celiac-friendly.
Low-Sugar Alternative: Utilize sugar-free pudding mix, stevia-sweetened whipped cream, and reduce peanut quantities for a diabetic-friendly dessert.
Pudding Questions, Answered
Yes, you can substitute instant pudding mix with homemade vanilla pudding. Just ensure it’s cooled and thick before mixing with whipped cream.
Toss banana slices in a bit of lemon juice before layering. This helps slow down oxidation and keeps them looking fresh longer.
Salted peanuts work best for this dessert, as they provide a nice contrast to the sweet pudding and bananas. They add a savory crunch that elevates the overall flavor.
Replace regular vanilla wafers with gluten-free vanilla wafers or graham crackers. Ensure all other ingredients are certified gluten-free to make the entire dessert safe for those with gluten sensitivities.
Print
Salty Peanut Banana Pudding Recipe
- Total Time: 2 hours 20 minutes
- Yield: 8 1x
Description
Southern comfort meets creamy indulgence in this salty peanut banana pudding, where rich layers of silky custard and ripe bananas dance with crunchy peanut accents. Nostalgic flavors blend perfectly, inviting you to savor each spoonful of this classic Southern dessert.
Ingredients
Main Ingredients:
- 4 large bananas, sliced
- 2 cups salted peanuts, roughly chopped
- 1 box (11 ounces/311 grams) vanilla wafers or butter cookies
Dairy and Pudding Components:
- 1 package (3.4 ounces/96 grams) instant vanilla pudding mix
- 2 cups cold milk
- 1 cup heavy cream
- ¼ cup powdered sugar
- 1 teaspoon vanilla extract
Garnish:
- Crushed peanuts
- Banana slices
- Whipped cream
Instructions
- Combine instant pudding mix and cold milk in a medium bowl, whisking vigorously for 2 minutes until the mixture thickens and becomes smooth.
- In a separate mixing bowl, whip heavy cream with powdered sugar and vanilla extract, creating a fluffy mixture with stiff, billowy peaks.
- Gently incorporate the whipped cream into the pudding base, folding carefully to maintain the airy texture.
- Chill the pudding mixture in the refrigerator for 20-30 minutes to enhance the consistency and flavor.
- Select a trifle dish, glass bowl, or individual serving cups for assembling the dessert.
- Create the first layer by spreading a generous portion of the chilled pudding across the bottom of the container.
- Arrange a uniform layer of thinly sliced ripe bananas directly over the pudding base.
- Carefully place vanilla wafers in a single layer, ensuring even coverage across the banana slices.
- Sprinkle a consistent layer of salted peanuts over the wafer layer, adding a crunchy texture.
- Repeat the layering process: pudding, bananas, wafers, and salted peanuts, creating multiple delicious strata.
- Finish with a final layer of pudding, creating a smooth and inviting top surface.
- Optionally, garnish with crushed peanuts, additional banana slices, and a delicate dollop of whipped cream.
- Refrigerate the dessert for a minimum of 2 hours, allowing the flavors to meld and intensify, or overnight for maximum taste development.
Notes
- Prevent banana browning by tossing sliced bananas in a bit of lemon juice before layering to maintain their fresh, vibrant color.
- Swap instant pudding mix for homemade custard to create a more sophisticated, less processed dessert with richer flavor depth.
- Toast peanuts briefly in a dry skillet to enhance their nutty taste and add a delightful crunch to the pudding layers.
- Make this dessert gluten-free by using almond flour cookies or gluten-free vanilla wafers instead of traditional vanilla wafers.
- Prep Time: 20 minutes
- Cook Time: 2 hours
- Category: Desserts, Snacks
- Method: None
- Cuisine: American
Nutrition
- Serving Size: 8
- Calories: 350
- Sugar: 19 g
- Sodium: 250 mg
- Fat: 22 g
- Saturated Fat: 10 g
- Unsaturated Fat: 8 g
- Trans Fat: 0 g
- Carbohydrates: 34 g
- Fiber: 2 g
- Protein: 6 g
- Cholesterol: 40 mg
Jamie Granger
Recipe Developer & Food Writer
Expertise
Education
Culinary Institute of America
Jamie Granger turns ingredients into memories. With her recipes, she brings a fusion-forward flair to every creation.
Her dishes reflect the places she’s explored, the chefs she’s learned from, and the deep connection she has to food as a form of expression.
At Pass and Provision, Jamie develops recipes that balance flavor, health, and beauty, meals that don’t just satisfy your appetite but speak to your curiosity.