
Cupid’s Delight: Dreamy Red Velvet Cake Balls Recipe
Decadent chocolate crumbs meld with creamy frosting in these irresistible red velvet cake balls that promise to steal hearts.
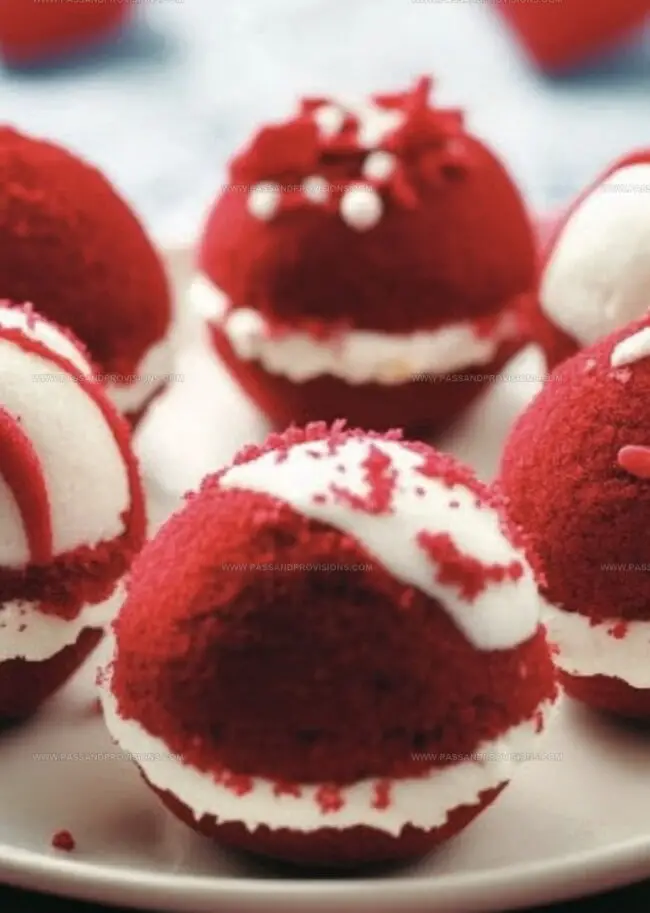
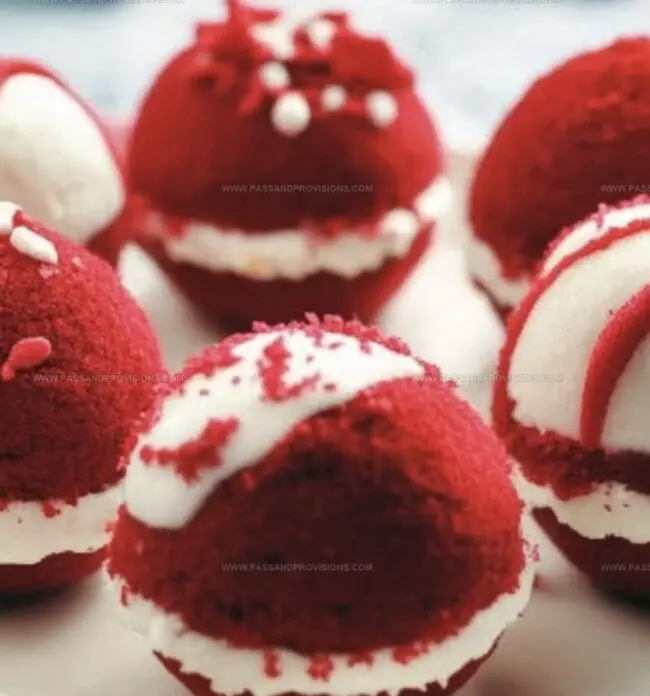
Rich crimson hues and velvety textures blend seamlessly in a dessert that whispers romance.
Each delicate sphere carries layers of deep flavor and tender crumbs.
Coating these delightful treats in smooth white chocolate adds an elegant finish that sparkles with indulgence.
Bite-sized and perfectly portioned, these cake balls transform an ordinary moment into something magical.
They emerge as small, charming ambassadors of sweet affection.
You’ll find these delectable morsels are perfect for special occasions or spontaneous celebrations of love.
Quick Recipe Overview
Ingredients for Valentines Day Red Velvet Cake Balls
For Cake Base:For Coating and Binding:For Decorative Touches:Baking Tools for Red Velvet Cake Ball Success
How to Make Red Velvet Cake Balls with Love
Whip up a delicious red velvet cake following the package directions. The vibrant crimson color and rich flavor will make your heart flutter with excitement.
Once the cake has cooled down completely, use your hands to transform it into delicate, soft crumbs. Break it down until you have a perfectly textured mixture that’s ready for the next magical step.
Fold cream cheese frosting into the cake crumbs, creating a luscious blend that will hold your cake balls together. Blend until the mixture is smooth and can be easily shaped.
Roll the cake mixture into adorable bite-sized balls. Use gentle pressure to ensure they’re compact and hold their perfect round shape. Place them on a parchment-lined tray.
Pop the cake balls into the refrigerator for about 30 minutes. This helps them firm up and makes the next step of coating much easier.
Melt white or dark chocolate and carefully dip each cake ball, ensuring a smooth, even coverage. Let excess chocolate drip off before placing back on the tray.
Sprinkle festive decorations like pink sugar crystals or heart-shaped sprinkles while the chocolate is still wet. Add a personal touch that screams romance.
Return the decorated cake balls to the refrigerator to allow the chocolate coating to set completely. Once firm, they’re ready to sweep your valentine off their feet.
Tips for Rolling the Perfect Cake Balls
Serving Up Cake Balls for Special Occasions
Storage Tips for Cake Balls that Stay Soft
Print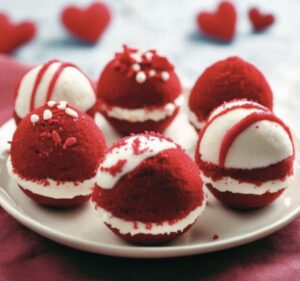
Romantic Red Velvet Cake Balls
- Total Time: 50 minutes
- Yield: 25 1x
Description
Sweet red velvet cake balls herald romantic dessert perfection for Valentine’s Day celebrations. Chocolate-coated spheres of creamy crimson cake delight partners with elegant bite-sized indulgence you’ll savor completely.
Ingredients
- 1 box red velvet cake mix
- Ingredients required to bake cake mix (as specified on box)
- 1 (8 oz / 226 g) package cream cheese (softened)
- ½ cup (60 g) powdered sugar
- ½ tsp vanilla extract
- 12 oz (340 g) white chocolate or candy melts (melted)
- 1 tbsp coconut oil or vegetable shortening (optional, for smoother coating)
- Valentines Day sprinkles (for decoration)
Instructions
- Cake Preparation: Bake red velvet cake mix according to package instructions, achieving a uniform, moist consistency throughout the baking process.
- Cooling and Crumbling: Allow cake to cool completely, then meticulously break down into fine, even crumbs using hands or a fork to create a uniform texture.
- Frosting Fusion: Blend cream cheese frosting with cake crumbs, kneading thoroughly until the mixture forms a cohesive, moldable dough that holds together effortlessly.
- Shaping and Chilling: Craft precise, bite-sized spheres by rolling the mixture with gentle, consistent pressure. Arrange on a parchment-lined tray and refrigerate for 30 minutes to solidify their structure.
- Chocolate Coating: Gently melt white chocolate in a microwave-safe bowl, stirring periodically to ensure a smooth, glossy consistency without lumps.
- Dipping and Decorating: Immerse each chilled cake ball into the melted chocolate, using a fork to drain excess coating. Embellish immediately with romantic red sprinkles or dark chocolate drizzle while the coating remains wet.
- Final Setting: Return decorated cake balls to the refrigerator, allowing the chocolate to set completely and preserve their elegant shape until serving time.
Notes
- Maintain Cake Consistency: Ensure cake is completely cool before crumbling to prevent moisture buildup and guarantee a perfect cake ball texture.
- Control Moisture Levels: Use room temperature cream cheese frosting and mix gradually to avoid soggy or overly wet cake ball mixture.
- Perfect Coating Technique: Melt chocolate at low power in microwave, stirring frequently to prevent burning and achieve smooth, glossy coverage.
- Optimize Chilling Process: Refrigerate cake balls before and after coating to stabilize structure and help chocolate set quickly for clean, professional presentation.
- Prep Time: 20 minutes
- Cook Time: 30 minutes
- Category: Desserts, Snacks
- Method: Baking
- Cuisine: American
Nutrition
- Serving Size: 25
- Calories: 150
- Sugar: 12 g
- Sodium: 150 mg
- Fat: 7 g
- Saturated Fat: 4 g
- Unsaturated Fat: 2 g
- Trans Fat: 0 g
- Carbohydrates: 20 g
- Fiber: 0 g
- Protein: 2 g
- Cholesterol: 10 mg
William Hawkins
Founder & Culinary Director
Expertise
Education
Sullivan University, Louisville, KY
William Hawkins isn’t just a chef, he’s a storyteller through food. From his hometown of Louisville, KY, he’s spent years refining his craft, turning local ingredients into something extraordinary.
With classical training from Sullivan University and a career marked by innovation, mentorship, and Southern soul, William approaches every recipe with purpose. His kitchen is where old techniques meet fresh ideas, and where comfort food gets a thoughtful, modern twist.
When he’s not building dishes from the ground up, he’s out gathering inspiration from nature, markets, and the stories people share around the table.