Dreamy Red Velvet Cookie Cups Recipe for Sweet Indulgence
Baking these delightful red velvet cookie cups can transport you to a world of sweet, indulgent bliss.
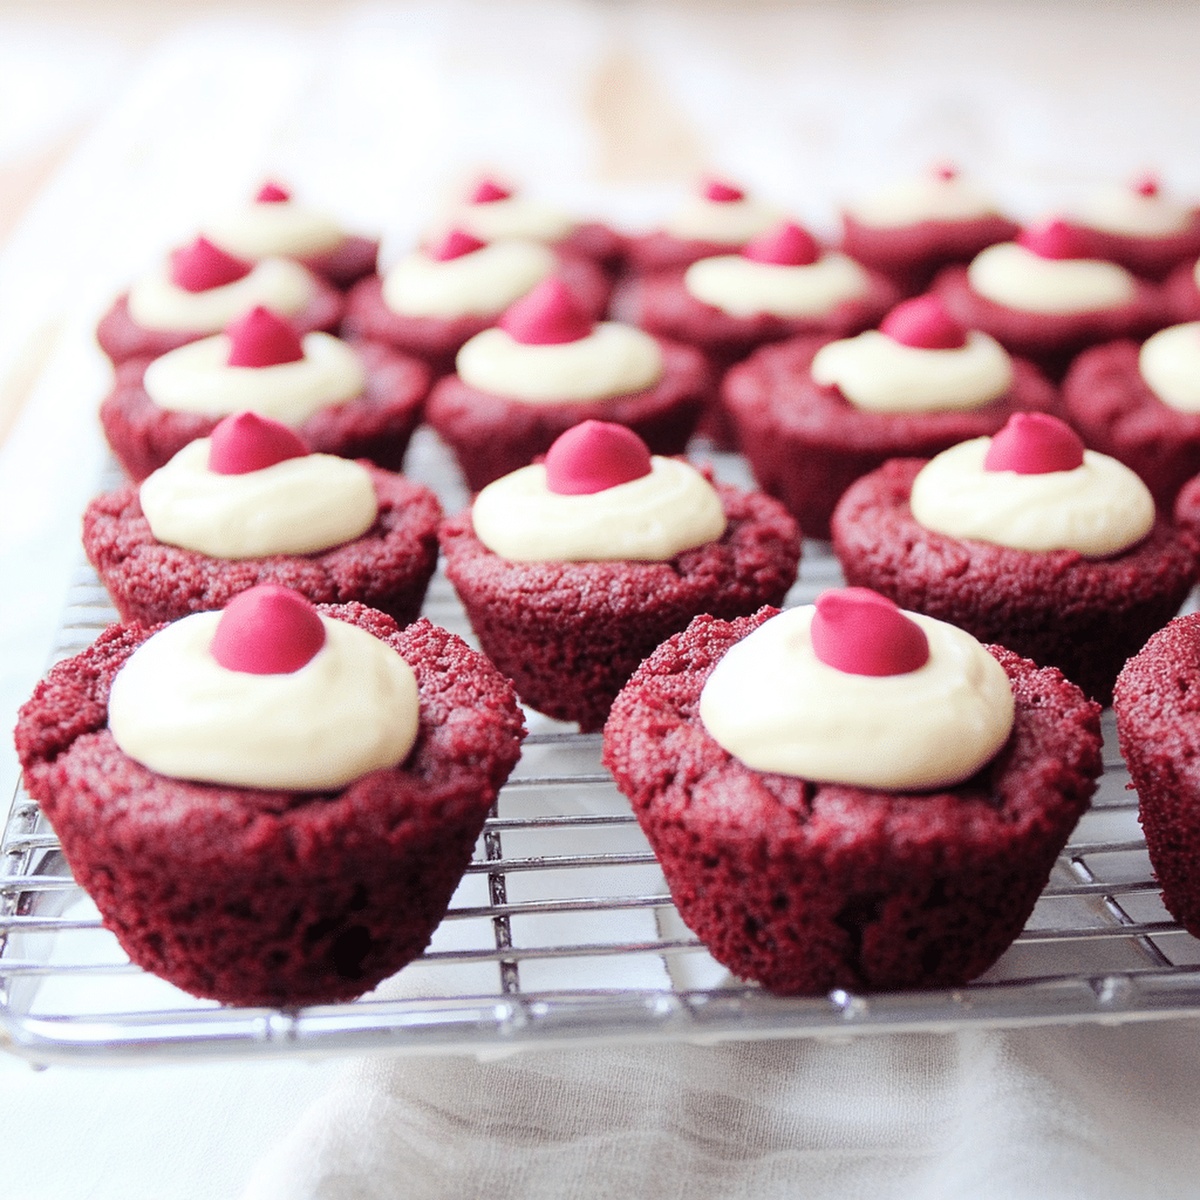
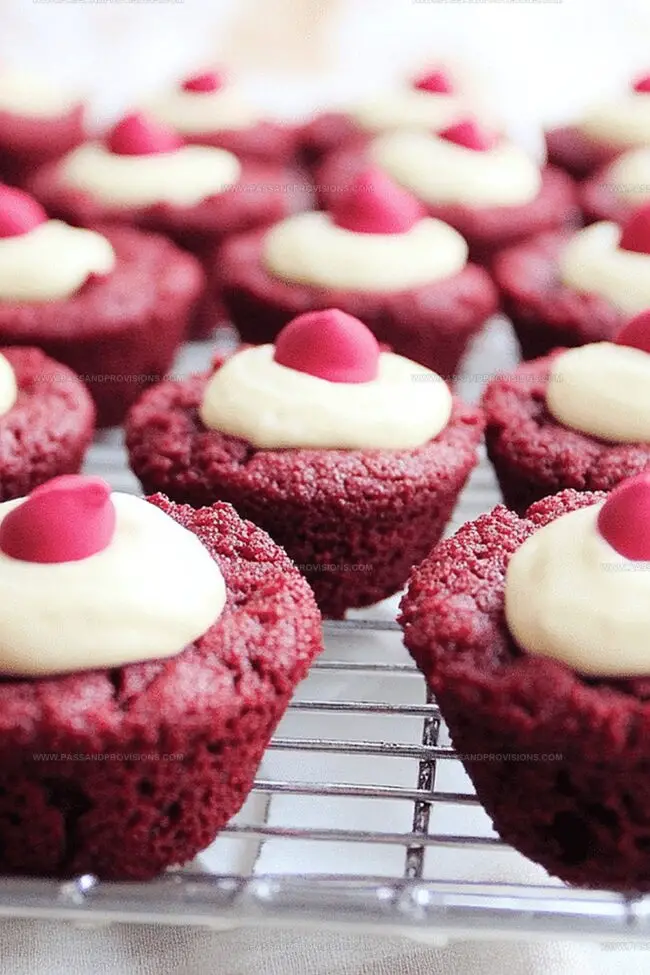
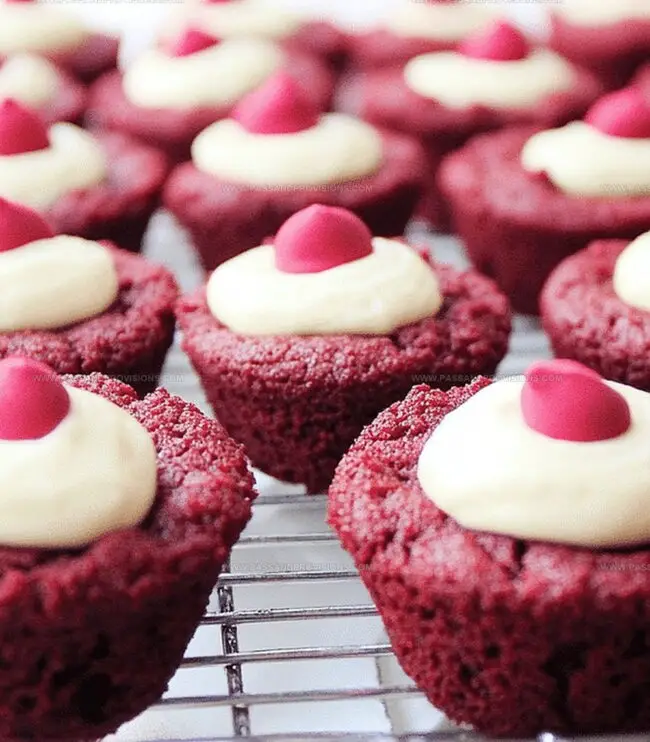
Crimson-colored dough creates a stunning visual treat that mesmerizes from the first glance.
Soft, velvety textures merge with rich chocolate undertones, promising an unforgettable dessert experience.
Delicate and compact, these miniature delights pack a powerful flavor punch that’ll make mouths water.
Creamy cream cheese filling nestled inside adds a luxurious surprise to each bite-sized morsel.
Chocolate lovers and dessert enthusiasts will absolutely adore these miniature masterpieces of culinary creativity.
Come explore this irresistible recipe that guarantees to become your new favorite sweet sensation.
Why Red Velvet Cookie Cups Stand Out
Ingredients That Make These Cups Special
Base Ingredients:Sweeteners and Binding Ingredients:Wet Ingredients and Flavoring:Cream Cheese Frosting Ingredients:Optional Decorative Ingredients:How to Bake and Fill Cookie Cups with Style
Step 1: Whip Up the Dough
Mix together softened butter, white sugar, and brown sugar until they become light and fluffy. Crack in the egg and stir in vanilla extract with a splash of red food coloring to create that signature vibrant look. In a separate bowl, combine:Gently fold the dry ingredients into the wet mixture until a soft, velvety dough forms.
Step 2: Shape and Bake the Cups
Roll the dough into small balls about the size of a walnut. Place each ball into a greased mini muffin tin. Use your finger or the back of a spoon to create a deep indentation in the center of each ball. Slide the tin into an oven preheated to 350°F (175°C) and bake for 10-12 minutes. The edges should look set and slightly crisp. Right after removing from the oven, press down the centers again to reinforce the cup shape. Let the cookie cups rest in the pan for 10 minutes, then transfer to a cooling rack.
Step 3: Craft the Creamy Frosting
Blend cream cheese and butter until smooth and silky. Gradually mix in powdered sugar and a touch of vanilla extract. Whip until the frosting becomes light and airy.
Step 4: Fill and Decorate
Pipe or spoon the luscious cream cheese frosting into the cooled cookie cups. Sprinkle with fun toppings like:Step 5: Serve and Enjoy
Serve these delightful treats immediately or store in the refrigerator until you’re ready to indulge. Perfect for parties, gatherings, or a sweet personal treat!
Tips to Keep Edges Neat and Centers Soft
Store These Cookies for Later Enjoyment
Perfect Pairings for Red Velvet Treats
Variations for Different Occasions
Cookie Cup FAQs Answered
The deep red color comes from a combination of cocoa powder and red food coloring, which creates the classic vibrant red hue associated with red velvet desserts.
While a mini muffin tin helps create the perfect cup shape, you can use a regular muffin tin or press the centers down on a baking sheet to create a similar indented cookie.
Press the dough balls down with your thumb or the back of a measuring spoon before and immediately after baking. This helps create and maintain the cup-like indentation for filling with frosting.
Yes, using both sugars helps create a more complex flavor and provides moisture to the cookie cups, resulting in a softer, chewier texture.
Print
Red Velvet Cookie Cups Recipe
- Total Time: 27 minutes
- Yield: 12 1x
Description
Irresistible red velvet cookie cups blend classic Southern charm with modern dessert innovation. Creamy cheesecake filling nestled in rich chocolate-kissed cookie shells promises pure indulgence you cannot resist.
Ingredients
Main Ingredients:
- 1 ¼ cups all-purpose flour
- ¼ cup unsweetened cocoa powder
- ½ cup unsalted butter, softened
- ¾ cup granulated sugar
- ¼ cup brown sugar
Binding and Flavor Ingredients:
- 1 large egg
- 1 tablespoon red food coloring
- 1 teaspoon vanilla extract
- ½ teaspoon baking soda
- ¼ teaspoon salt
Cream Cheese Frosting Ingredients:
- 4 ounces (113 grams) cream cheese, softened
- ¼ cup unsalted butter, softened
- 1 cup powdered sugar
- ½ teaspoon vanilla extract
Optional Toppings:
- Red, white, and pink sprinkles
- Crushed cookies or chocolate chips
Instructions
- Preheat the oven to 350F (175C) and thoroughly coat a mini muffin tin with non-stick spray to ensure easy cookie removal.
- Combine softened butter with granulated and brown sugars in a mixing bowl, whipping until the mixture becomes light and airy with a pale, creamy texture.
- Incorporate the egg, vanilla extract, and vibrant red food coloring, stirring until the mixture transforms into a uniform, glossy consistency.
- In a separate vessel, sift together flour, cocoa powder, baking soda, and salt, creating a cohesive dry ingredient blend.
- Gently fold the dry ingredients into the wet mixture, stirring until a soft, pliable dough emerges without overmixing.
- Form the dough into small, uniform spheres approximately one inch in diameter, carefully placing each into the prepared muffin tin cavities.
- Using your thumb or a rounded utensil, create a gentle indentation in the center of each dough ball, sculpting a delicate cup shape.
- Bake for 10-12 minutes, watching for set edges and slightly puffy centers that indicate perfect doneness.
- Immediately upon removal from the oven, reinforce the cup shape by pressing down the centers while the cookies remain warm and malleable.
- Allow the cookie cups to cool within the tin for 10 minutes, then transfer to a wire rack for complete cooling.
- Whip cream cheese and butter together until smooth, creating a silky base for the frosting.
- Gradually integrate powdered sugar and vanilla extract, beating until the frosting becomes light, fluffy, and spreadable.
- Fill the cooled cookie cups with the cream cheese frosting, using a piping bag or spoon for precise and attractive application.
- Embellish with optional decorative elements like colorful sprinkles, crushed cookies, or chocolate chips.
- Serve immediately or store in a sealed container in the refrigerator to maintain freshness and texture.
Notes
- Chill the dough for 30 minutes before shaping to prevent spreading and maintain the cup shape during baking.
- Use a consistent dough ball size to ensure even baking and uniform cookie cups.
- Press gently when creating the cup shape to avoid tearing the delicate cookie dough.
- Experiment with natural food coloring alternatives like beetroot powder for a healthier red velvet version.
- Allow cookies to cool completely before frosting to prevent melting and maintain a clean, crisp appearance.
- Swap cream cheese for dairy-free alternatives like coconut cream for a vegan-friendly option.
- Store leftovers in the refrigerator for up to 3 days, separating layers with parchment paper to prevent sticking.
- For a gluten-free version, replace all-purpose flour with a 1:1 gluten-free baking blend.
- Prep Time: 15 minutes
- Cook Time: 12 minutes
- Category: Desserts, Snacks
- Method: Baking
- Cuisine: American
Nutrition
- Serving Size: 12
- Calories: 210
- Sugar: 18 g
- Sodium: 120 mg
- Fat: 10 g
- Saturated Fat: 6 g
- Unsaturated Fat: 4 g
- Trans Fat: 0 g
- Carbohydrates: 30 g
- Fiber: 0.5 g
- Protein: 2 g
- Cholesterol: 30 mg
Jamie Granger
Recipe Developer & Food Writer
Expertise
Education
Culinary Institute of America
Jamie Granger turns ingredients into memories. With her recipes, she brings a fusion-forward flair to every creation.
Her dishes reflect the places she’s explored, the chefs she’s learned from, and the deep connection she has to food as a form of expression.
At Pass and Provision, Jamie develops recipes that balance flavor, health, and beauty, meals that don’t just satisfy your appetite but speak to your curiosity.