
Red Velvet Cheesecake Balls Recipe: Sweet Bites of Bliss
Sweet and decadent red velvet cheesecake balls dance between indulgence and pure culinary magic.
Creamy textures meld with rich cocoa notes in this irresistible treat.
Professional bakers and home cooks adore these bite-sized delights for their elegant presentation.
Minimal ingredients create maximum flavor impact without overwhelming complexity.
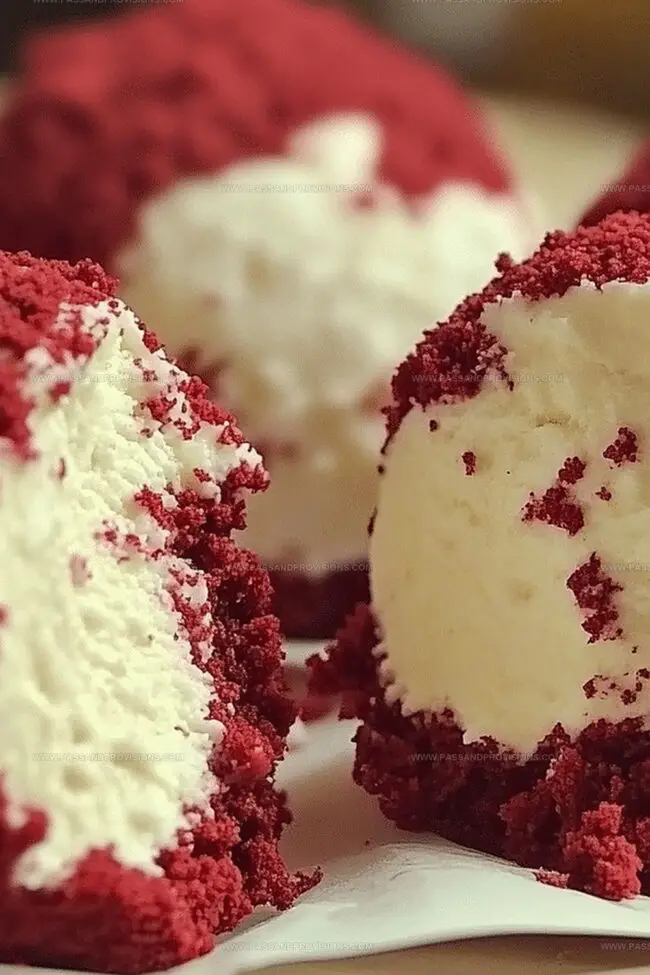
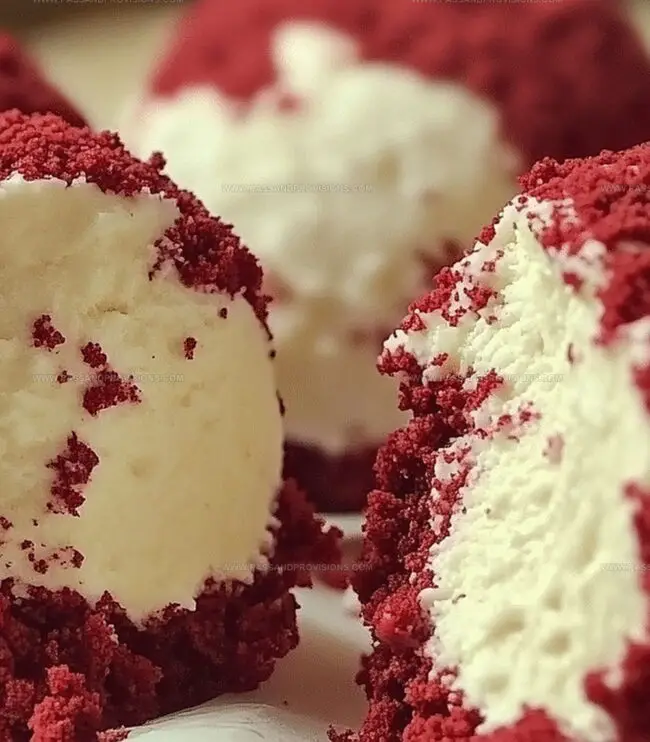
Soft cream cheese blends seamlessly with velvety cake crumbs, producing a luxurious sensation.
Guests will marvel at your impressive dessert skills when you serve these delectable spheres.
You can wow everyone with this simple yet stunning confectionery masterpiece.
Red Velvet Cheesecake Balls That Feel Like Dessert Bites
Red Velvet and Cheesecake Ingredients You’ll Need
Base Ingredients:Red Velvet Cake Components:Coating and Decoration Ingredients:How to Shape and Chill Cheesecake Balls
Step 1: Whip Creamy Filling
Blend ingredients in a mixing bowl until silky smooth. Refrigerate mixture for about 30 minutes to achieve perfect consistency.
Step 2: Create Crumbly Base
Crumble red velvet cake into fine, delicate crumbs. If mixture seems dry, incorporate melted chocolate chips to help bind ingredients together.
Step 3: Shape Delightful Spheres
Scoop cream cheese mixture and form into compact balls. Gently wrap each ball with red velvet crumb mixture, ensuring complete coverage. Roll between palms to create smooth, uniform spheres.
Step 4: Chill and Solidify
Transfer balls onto parchment-lined baking sheet. Refrigerate for approximately 30 minutes until firm and stable.
Step 5: Chocolate Dipping Technique
Melt chocolate using microwave technique, stirring between 30-second intervals until perfectly smooth. Carefully dip each ball using fork or skewer, allowing excess chocolate to drip off.
Step 6: Add Decorative Touches
Before chocolate sets, sprinkle with reserved red velvet crumbs or decorative elements like colorful sprinkles. Drizzle additional melted chocolate for elegant finish.
Step 7: Final Presentation
Allow chocolate coating to completely set at room temperature or inside refrigerator. Serve chilled or at room temperature for maximum enjoyment.
Tips to Get That, Sweet Center
Proper Storage Tips for Cheesecake Balls
Serve These Bites with These Pairings
Fun Flavors to Try in Red Velvet Cheesecake Balls
Cheesecake Ball FAQs
Chill the cream cheese mixture in the refrigerator for 20-30 minutes before assembling. This helps firm up the filling, making it easier to shape into balls without falling apart.
Both work perfectly! If using homemade cake, ensure it’s completely cooled before crumbling. Store-bought cake works just as well and saves preparation time.
Use a fork or skewer to carefully lower the ball into melted chocolate, tap off excess, and gently place on parchment paper. This technique helps create a smooth, even chocolate coating.
You can prepare them up to 3 days ahead. Store in an airtight container in the refrigerator, and they’ll maintain their texture and flavor perfectly.
Print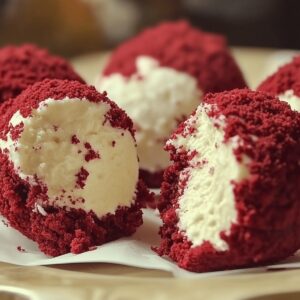
Red Velvet Cheesecake Balls Recipe
- Total Time: 50 minutes
- Yield: 12 1x
Description
Chocolate-lovers celebrate this red velvet cheesecake balls journey through creamy indulgence and rich flavor. Crumbly cake meets smooth cream cheese, rolled in delicate chocolate coating, creating irresistible bite-sized delights you cannot resist.
Ingredients
Main Ingredients:
- 8 ounces (226 grams) cream cheese, softened
- 1 ½ cups red velvet cake crumbs (from a boxed mix or homemade cake)
- 12 ounces (340 grams) white chocolate or semi-sweet chocolate, melted
Binding and Sweetening Ingredients:
- ¼ cup powdered sugar
- ½ cup semi-sweet or white chocolate chips, melted (for binding if needed)
- 1 teaspoon vanilla extract
Decoration Ingredients:
- Red velvet cake crumbs for garnish
- Red or white sprinkles
Instructions
- Craft a velvety cream cheese base by whipping softened cream cheese with powdered sugar and vanilla extract until silky and uniform in texture.
- Chill the cream cheese mixture in the refrigerator for approximately 20-30 minutes to enhance its consistency and make it easier to handle.
- Meticulously crumble the red velvet cake into fine, uniform crumbs, ensuring no large chunks remain.
- If the cake crumbs appear too dry, incorporate melted chocolate chips to create a cohesive binding agent.
- Carefully portion the chilled cream cheese mixture and shape into compact, uniform spheres using gentle rolling motions.
- Delicately encase each cream cheese sphere with the red velvet crumb mixture, ensuring complete coverage and a smooth exterior.
- Arrange the formed balls on a parchment-lined baking sheet, then transfer to the refrigerator for a thorough 30-minute chilling period.
- Prepare the chocolate coating by gradually melting it in a microwave-safe container, stirring intermittently to achieve a glossy, smooth consistency.
- Methodically immerse each chilled ball into the molten chocolate, allowing excess to drip off before positioning on the prepared tray.
- While the chocolate remains fluid, embellish the balls with reserved red velvet crumbs, decorative sprinkles, or an elegant chocolate drizzle.
- Allow the chocolate coating to set completely, either at ambient temperature or by briefly chilling in the refrigerator.
- Serve the elegant red velvet cheesecake balls chilled or at room temperature for optimal flavor and texture.
Notes
- Soften cream cheese completely at room temperature to ensure smooth, lump-free filling without over-mixing.
- Use a cookie scoop or small ice cream scoop for uniform-sized cheesecake balls to guarantee consistent coating and presentation.
- Control cake moisture by checking red velvet cake’s texture; slightly drier cake works better for holding shape during rolling and coating.
- Chill balls between stages to maintain structural integrity and prevent crumbling during chocolate dipping process.
- Work quickly when coating in chocolate to prevent mixture from warming up and losing firmness.
- Store cheesecake balls in an airtight container in refrigerator for up to 5 days for maximum freshness.
- Experiment with alternative coatings like white chocolate, dark chocolate, or colored candy melts for diverse flavor profiles.
- Consider gluten-free adaptation by using gluten-free red velvet cake mix or almond flour-based cake for similar texture.
- Prep Time: 20 minutes
- Cook Time: 30 minutes
- Category: Desserts, Snacks
- Method: None
- Cuisine: American
Nutrition
- Serving Size: 12
- Calories: 202
- Sugar: 17 g
- Sodium: 115 mg
- Fat: 10 g
- Saturated Fat: 6 g
- Unsaturated Fat: 4 g
- Trans Fat: 0 g
- Carbohydrates: 26 g
- Fiber: 1 g
- Protein: 2 g
- Cholesterol: 30 mg
Jamie Granger
Recipe Developer & Food Writer
Expertise
Education
Culinary Institute of America
Jamie Granger turns ingredients into memories. With her recipes, she brings a fusion-forward flair to every creation.
Her dishes reflect the places she’s explored, the chefs she’s learned from, and the deep connection she has to food as a form of expression.
At Pass and Provision, Jamie develops recipes that balance flavor, health, and beauty, meals that don’t just satisfy your appetite but speak to your curiosity.