Peanut Butter Banana Cups Recipe

Irresistible Peanut Butter Banana Cups Recipe for Sweet Snackers

Sweet memories of childhood snacks dance through my mind when I think about this creamy peanut butter banana cups revelation.

Nostalgia mingles with culinary creativity in a dessert that promises pure delight.

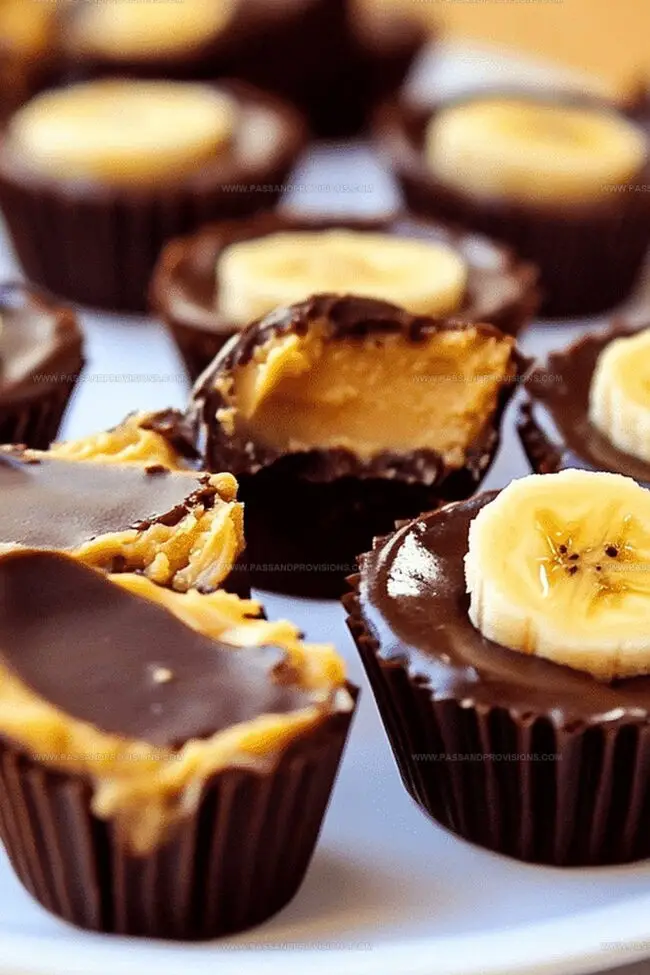
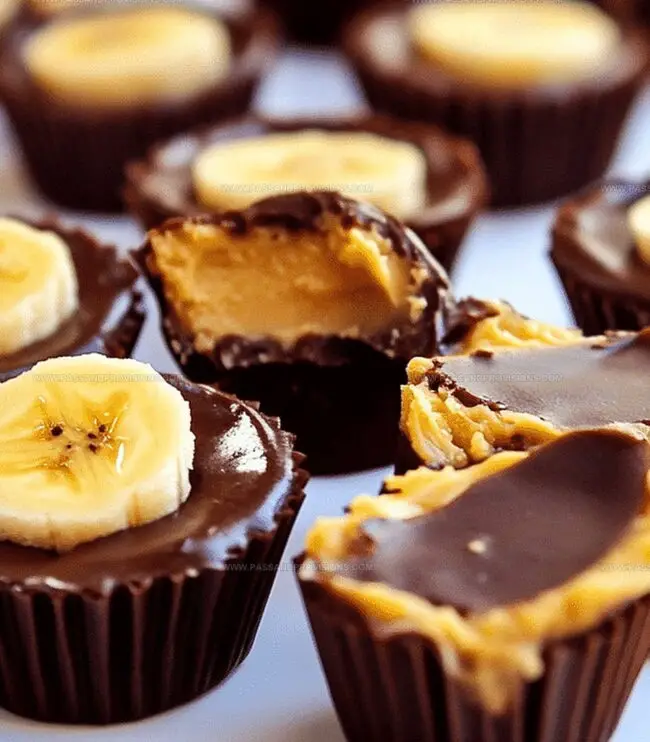
Smooth peanut butter blends perfectly with ripe banana slices, creating a harmonious treat.

Minimal ingredients and simple steps make this recipe accessible for even novice bakers.

Chocolate drizzles add an extra layer of indulgence to these delectable cups.

Nothing beats the combination of rich, velvety textures that melt effortlessly on your tongue.

You’ll want to savor every single bite of this irresistible dessert.

Top With These Add-Ons

  • Silky cold milk perfectly complements the rich, nutty flavors of peanut butter and sweet banana, creating a delightful harmony that cools and balances the dessert's intensity.
  • Spicy chai tea with its warm, aromatic blend of cinnamon, cardamom, and ginger provides a sophisticated contrast to the sweet and creamy peanut butter banana cups.
  • Bold, robust dark roast coffee cuts through the dessert's sweetness, offering a robust counterpoint that enhances the nutty undertones of the peanut butter.
  • A bright, tangy berry smoothie adds a refreshing fruity layer that lifts the dense, creamy texture of the peanut butter banana cups, creating a vibrant flavor experience.

Try These Flavors in Future Versions

  • Almond Butter Berry Cups: Swap peanut butter with almond butter and replace banana with mashed raspberries for a tangy, antioxidant-rich dessert.
  • Vegan Chocolate Coconut Cups: Use coconut butter instead of peanut butter, add cocoa powder, and sweeten with maple syrup for a plant-based alternative.
  • Keto-Friendly Nut Butter Cups: Substitute banana with cream cheese, use sugar-free sweetener, and incorporate chopped nuts for a low-carb version.
  • Protein Power Cups: Blend in vanilla protein powder with peanut butter and banana for an extra protein-packed snack that supports muscle recovery.

Peanut Butter Cup Q&A

  • How ripe should the bananas be for this recipe?

Use very ripe bananas with brown spots on the peel. Overripe bananas are sweeter and mash more easily, creating a smoother texture in the peanut butter mixture.

  • Can I use natural or crunchy peanut butter?

Both work great! Natural peanut butter will give a more authentic flavor, while crunchy peanut butter adds extra texture. Just ensure it’s well-mixed before combining with bananas.

  • Is this recipe suitable for people with dietary restrictions?

The basic recipe can be adapted for gluten-free diets. For vegan options, use plant-based honey or maple syrup. Those with nut allergies should avoid this recipe due to peanut butter.

  • What's the best way to get a smooth peanut butter and banana mixture?

Use a fork or whisk to mash the banana thoroughly, then stir continuously until the ingredients are completely blended with no banana lumps remaining.

Why Peanut Butter Banana Cups Are Great on the Go

  • These peanut butter banana cups take just 15 minutes to prepare, making them a lightning-fast dessert for busy families or sudden sweet cravings.
  • Enjoy a hassle-free treat that requires zero oven time, perfect for hot summer days or when you want a simple, cool dessert without complex cooking techniques.
  • Packed with natural sweetness from bananas and creamy peanut butter, these cups are a nutritious and delicious option that children will absolutely love, turning a healthy snack into a fun experience.
  • With just a few pantry staples like peanut butter, bananas, and chocolate, you can create an impressive dessert that looks and tastes gourmet without complicated shopping or expensive ingredients.

Everything That Goes Inside the Cups

Main Ingredients:
  • Peanut Butter: Rich, creamy base that provides nutty flavor and smooth texture. Opt for natural, unsweetened variety for healthier option.
  • Banana: Adds natural sweetness and helps bind the mixture. Choose ripe, soft bananas for easier mashing.
Sweetening Agents:
  • Honey: Optional natural sweetener that enhances overall flavor. Adds depth and helps balance peanut butter's richness.
  • Vanilla Extract: Provides warm, aromatic undertone that complements peanut butter and banana. Use pure vanilla for best flavor.
Preparation Ingredients:
  • Chocolate Chips or Chocolate Coating: Adds rich chocolate layer for extra indulgence. Dark or milk chocolate works well for coating or topping.
  • Cupcake Liners or Silicone Molds: Essential for shaping and easy removal of peanut butter banana cups. Helps create neat, individual portions.

How to Layer and Set Just Right

Step 1: Prepare Chocolate Base

Line a muffin tin with paper liners or silicone cups. Melt dark chocolate using a double boiler or microwave in short intervals, stirring between each until smooth.

Step 2: Create Chocolate Layer

Spoon a thin layer of melted chocolate into each muffin cup, covering the bottom completely. Place the muffin tin in the freezer for 5-10 minutes to set the chocolate layer.

Step 3: Whip Creamy Filling

In a mixing bowl, combine:
  • Creamy peanut butter
  • Ripe mashed banana
  • Honey
  • Vanilla extract

Blend ingredients until completely smooth and well incorporated.

Step 4: Layer Filling

Remove the chocolate-lined muffin tin from the freezer. Carefully spoon the peanut butter-banana mixture over the chocolate base, leaving a small space at the top for additional chocolate.

Step 5: Seal With Chocolate

Pour melted chocolate over the peanut butter-banana layer, ensuring it covers the entire surface and seals the edges.

Step 6: Chill and Set

Place the muffin tin in the refrigerator for 1-2 hours until the cups are completely firm and set.

Step 7: Serve and Enjoy

Gently remove the cups from the muffin tin by lifting the paper liners. Let sit at room temperature for 2-3 minutes before serving for the best texture.

Tips to Avoid Stickiness or Cracking

  • Smooth Out Consistency: Use a fork or whisk to thoroughly blend peanut butter and banana, ensuring no lumps remain for a perfectly creamy texture.
  • Select Ripe Bananas: Choose overripe bananas with brown spots for maximum sweetness and easier mashing, which enhances the overall flavor of the cups.
  • Control Sweetness Level: Adjust honey to taste, or substitute with maple syrup or agave nectar for different flavor profiles and dietary preferences.
  • Prevent Sticking: Line muffin tin with paper liners or lightly grease with cooking spray to make removing the cups easier and maintain their shape.
  • Chill for Best Results: Refrigerate the cups for at least 30 minutes before serving to help them set and develop a firmer, more satisfying texture.

Storing and Serving Without the Mess

  • Store leftover peanut butter banana cups in an airtight container in the refrigerator for up to 5 days, keeping them fresh and preventing spoilage.
  • Wrap individual cups tightly in plastic wrap or place in a freezer-safe container for up to 2 months, perfect for make-ahead treats.
  • Remove frozen cups from the freezer and let them sit at room temperature for 15-20 minutes before enjoying, allowing them to soften gently.
  • Note that the texture might slightly change after freezing, becoming a bit firmer but still deliciously creamy.
Print
clock clock iconcutlery cutlery iconflag flag iconfolder folder iconinstagram instagram iconpinterest pinterest iconfacebook facebook iconprint print iconsquares squares iconheart heart iconheart solid heart solid icon
Peanut Butter Banana Cups Recipe

Peanut Butter Banana Cups Recipe


5 Stars 4 Stars 3 Stars 2 Stars 1 Star

4.6 from 37 reviews

  • Total Time: 30 minutes
  • Yield: 12 1x

Description

Creamy, dreamy Peanut Butter Banana Cups deliver a heavenly dessert experience that blends rich nutty flavors with sweet banana goodness. Quick and simple layers of chocolate, peanut butter, and banana create an irresistible treat you cannot resist devouring.


Ingredients

Scale

Main Ingredients:

  • ½ cup (120 g) natural peanut butter (smooth or crunchy)
  • 1 cup (175 g) dark chocolate chips or chopped chocolate
  • 1 ripe banana, mashed

Sweeteners and Flavor Enhancers:

  • 1 tablespoon honey or maple syrup (optional, for extra sweetness)
  • 1 teaspoon vanilla extract
  • 1 teaspoon coconut oil (optional, for a smoother texture)

Optional Toppings:

  • Crushed peanuts
  • Sea salt flakes
  • Banana chips

Instructions

  1. Thoroughly mash ripe bananas in a medium mixing bowl until no large chunks remain.
  2. Add creamy peanut butter to the mashed bananas, stirring gently to create a uniform consistency.
  3. Pour in honey and vanilla extract, continuing to blend until the mixture becomes silky and homogeneous.
  4. Ensure all ingredients are completely integrated, with no streaks of separate components visible.
  5. The resulting mixture should have a smooth, spreadable texture that holds together well.

Notes

  • Choose ripe bananas with brown spots for maximum sweetness and easier mashing.
  • Use natural peanut butter without added sugars for a healthier version of the treat.
  • Swap honey with maple syrup for a vegan alternative or agave nectar for different flavor profile.
  • Freeze the cups for a refreshing summer dessert that doubles as a cool, protein-packed snack.
  • Prep Time: 10 minutes
  • Cook Time: 20 minutes
  • Category: Snacks, Desserts
  • Method: Blending
  • Cuisine: American

Nutrition

  • Serving Size: 12
  • Calories: 150
  • Sugar: 6 g
  • Sodium: 80 mg
  • Fat: 9 g
  • Saturated Fat: 3 g
  • Unsaturated Fat: 5 g
  • Trans Fat: 0 g
  • Carbohydrates: 15 g
  • Fiber: 2 g
  • Protein: 4 g
  • Cholesterol: 0 mg
Jamie Granger

Jamie Granger

Recipe Developer & Food Writer

Expertise

  • Fusion Cuisine Development
  • Recipe Development and Food Styling
  • Culinary Writing and Content Creation
  • Nutrition and Healthy Cooking​

Education

Culinary Institute of America

  • Degree: Associate in Culinary Arts
  • Focus: Emphasis on flavor development, classic and contemporary culinary techniques, menu design, and global cuisine preparation; combined with food-service management, communication, and finance training; and immersive hands‑on restaurant operations through paid industry internships.

Jamie Granger turns ingredients into memories. With her recipes, she brings a fusion-forward flair to every creation. 

Her dishes reflect the places she’s explored, the chefs she’s learned from, and the deep connection she has to food as a form of expression. 

At Pass and Provision, Jamie develops recipes that balance flavor, health, and beauty, meals that don’t just satisfy your appetite but speak to your curiosity.

Leave a Reply

Your email address will not be published. Required fields are marked *

Recipe rating 5 Stars 4 Stars 3 Stars 2 Stars 1 Star