Dreamy No-Bake Buckeye Cheesecake Bars Recipe for Sweet Lovers
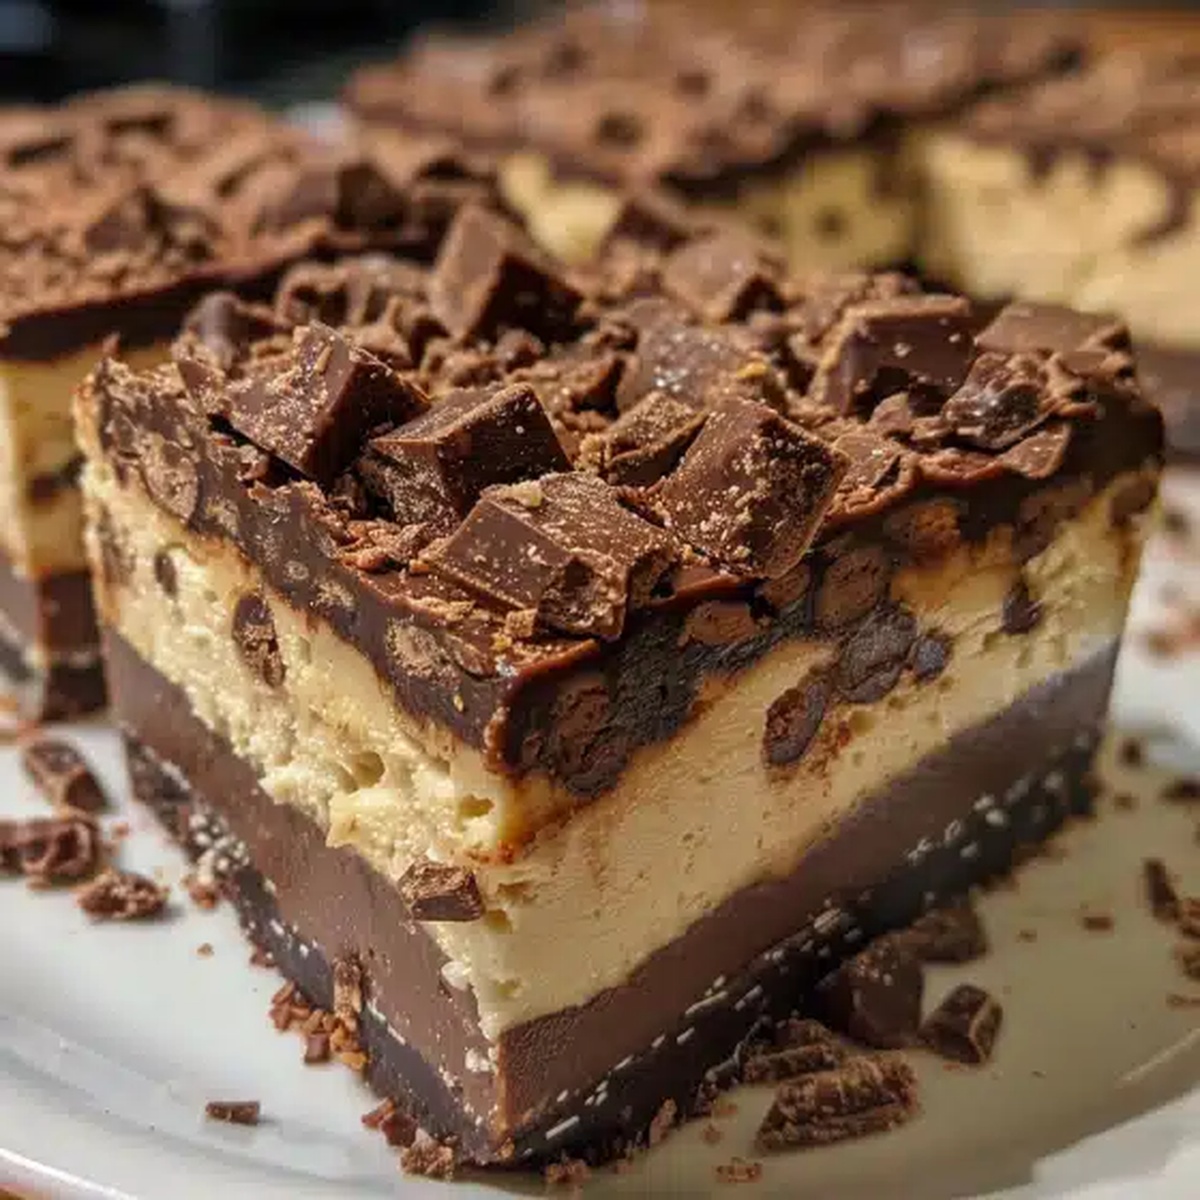
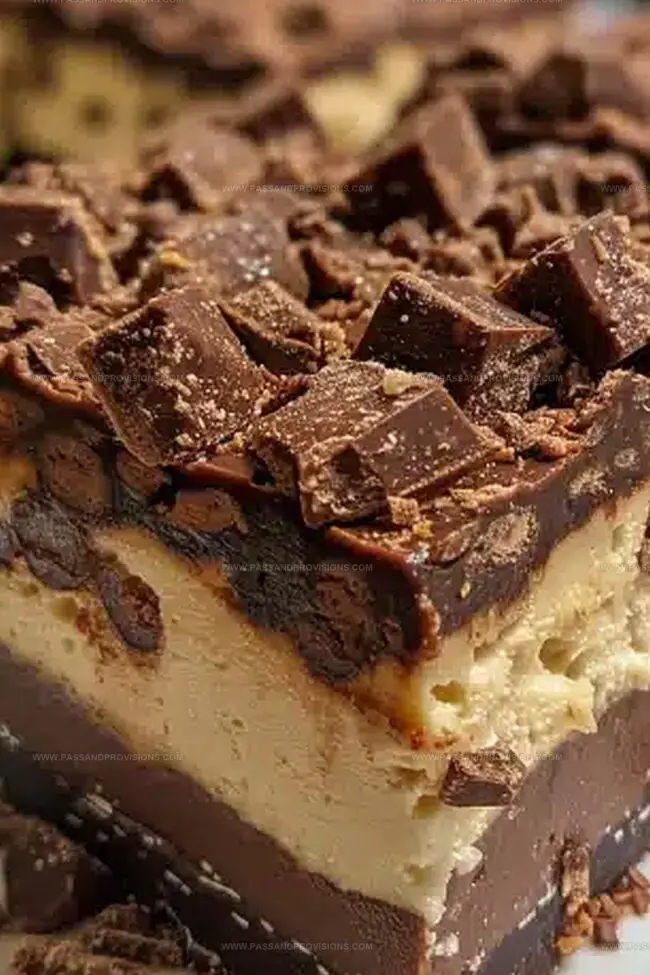
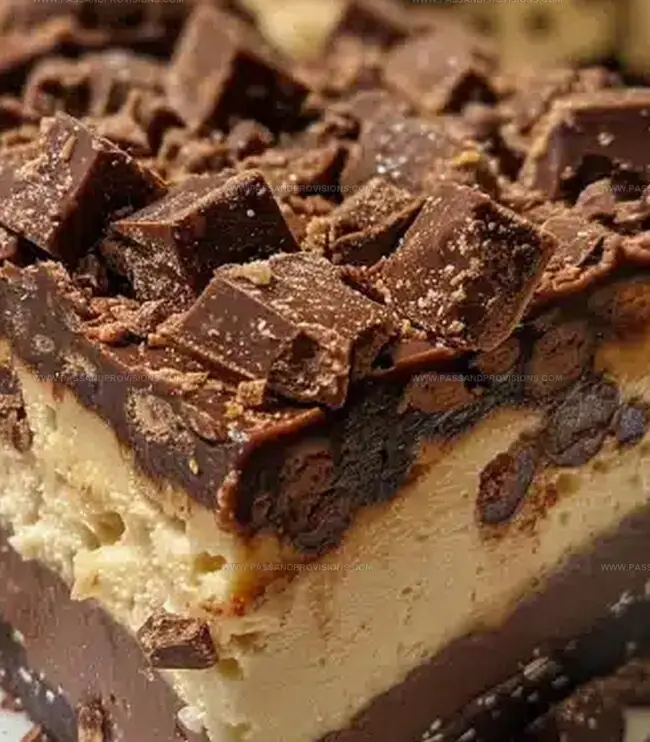
Chocolate and peanut butter lovers stumble upon a dreamy no-bake buckeye cheesecake bars paradise that promises pure indulgence.
Creamy layers melt together in a delightful dance of sweet and rich flavors.
Every bite feels like a luxurious escape from ordinary desserts.
Rich peanut butter swirls intermingle with smooth chocolate in these decadent bars.
Minimal effort yields maximum satisfaction with this simple yet impressive treat.
Chilled and silky, these bars will become your go-to dessert for any celebration.
You’ll want to savor each incredible morsel of this irresistible confection.
Grab a slice and let your taste buds embark on an unforgettable journey.
Reasons to Love No-Bake Buckeye Cheesecake Bars Instantly
Inside the Ingredients of No-Bake Buckeye Cheesecake Bars
Crust Ingredients:Filling Ingredients:Topping Ingredients:How to Layer and Chill No-Bake Buckeye Cheesecake Bars
Step 1: Prepare Chocolate Graham Cracker Base
Mix graham cracker crumbs with melted butter until the mixture looks like damp sand. The texture should hold together when gently pressed.
Step 2: Create Sturdy Crust Foundation
Line a 9×9-inch square baking pan with parchment paper, allowing slight overhang for easy removal. Press the crumb mixture firmly and evenly across the bottom, creating a compact base. Slide the pan into the refrigerator to set while preparing the next components.
Step 3: Whip Silky Cream Cheese Filling
Blend cream cheese until smooth and creamy. Gradually incorporate powdered sugar and vanilla, mixing until completely integrated. In a separate bowl, whip heavy cream to soft peaks. Gently fold whipped cream into the cream cheese mixture, maintaining a light, airy texture.
Step 4: Swirl Peanut Butter Magic
Combine peanut butter with powdered sugar, creating a rich, spreadable mixture. Pour cheesecake filling into the chilled crust. Drizzle peanut butter mixture across the surface, using a knife to create elegant swirls.
Step 5: Chill and Set
Refrigerate the bars for at least 4 hours or overnight. The cheesecake will firm up and develop deeper flavors during chilling.
Step 6: Slice and Serve
Remove bars from refrigerator. Lift parchment paper to extract from pan. Slice into neat squares. Serve chilled for maximum enjoyment.
Expert Tips for No-Bake Buckeye Cheesecake Bars Perfection
Keeping No-Bake Buckeye Cheesecake Bars Fresh and Firm
Tasty Pairings for No-Bake Buckeye Cheesecake Bars
Sweet Swaps for No-Bake Buckeye Cheesecake Bars Fans
Buckeye Cheesecake Bars Questions, Solved
Buckeye Bars combine the classic chocolate and peanut butter taste, featuring a chocolate graham cracker crust and a creamy cheesecake filling with rich peanut butter swirls.
Yes, you can substitute graham crackers with chocolate cookie crumbs or crushed Oreo cookies to create a similar chocolate base for the crust.
You’ll need a 9×9-inch square baking pan, parchment paper, and a mixer or hand whisk to blend the cheesecake filling smoothly.
No, the recipe contains peanut butter, which makes it unsafe for those with nut allergies. Consider alternative fillings or recipes if nut allergies are a concern.
Print
No-Bake Buckeye Cheesecake Bars Recipe
- Total Time: 4 hours 20 minutes
- Yield: 16 1x
Description
Indulgent no-bake buckeye cheesecake bars combine creamy peanut butter and chocolate in a dreamy dessert that melts hearts. Chocolate lovers will crave these rich, silky bars that promise pure bliss with each delectable bite.
Ingredients
Main Ingredients:
- 16 ounces (454 grams) cream cheese
- 1 cup creamy peanut butter
- 1 ½ cups semisweet chocolate chips
- 2 cups chocolate graham cracker crumbs
Dairy and Binding Ingredients:
- 1 cup heavy whipping cream
- ¾ cup heavy cream
- ½ cup unsalted butter (melted)
Sweetening and Flavoring Ingredients:
- ¾ cup powdered sugar
- 1 teaspoon vanilla extract
Instructions
- Crush chocolate graham crackers into fine, uniform crumbs, then blend thoroughly with melted butter until the mixture achieves a compact, sandy texture.
- Prepare a 9×9-inch square baking pan by lining it with parchment paper, ensuring slight overhang for easy removal later.
- Distribute the crumb mixture evenly across the pan’s base, using firm, consistent pressure to create a compact, smooth foundation.
- Transfer the crust to the refrigerator to set and chill while assembling the subsequent layers.
- In a large mixing bowl, whip cream cheese until smooth and free of lumps, ensuring a velvety consistency.
- Gradually incorporate powdered sugar and peanut butter, blending until the mixture becomes uniform and creamy.
- Fold in vanilla extract, creating a harmonious flavor profile throughout the filling.
- Gently fold whipped cream into the cream cheese mixture, maintaining a light, airy texture.
- Carefully spread the peanut butter cheesecake filling over the chilled crust, smoothing the surface with a spatula.
- Melt chocolate chips and drizzle in elegant swirls across the cheesecake surface, creating a decorative pattern.
- Return the pan to the refrigerator and allow the bars to set completely, approximately 4-6 hours or overnight.
- Once fully chilled, lift the bars from the pan using parchment paper edges and slice into neat, uniform squares.
Notes
- Swap graham crackers with gluten-free alternatives like almond flour or crushed gluten-free cookies for a celiac-friendly version.
- Use room temperature cream cheese to prevent lumps and ensure a smooth, creamy cheesecake texture.
- Crush graham crackers in a food processor for more uniform crumbs, creating a more stable and compact crust.
- Freeze the bars for 15-20 minutes before cutting to achieve clean, sharp edges and prevent crumbling.
- Prep Time: 20 minutes
- Cook Time: 4 hours
- Category: Desserts, Snacks
- Method: None
- Cuisine: American
Nutrition
- Serving Size: 16
- Calories: 400
- Sugar: 20 g
- Sodium: 250 mg
- Fat: 30 g
- Saturated Fat: 15 g
- Unsaturated Fat: 10 g
- Trans Fat: 0 g
- Carbohydrates: 35 g
- Fiber: 1 g
- Protein: 6 g
- Cholesterol: 60 mg
Jamie Granger
Recipe Developer & Food Writer
Expertise
Education
Culinary Institute of America
Jamie Granger turns ingredients into memories. With her recipes, she brings a fusion-forward flair to every creation.
Her dishes reflect the places she’s explored, the chefs she’s learned from, and the deep connection she has to food as a form of expression.
At Pass and Provision, Jamie develops recipes that balance flavor, health, and beauty, meals that don’t just satisfy your appetite but speak to your curiosity.