
Easy No Bake Peanut Butter Oatmeal Bars Recipe for Quick Snacking
My latest kitchen obsession involves these creamy no bake peanut butter oatmeal bars that promise delightful sweet simplicity.
Sweet layers of nutty goodness stack together without requiring any oven time.
Chocolate and peanut butter create magical combinations that feel indulgent yet surprisingly easy to prepare.
Minimal ingredients mean maximum flavor in every single bite.
Quick assembly lets you whip up these treats faster than running to the store for packaged desserts.
Anyone craving a no-stress dessert will absolutely adore how smoothly these bars come together.
You’ll want to make a double batch because they disappear in seconds.
Why No Bake Peanut Butter Oatmeal Bars Are Worth It
Pantry Staples for Peanut Butter Oatmeal Bars
Base Ingredients:Oat Group:Optional Add-In Ingredients:Additional Flavor Enhancers:No-Bake Peanut Butter Bars in Just a Few Steps
Step 1: Prepare Baking Dish
Line an 8×8-inch baking pan with parchment paper, allowing extra paper to hang over the sides for easy removal later.
Step 2: Warm Peanut Butter Mixture
Combine peanut butter and honey in a microwave-safe bowl. Heat in short bursts, stirring every 15 seconds until smooth and slightly warm. Gently mix in vanilla extract to create a rich, fragrant base.
Step 3: Blend Oats and Mixture
In a large mixing bowl, combine:Stir thoroughly until oats are completely coated and ingredients are well integrated. Optional mix-ins:Step 4: Pack Into Pan
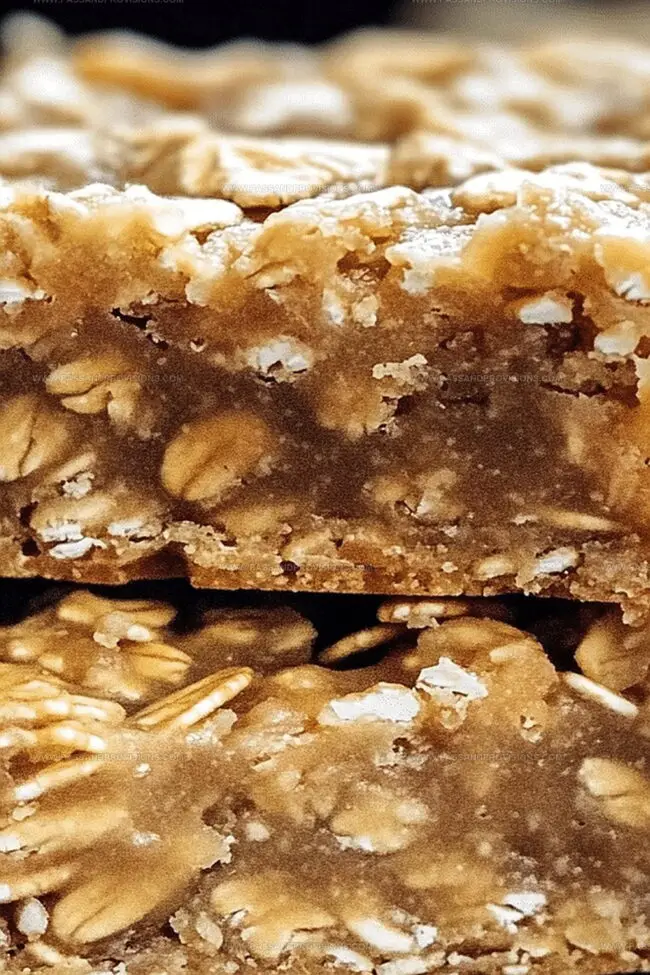
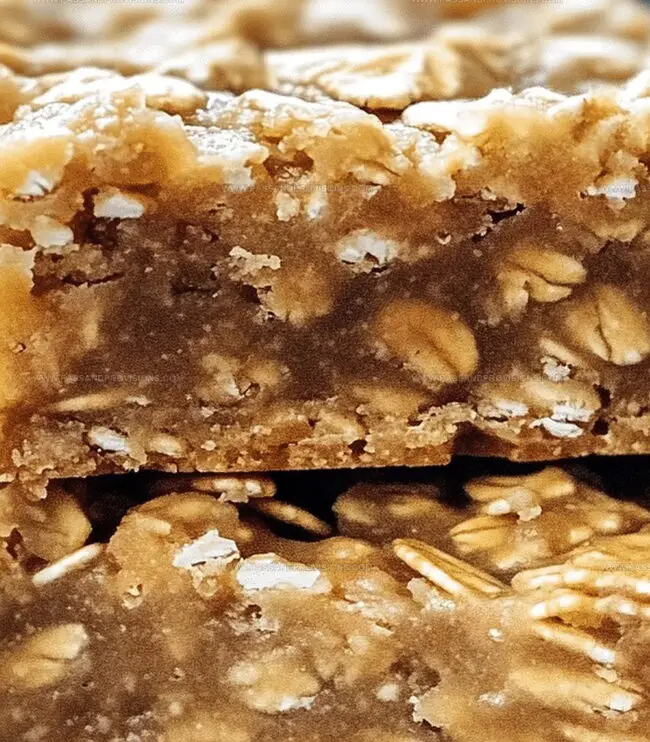
Transfer the oat mixture into the prepared baking dish. Use the back of a spoon or clean hands to press down firmly, creating a compact and even layer.
Step 5: Chill and Set
Place the pan in the refrigerator for at least 2 hours. The bars will firm up and become deliciously solid during this time.
Step 6: Slice and Enjoy
Remove the bars from the refrigerator. Lift the entire block out using the parchment paper overhang. Slice into squares or rectangles. Serve chilled and savor the no-bake treat!
Tips for Chewy, Tasty Oatmeal Bars
Keep Oatmeal Bars Fresh Without the Fuss
Snacks and Drinks That Pair with Oatmeal Bars
Creative Twists on Peanut Butter Oatmeal Bars
Common Questions About Oatmeal Bars
Yes, as long as you use certified gluten-free oats, these bars are naturally gluten-free. Always check your oat packaging to confirm.
Absolutely! Almond butter, cashew butter, or sunflower seed butter work great as substitutes for peanut butter. Each will give a slightly different flavor profile.
When stored in an airtight container in the refrigerator, these bars will stay fresh for up to 1 week. For best texture and taste, keep them chilled.
No special equipment is needed. Just a microwave-safe bowl, a mixing bowl, and an 8×8-inch baking pan with parchment paper will do the trick.
Print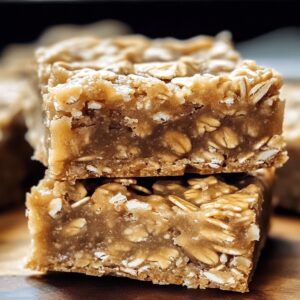
No Bake Peanut Butter Oatmeal Bars Recipe
- Total Time: 2 hours 10 minutes
- Yield: 16 1x
Description
Sweet layers of creamy peanut butter meet hearty oats in these no-bake bars, creating a delightful dessert that’s both simple and irresistible. Chocolate drizzle adds richness, making these bars a perfect quick treat you’ll crave again and again.
Ingredients
Protein and Base Ingredients:
- 2 cups (480 ml) old-fashioned rolled oats
- 1 cup (240 ml) creamy peanut butter
- ¼ cup (40 g) chopped nuts (almonds or walnuts)
Binding and Flavor Ingredients:
- ½ cup (170 g) honey (or maple syrup for vegan option)
- 1 teaspoon (5 ml) vanilla extract
Optional Topping Ingredient:
- ½ cup (85 g) dark or semi-sweet chocolate chips
Instructions
- Prepare the baking vessel by lining an 8-inch square dish with parchment paper, ensuring edges extend slightly beyond the pan for effortless extraction.
- Create a smooth base by heating peanut butter and honey in a microwave-safe container, stirring periodically until completely blended and warm. Incorporate vanilla extract into the liquid mixture, blending thoroughly.
- Add rolled oats to the warm peanut butter concoction, stirring meticulously to guarantee uniform coating across every oat particle. If desired, gently fold chocolate chips and chopped nuts into the mixture for enhanced texture and flavor complexity.
- Transfer the oat mixture into the prepared pan, utilizing a spatula or clean hands to compress the ingredients evenly, creating a compact and uniform layer that fills the entire surface.
- Place the pan in the refrigerator, allowing the bars to solidify and set for approximately two hours, or until the mixture reaches a firm, sliceable consistency.
- Remove the chilled mixture from the refrigerator and lift the entire block from the pan using the parchment paper overhang. Slice into precise rectangles or squares, revealing a delectable no-bake treat ready for immediate enjoyment.
Notes
- Ensure parchment paper overhangs pan sides for effortless bar removal and clean cutting.
- Use natural peanut butter with no added sugar for a healthier, less sweet version that highlights nutty flavors.
- Customize mix-ins like dried cranberries, coconut flakes, or dark chocolate chunks to create unique flavor combinations that suit personal taste preferences.
- Store bars in an airtight container between parchment layers in the refrigerator for up to one week, allowing quick grab-and-go snacking without compromising texture or taste.
- Prep Time: 10 minutes
- Cook Time: 2 hours
- Category: Breakfast, Snacks, Desserts
- Method: None
- Cuisine: American
Nutrition
- Serving Size: 16
- Calories: 190
- Sugar: 9g
- Sodium: 50mg
- Fat: 8g
- Saturated Fat: 2g
- Unsaturated Fat: 6g
- Trans Fat: 0g
- Carbohydrates: 25g
- Fiber: 3g
- Protein: 5g
- Cholesterol: 0mg
Jamie Granger
Recipe Developer & Food Writer
Expertise
Education
Culinary Institute of America
Jamie Granger turns ingredients into memories. With her recipes, she brings a fusion-forward flair to every creation.
Her dishes reflect the places she’s explored, the chefs she’s learned from, and the deep connection she has to food as a form of expression.
At Pass and Provision, Jamie develops recipes that balance flavor, health, and beauty, meals that don’t just satisfy your appetite but speak to your curiosity.