Mini Cherry Pie Recipe for Tangy Sweetness
Sweet memories dance around this mini cherry pie that bursts with homemade charm and rustic delight.
Grandma’s kitchen always smelled like pure happiness when she rolled out pastry dough.
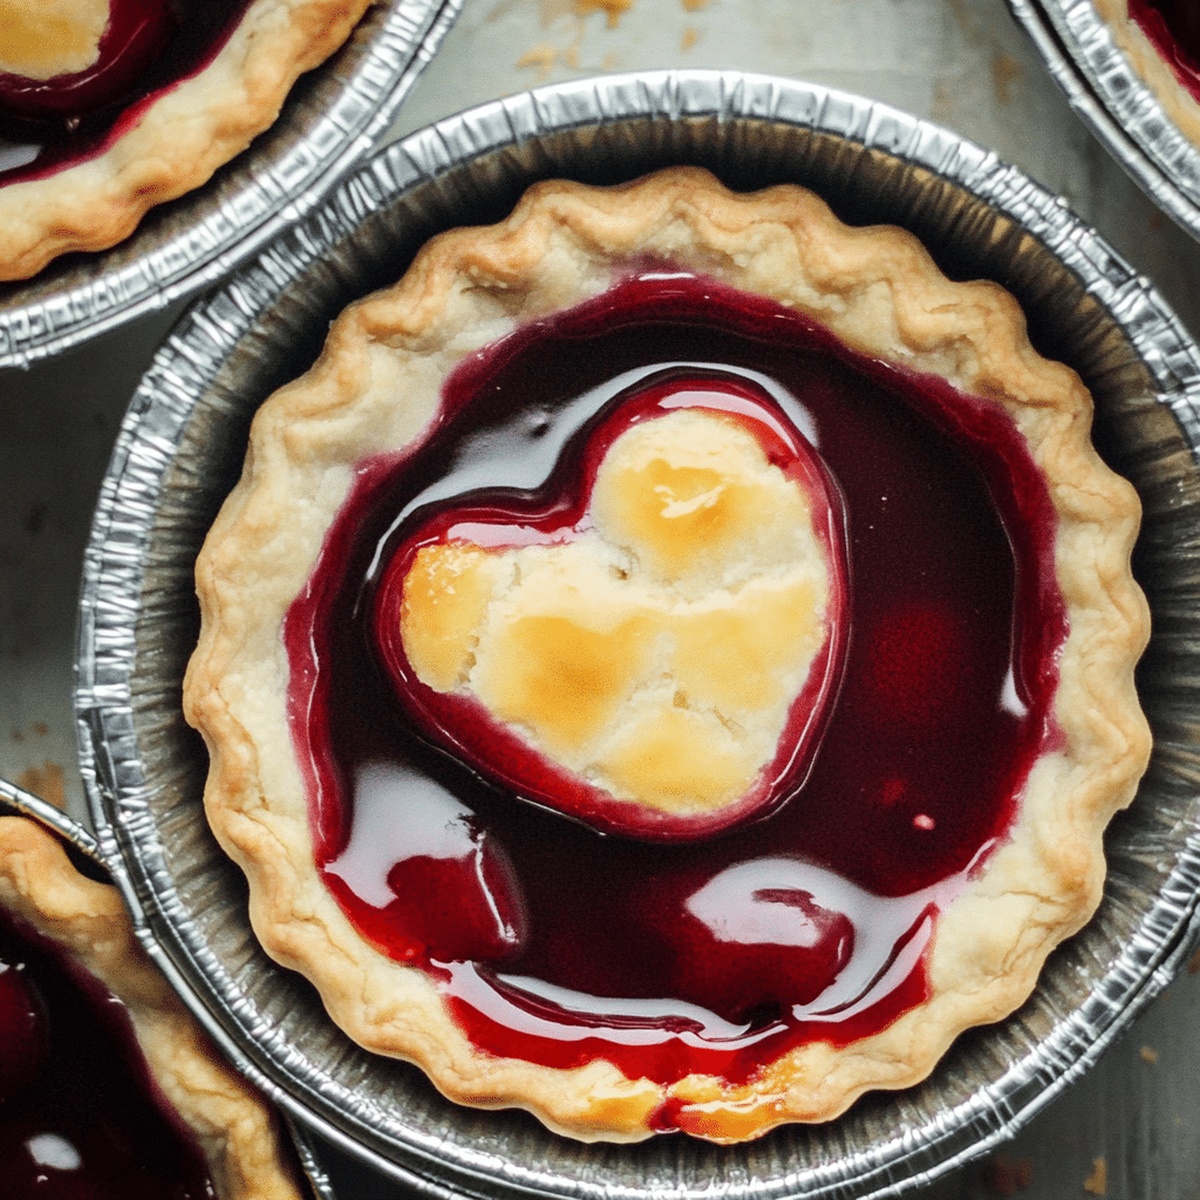
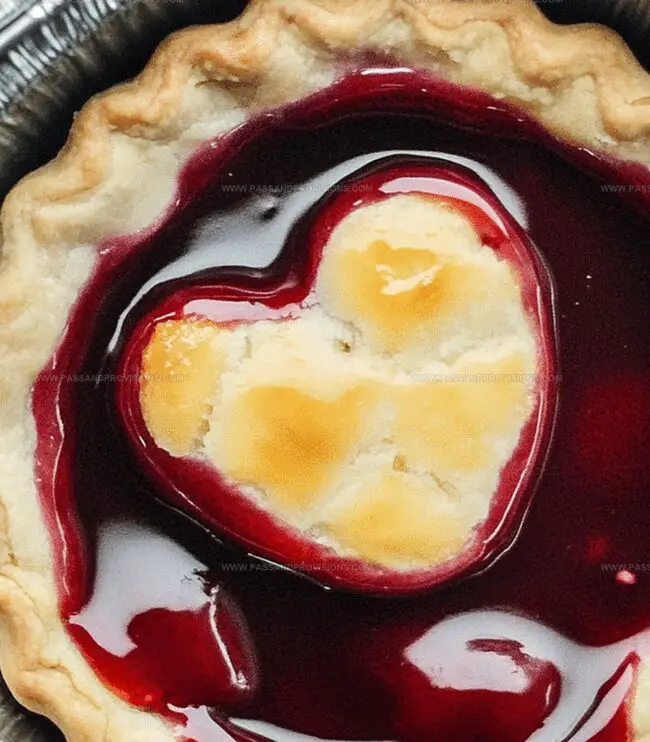
Pure fruit filling nestles between delicate layers of buttery crust, creating a perfect single-serving treat.
Small pockets of tart cherries peek through golden-brown lattice tops, promising intense flavor in every bite.
Weekend baking becomes an intimate adventure with these charming miniature desserts.
Bakers who love precision and playful presentation will adore crafting these adorable individual pies.
You can’t resist the magic of these bite-sized cherry treasures waiting to surprise and delight.
Why Mini Cherry Pie Stands Out

What You’ll Need for Mini Cherry Pie
Pie Crust Ingredients:Fat Ingredients:Liquid Ingredient:Filling Ingredients:Garnish Ingredient:How to Bake Mini Cherry Pie at Home
Step 1: Mix Dry Ingredients
Grab a spacious mixing bowl and whisk flour and salt together until well combined.
Step 2: Create Crumbly Texture
Drop cold, diced butter into the flour mixture. Use a pastry cutter or your fingertips to break down the butter, working it into the flour until the mixture looks like coarse, uneven crumbs.
Step 3: Bind The Dough
Slowly introduce ice water, adding one tablespoon at a time. Gently mix until the dough starts to stick together and forms a cohesive mass. Carefully shape the dough into a smooth disk.
Step 4: Chill The Dough
Wrap the dough disk tightly in plastic wrap. Place in the refrigerator and let it rest for a minimum of 30 minutes. This chilling process helps relax the gluten and solidifies the butter, ensuring an incredibly tender and flaky pie crust.
Step 5: Prepare For Baking
After chilling, the dough is ready to be rolled out and transformed into a delectable mini cherry pie crust. The cold resting period guarantees a perfectly crisp and delightful pastry.
Tips That Help With Mini Cherry Pie
Saving and Reheating Mini Cherry Pie
Serving Ideas for Mini Cherry Pie
Mini Cherry Pie Tweaks
Mini Cherry Pie FAQs
Handle the dough minimally and keep ingredients cold. Overworking the dough develops gluten, which makes the crust tough. Mix just until the ingredients come together and chill the dough before rolling.
Yes, you can prepare the pie dough up to 3 days in advance. Wrap it tightly in plastic wrap and store in the refrigerator. You can also freeze the dough for up to 2 months, just thaw in the refrigerator overnight before using.
Roll the dough on a lightly floured surface using gentle, even strokes. Rotate the dough frequently to prevent sticking and ensure an even thickness. Use a bench scraper or spatula to help lift the dough if it sticks.
The dough should look like coarse crumbs and hold together when pinched. When you squeeze a small amount, it should form a clump without being too wet or dry. Avoid overmixing to keep the crust tender and flaky.
Print
Mini Cherry Pie Recipe
- Total Time: 1 hour 5 minutes
- Yield: 6 1x
Description
Cherry lovers rejoice! Mini Cherry Pie elevates classic dessert with bite-sized charm. Flaky pastry cradles sweet-tart filling, promising pure delight in each delectable morsel that captures summer’s essence perfectly.
Ingredients
Main Ingredients:
- 2 cups (300g) pitted cherries (fresh or frozen)
- 1 ¼ cups (155g) all-purpose flour
- ½ cup (115g) unsalted butter, cold and diced
Sweeteners and Flavor Enhancers:
- ¼ cup (50g) granulated sugar
- ½ teaspoon vanilla extract
- ¼ teaspoon almond extract (optional, for extra flavor)
- Coarse sugar (optional, for sprinkling)
Binding and Finishing Ingredients:
- ½ teaspoon salt
- 1 tablespoon cornstarch
- 34 tablespoons ice water
- 1 egg, beaten (for egg wash)
Instructions
- Sift the flour and salt together in a spacious mixing vessel, ensuring even distribution of dry ingredients.
- Introduce chilled, cubed butter into the flour mixture, utilizing a pastry blender or nimble fingertips to create a textural landscape resembling rough, pebbly crumbs.
- Incorporate glacial water incrementally, gently folding and pressing until the dough coheres into a unified mass without overworking the delicate mixture.
- Compress the nascent pastry into a compact disk, envelop completely in transparent film, and nestle within the refrigerator’s cool embrace for a minimum of half an hour to relax the gluten and solidify the butter.
- After resting, transfer the chilled dough to a lightly floured surface, rolling with measured strokes to create a thin, even sheet that will form the foundation of your miniature cherry confection.
- Delicately drape the rolled pastry into petite pie vessels, trimming excess edges with precision and creating decorative crimped borders to contain the forthcoming fruity filling.
- Layer the prepared cherry mixture into the pastry shells, distributing the vibrant fruit with careful consideration to achieve balanced coverage.
- Craft a complementary top crust, either as a full cover with artful venting or as a lattice design that allows glimpses of the ruby-hued filling beneath.
- Brush the exposed pastry with a whisked egg wash to encourage a golden, luminous finish during baking.
- Position the assembled mini pies in a preheated oven, allowing the heat to transform the raw ingredients into a bubbling, aromatic delicacy with a perfectly crisp, flaky exterior.
Notes
- Chill butter thoroughly before cutting to ensure a flaky, tender crust that separates beautifully when baked.
- Work quickly and handle the dough minimally to prevent warming, which can make the crust tough and less delicate.
- For a gluten-free version, swap traditional flour with a cup-for-cup gluten-free blend that includes xanthan gum for better binding.
- Consider freezing prepared mini pies for up to a month, allowing you to have homemade desserts ready at a moment’s notice.
- Prep Time: 40 minutes
- Cook Time: 25 minutes
- Category: Desserts, Snacks
- Method: Baking
- Cuisine: American
Nutrition
- Serving Size: 6
- Calories: 239
- Sugar: 10 g
- Sodium: 65 mg
- Fat: 13 g
- Saturated Fat: 8 g
- Unsaturated Fat: 4 g
- Trans Fat: 0 g
- Carbohydrates: 27 g
- Fiber: 2 g
- Protein: 3 g
- Cholesterol: 37 mg
Jamie Granger
Recipe Developer & Food Writer
Expertise
Education
Culinary Institute of America
Jamie Granger turns ingredients into memories. With her recipes, she brings a fusion-forward flair to every creation.
Her dishes reflect the places she’s explored, the chefs she’s learned from, and the deep connection she has to food as a form of expression.
At Pass and Provision, Jamie develops recipes that balance flavor, health, and beauty, meals that don’t just satisfy your appetite but speak to your curiosity.