
Bright & Crunchy Frozen Yogurt Granola Cups Recipe for Summer
Whipping up these delightful frozen yogurt granola cups can turn an ordinary snack into a magical moment of pure bliss.
Summer calls for cool treats that refresh and energize.
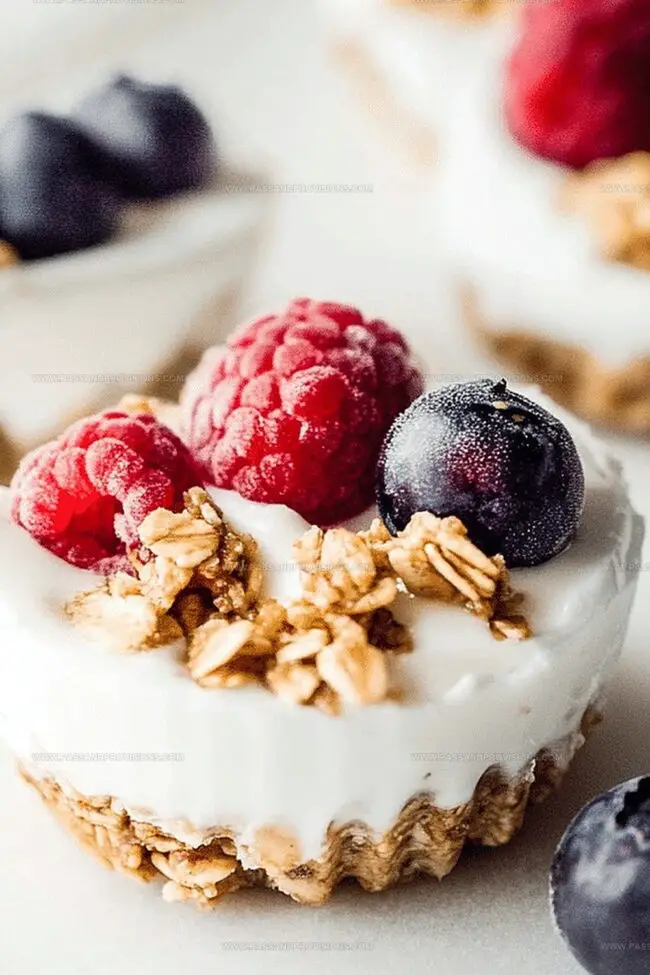
Sweet creamy yogurt nestled with crunchy granola creates an irresistible combination that dances on your palate.
Layers of texture and flavor make this recipe a simple yet elegant dessert option.
Colorful berries and nuts can personalize each cup with individual flair.
Fresh ingredients elevate this treat from basic to spectacular.
You’ll want to make these again and again for every gathering or quiet afternoon indulgence.
Why Frozen Yogurt Granola Cups Are Worth Making
Ingredients Guide for Frozen Yogurt Granola Cups
Base Layer:Creamy Layer:Topping Options:Putting Together Frozen Yogurt Granola Cups Easily
Step 1: Prepare Muffin Tin
Line a 12-cup muffin tin with silicone or paper liners, ensuring each cup is evenly covered.
Step 2: Create Granola Mixture
Grab a mixing bowl and combine:Stir ingredients until they blend into a sticky, cohesive mixture.
Step 3: Form Granola Foundations
Scoop approximately 1 tablespoon of the granola blend into each muffin cup. Use your fingers or the back of a spoon to firmly press the mixture, creating a compact and solid base that will hold its shape.
Step 4: Chill Granola Bases
Place the muffin tin in the refrigerator for about 15 minutes to help the granola bases set and become firm.
Step 5: Prepare Yogurt Filling
Select your favorite yogurt- Greek, regular, or flavored- and let it sit at room temperature for a few minutes to soften.
Step 6: Fill Yogurt Cups
Carefully spoon yogurt over the chilled granola bases, filling each cup almost to the top.
Step 7: Add Delightful Toppings
Sprinkle fresh fruits, nuts, or additional granola on top for extra crunch and flavor.
Step 8: Freeze Your Creation
Place the muffin tin in the freezer for 2-3 hours until the yogurt cups are completely solid.
Step 9: Serve and Enjoy
Remove the frozen yogurt cups from the tin by gently lifting the liners. Let them sit for 2-3 minutes before serving to slightly soften.
Smart Tips for Frozen Yogurt Granola Cups Success
How to Keep Frozen Yogurt Granola Cups Fresh
What Goes Well with Frozen Yogurt Granola Cups
Frozen Yogurt Granola Cups with a Personal Touch
Frozen Yogurt Granola Cups: What People Ask Most
Use silicone or parchment paper liners, and lightly grease them with a cooking spray or coconut oil before adding the granola mixture. This ensures easy removal of the frozen yogurt cups.
Absolutely! You can use store-bought or homemade granola. Just make sure it’s finely chopped and will hold together well when mixed with honey and coconut oil.
Use the back of a spoon or a small measuring cup to firmly press the granola mixture into the bottom of each liner. This helps create a compact and stable base for your frozen yogurt cups.
Typically, they need about 2-3 hours in the freezer to fully set and become easy to remove from the liners. For best results, freeze them overnight for a firmer texture.
Print
Frozen Yogurt Granola Cups Recipe
- Total Time: 3 hours 10 minutes
- Yield: 12 1x
Description
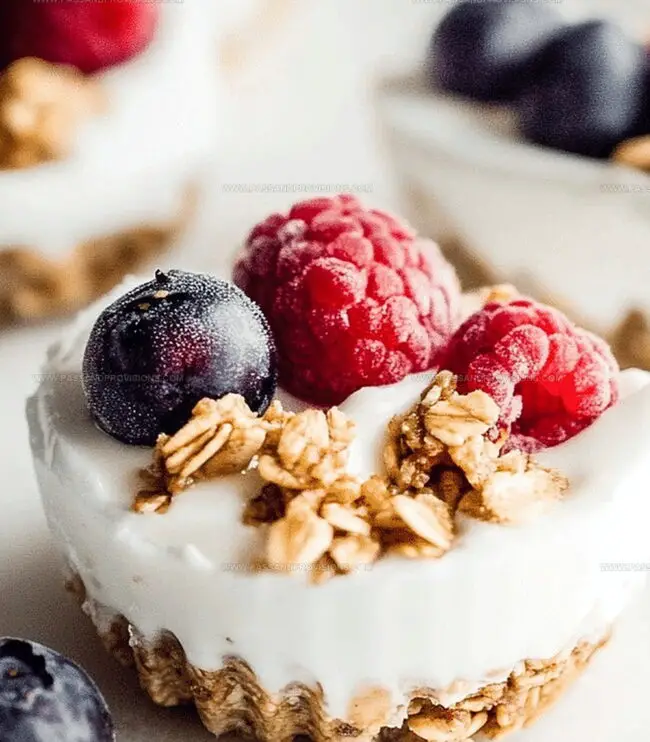
Cool summer mornings find their perfect match with these frozen yogurt granola cups, blending creamy Greek yogurt and crunchy homemade granola into a refreshing breakfast or snack. Protein-packed and simple to prepare, these cups offer a delightful balance of texture and flavor that will energize you throughout the day.
Ingredients
Base:
- 1 ½ cups (360 milliliters) granola (store-bought or homemade)
- 2 tablespoons (30 milliliters) honey or maple syrup
- 2 tablespoons (30 milliliters) melted coconut oil or peanut butter
Filling:
- 1 ½ cups (360 milliliters) Greek yogurt (vanilla or plain)
- 2 tablespoons (30 milliliters) honey or maple syrup (optional, for sweetness)
- 1 teaspoon (5 milliliters) vanilla extract (optional for extra flavor)
Toppings:
- Fresh berries (strawberries, blueberries, raspberries, etc.)
- Chopped nuts (almonds, walnuts, or pistachios)
- Mini chocolate chips or coconut flakes (optional)
Instructions
- Prepare a 12-cup muffin tin by inserting silicone or paper liners to ensure easy removal of the yogurt cups.
- Create a cohesive granola base by combining granola, honey, and melted coconut oil in a mixing bowl, thoroughly blending the ingredients until they stick together.
- Distribute the granola mixture evenly among the muffin cups, using approximately 1 tablespoon per liner, and firmly compact the mixture to establish a solid, compact foundation.
- Transfer the muffin tin to the refrigerator and allow the granola base to chill and set for 10-15 minutes, which will help stabilize the crust.
- Remove the chilled tin and carefully layer Greek yogurt over the granola base, filling each cup to approximately three-quarters full.
- Embellish the yogurt surface with fresh berries, sliced almonds, or additional granola for texture and visual appeal.
- Place the filled muffin tin in the freezer and allow the yogurt cups to solidify completely, which typically takes 2-3 hours.
- Before serving, let the frozen yogurt granola cups rest at room temperature for 2-3 minutes to slightly soften, making them easier to remove from the liners.
- Gently extract the cups from the muffin tin and serve immediately for optimal taste and texture.
Notes
- Ensure granola base is tightly packed to create a sturdy foundation for the yogurt cups, preventing crumbling when serving.
- Experiment with different granola types like oat-based or nut-rich varieties to customize flavor and nutritional profile.
- Freeze cups for at least 2 hours to achieve a firm, scoopable texture that holds its shape when removed from the liner.
- Swap honey for maple syrup or agave nectar to make the recipe vegan-friendly and accommodate different dietary preferences.
- Prep Time: 10 minutes
- Cook Time: 2-3 hours
- Category: Breakfast, Snacks, Desserts
- Method: Baking
- Cuisine: American
Nutrition
- Serving Size: 12
- Calories: 200
- Sugar: 10 g
- Sodium: 50 mg
- Fat: 8 g
- Saturated Fat: 5 g
- Unsaturated Fat: 3 g
- Trans Fat: 0 g
- Carbohydrates: 28 g
- Fiber: 3 g
- Protein: 6 g
- Cholesterol: 15 mg
Jamie Granger
Recipe Developer & Food Writer
Expertise
Education
Culinary Institute of America
Jamie Granger turns ingredients into memories. With her recipes, she brings a fusion-forward flair to every creation.
Her dishes reflect the places she’s explored, the chefs she’s learned from, and the deep connection she has to food as a form of expression.
At Pass and Provision, Jamie develops recipes that balance flavor, health, and beauty, meals that don’t just satisfy your appetite but speak to your curiosity.