Easy Valentine’s Day Mini Cakes Recipe: Sweet Love Bites!
Crafting delightful valentines day mini cakes brings pure joy to your kitchen adventure.
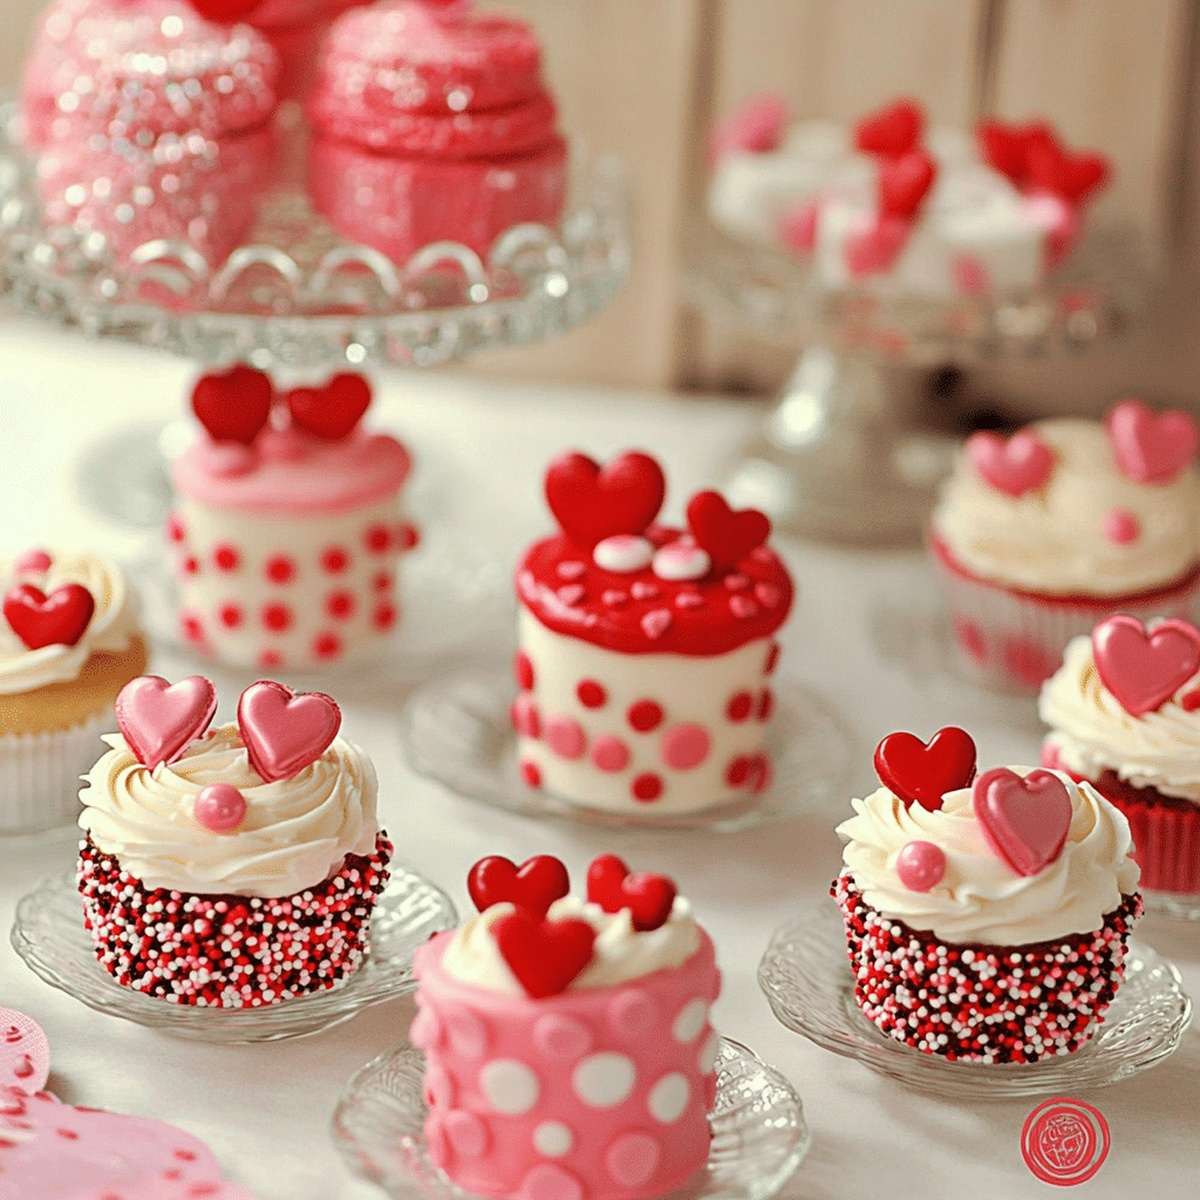
Sweet moments emerge when small desserts capture romantic hearts.
Tiny confections spark happiness through intricate design and delicate flavors.
Compact cake creations invite playful baking experiences with minimal effort.
Chocolate and strawberry combinations create magical miniature treats perfect for celebrating love.
Whimsical decorations transform simple ingredients into charming edible expressions of affection.
You’ll adore these adorable little desserts that promise to delight and surprise.
Mini Cakes That Make Valentine’s Sweeter

Ingredients for These Adorable Little Cakes
Cake Base Ingredients:Flavoring and Leavening Ingredients:Decorative Ingredients:How to Bake and Ice Mini Cakes Easily

Step 1: Warm Up the Oven
Crank your oven to a cozy 350°F (175°C). Grab a 9×13-inch pan and dress it with parchment paper, giving it a quick spray of cooking oil to prevent sticking.
Step 2: Create Dry Ingredient Magic
Whisk together in a bowl:Step 3: Whip Up a Creamy Base
Grab your mixer and beat until fluffy:Aim for a cloud-like texture that looks light and dreamy.
Step 4: Introduce Egg and Flavor Companions
Gently blend into the butter mixture:Mix until everything plays nicely together.
Step 5: Marry Wet and Dry Ingredients
Slowly combine dry ingredients with milk, alternating between the two. Start and end with dry ingredients. Mix just until everything looks harmonious- no overmixing!
Step 6: Add Romantic Color
Drop in some vibrant red or pink gel food coloring. Stir until the batter transforms into a lovely romantic hue.
Step 7: Bake with Love
Pour batter into prepared pan, spreading evenly. Slide into the preheated oven and bake for 20-25 minutes. Check doneness by inserting a toothpick- it should come out clean. Allow cake to cool completely before cutting into heart shapes.
Tips for Even Layers and Smooth Frosting
Storage Tips to Keep Them Fresh and Cute
Perfect Pairings for Mini Treats
Mini Cake Twists to Try This Year
Valentine Mini Cake Questions Solved
Yes, you can skip the food coloring and have a classic vanilla cake. The texture and taste will remain the same, just without the pink or red color.
Use a heart-shaped cookie cutter or cake pan to create uniform Valentine’s Day mini cakes. Alternatively, cut the cake into clean squares or rectangles using a sharp knife.
Gel food coloring is recommended because it provides vibrant color without changing the cake’s consistency. Liquid food coloring can make the batter too thin and affect the cake’s texture.
The batter should look smooth and slightly glossy, with no visible flour streaks. When you lift the mixer, the batter should fall slowly and form a ribbon-like pattern.
Print
Easy Valentines Day Mini Cakes Recipe
- Total Time: 55 minutes
- Yield: 12 1x
Description
Romantic Valentine’s Day Mini Cakes sparkle with sweet love and delicate charm. Miniature desserts bring intimate moments of connection, promising delightful bites that melt hearts and celebrate affection between partners.
Ingredients
Main Ingredients:
- 1 ½ cups (360 milliliters) all-purpose flour
- 1 cup (200 grams) granulated sugar
- ½ cup (113 grams) unsalted butter (softened)
- 2 large eggs
Leavening and Seasoning Ingredients:
- 1 ½ teaspoons baking powder
- ¼ teaspoon salt
- 1 teaspoon vanilla extract
Liquid and Coloring Ingredients:
- ½ cup (120 milliliters) milk (room temperature)
- Red or pink gel food coloring
Frosting Ingredients:
- 1 cup (227 grams) unsalted butter (softened)
- 3 cups (360 grams) powdered sugar (sifted)
- 2–3 tablespoons heavy cream or milk
- 1 teaspoon vanilla extract
- Food coloring (optional, pink or red)
Decorative Ingredients:
- Sprinkles
- Heart-shaped candies
- Edible glitter
Instructions
- Prepare the baking environment by heating the oven to 350F (175C), ensuring the 9×13-inch pan is lined with parchment paper and lightly greased to prevent sticking.
- Combine the flour, baking powder, and salt in a medium mixing bowl, whisking thoroughly to distribute ingredients evenly and eliminate potential lumps.
- Using an electric mixer, cream the butter and sugar together until the mixture becomes light, airy, and noticeably fluffy, which typically takes 2-3 minutes of consistent beating.
- Incorporate eggs individually into the butter-sugar mixture, blending completely after each addition, then mix in the vanilla extract to enhance the flavor profile.
- Gradually fold the dry ingredient mixture into the wet ingredients, alternating with milk and maintaining a gentle mixing technique to preserve the batter’s delicate texture.
- Introduce a few drops of red or pink gel food coloring, stirring carefully until the batter achieves a uniform, romantic hue that speaks to the Valentine’s Day theme.
- Transfer the colored batter into the prepared pan, spreading it evenly to ensure consistent baking, and place in the preheated oven.
- Bake for 20-25 minutes, monitoring the cake’s progress and testing for doneness by inserting a toothpick into the center – it should emerge clean and free of raw batter.
- Allow the cake to cool completely in the pan, which helps set the structure and makes cutting into mini cakes easier and more precise.
Notes
- Customize the color intensity by gradually adding food coloring, ensuring a vibrant yet subtle Valentine’s Day hue without overwhelming the cake’s delicate flavor.
- Swap whole milk for almond or oat milk to create a dairy-free version that maintains the cake’s rich, tender texture.
- Use silicone heart-shaped molds instead of a rectangular pan for adorable individual mini cakes that showcase romantic presentation.
- Prevent dry edges by checking the cake a few minutes early and removing from the oven when a toothpick comes out with minimal moist crumbs.
- Prep Time: 30 minutes
- Cook Time: 25 minutes
- Category: Desserts, Snacks
- Method: Baking
- Cuisine: American
Nutrition
- Serving Size: 12
- Calories: 360
- Sugar: 30 g
- Sodium: 180 mg
- Fat: 18 g
- Saturated Fat: 11 g
- Unsaturated Fat: 6 g
- Trans Fat: 0 g
- Carbohydrates: 45 g
- Fiber: 0 g
- Protein: 3 g
- Cholesterol: 55 mg
Jamie Granger
Recipe Developer & Food Writer
Expertise
Education
Culinary Institute of America
Jamie Granger turns ingredients into memories. With her recipes, she brings a fusion-forward flair to every creation.
Her dishes reflect the places she’s explored, the chefs she’s learned from, and the deep connection she has to food as a form of expression.
At Pass and Provision, Jamie develops recipes that balance flavor, health, and beauty, meals that don’t just satisfy your appetite but speak to your curiosity.