Double Chocolate Snowball Cookies Recipe for Scrumptious Bites
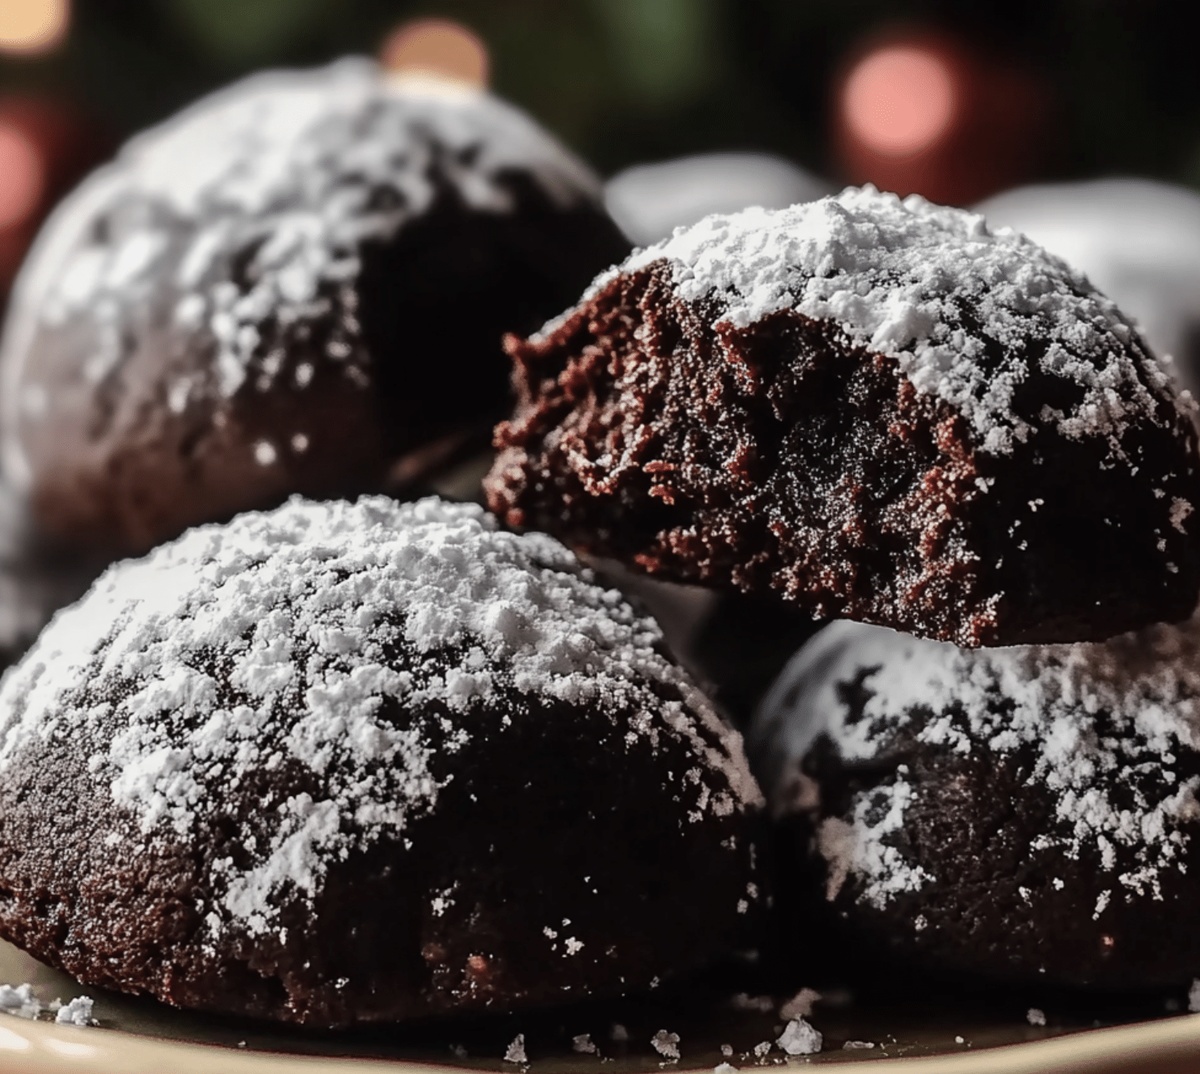
Soft, powdery double chocolate snowball cookies melt into a delightful winter treat that surprises everyone.
Cocoa-infused dough creates magical little rounds dusted with snowy sweetness.
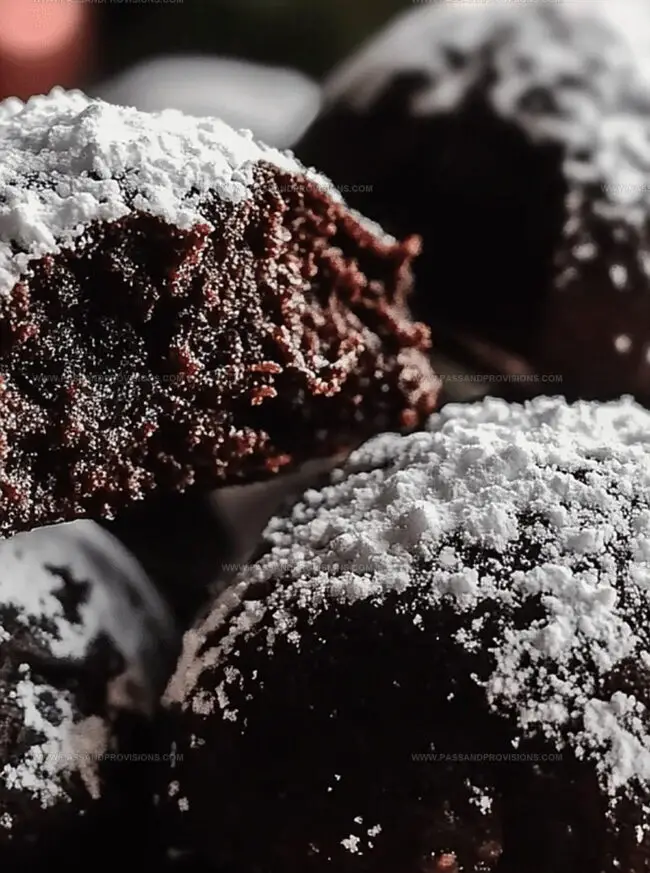
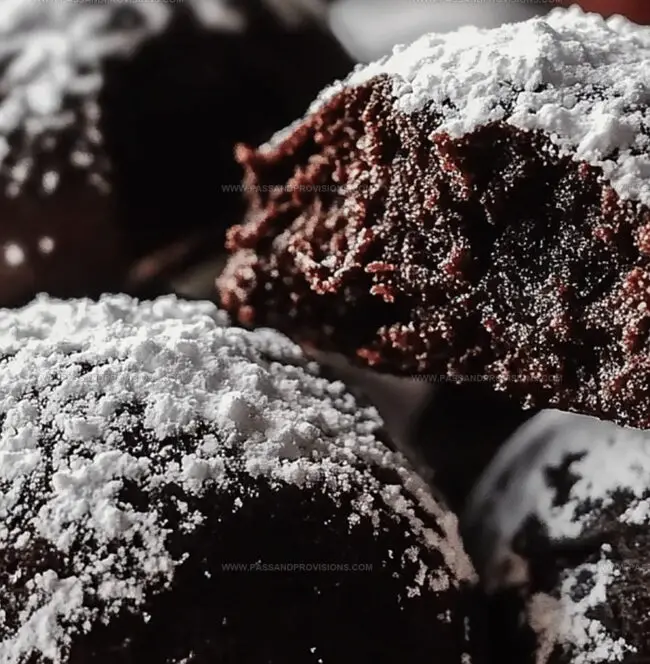
Crisp exterior gives way to rich, velvety centers that crumble gently.
Festive baking becomes an adventure with these charming confections.
Chocolate lovers will swoon over each delicate, sugar-coated bite.
Quick preparation makes these cookies perfect for spontaneous dessert cravings.
Dust off your mixing bowl and let deliciousness begin!
Why Double Chocolate Snowballs Are a Fun Treat
What You’ll Need for Snowball Cookies
Base Ingredients:Chocolate Components:Dry Ingredients:How to Mix, Roll, and Bake These Bites
Step 1: Whip Up Creamy Base
Blend butter and sugar in a spacious mixing bowl until super fluffy and light. Drizzle in vanilla extract and mix thoroughly until everything looks silky smooth.
Step 2: Blend Dry Ingredients
Grab another bowl and whisk flour, cocoa powder, and salt together. Slowly incorporate dry ingredients into butter mixture, stirring until perfectly combined. Gently fold chocolate chips throughout the dough.
Step 3: Chill Dough
Wrap dough completely and park it in refrigerator for half an hour. Cooling helps cookies maintain gorgeous shape during baking.
Step 4: Prepare Baking Setup
Warm oven to 350°F. Line baking sheet with parchment paper. Roll dough into adorable one-inch spheres, positioning them comfortably apart on sheet.
Step 5: Bake Cookies
Slide sheet into oven and bake for 10-12 minutes until cookies look wonderfully set.
Step 6: Sugar Coating Magic
Let cookies rest briefly. Roll warm cookies in powdered sugar. Once completely cooled, roll again for an extra luxurious snowy effect.
Tips for Powdered Sugar Without the Mess
Storage Hacks to Keep Them Soft Inside
What to Sip with Chocolate Snowballs
Flavor Options for These Little Rounds
Snowball Cookie FAQs
No, these double chocolate snowball cookies are beginner-friendly and require basic baking skills. The recipe has simple steps and minimal ingredients, making it easy for anyone to prepare.
Yes, you can substitute regular chocolate chips, but mini chocolate chips distribute more evenly throughout the dough and provide a more consistent chocolate flavor in each bite.
Chilling the dough helps prevent spreading during baking, ensures the cookies maintain their round shape, and allows the flavors to develop more deeply. It also makes the dough easier to handle when shaping the cookies.
The cookies are done when they appear set and have a slightly firm edge. They won’t look completely hard, but they should look dry and not look wet or soft in the center when you remove them from the oven.
Print
Double Chocolate Snowball Cookies Recipe
- Total Time: 27 minutes
- Yield: 24 1x
Description
Irresistible Double Chocolate Snowball Cookies bring winter magic to sweet treats with rich cocoa and powdered sugar perfection. Chocolate lovers will melt over these delicate, melt-in-mouth morsels that promise festive joy in each delightful bite.
Ingredients
Main Ingredients:
- 2 cups (250 g) all-purpose flour
- 1 cup (225 g) unsalted butter, softened
- ¾ cup (120 g) mini chocolate chips or finely chopped chocolate
Flavoring and Sweet Ingredients:
- ½ cup (100 g) granulated sugar
- 1 cup (120 g) powdered sugar, for coating
- 1 teaspoon vanilla extract
Dry Ingredients:
- ¼ cup (25 g) unsweetened cocoa powder
- ¼ teaspoon salt
Instructions
- Create a velvety base by thoroughly blending softened butter with powdered sugar until the mixture appears airy and pale, ensuring no lumps remain. Incorporate vanilla extract to enhance the aromatic profile.
- Sift together flour, cocoa powder, and salt in a separate vessel, ensuring a uniform dry mixture without clumps. Gradually introduce the dry ingredients into the butter mixture, stirring gently to maintain a smooth, consistent texture.
- Delicately fold mini chocolate chips into the dough, distributing them evenly throughout the mixture. Wrap the dough securely in plastic film and refrigerate for approximately 30 minutes to firm up the consistency and facilitate easier shaping.
- Heat the oven to 350F (175C) and prepare a baking sheet with parchment paper. Using gentle pressure, form the chilled dough into compact, uniform spheres approximately 1 inch in diameter.
- Arrange the dough balls strategically on the prepared baking sheet, maintaining adequate spacing to prevent merging during baking. Place in the preheated oven and bake for 10-12 minutes until the edges appear set and slightly firm.
- Remove the cookies and allow them to cool momentarily on the baking sheet. While still slightly warm, carefully coat each cookie in a generous layer of powdered sugar, ensuring complete coverage.
- Once the cookies have reached room temperature, perform a second rolling in powdered sugar to create a thick, snow-like exterior that completely conceals the chocolate base.
Notes
- Always use room temperature butter for smoother mixing and better cookie texture.
- Chill the dough for at least 30 minutes to prevent spreading and create a more compact cookie shape.
- Sift cocoa powder and flour to eliminate lumps and ensure a smooth, consistent dough.
- Roll cookies in powdered sugar while still slightly warm for better sugar adherence and a beautiful snow-like coating.
- Prep Time: 15 minutes
- Cook Time: 12 minutes
- Category: Desserts, Snacks
- Method: Baking
- Cuisine: American
Nutrition
- Serving Size: 24
- Calories: 166
- Sugar: 10 g
- Sodium: 58 mg
- Fat: 9 g
- Saturated Fat: 5 g
- Unsaturated Fat: 4 g
- Trans Fat: 0 g
- Carbohydrates: 20 g
- Fiber: 1 g
- Protein: 2 g
- Cholesterol: 30 mg
Jamie Granger
Recipe Developer & Food Writer
Expertise
Education
Culinary Institute of America
Jamie Granger turns ingredients into memories. With her recipes, she brings a fusion-forward flair to every creation.
Her dishes reflect the places she’s explored, the chefs she’s learned from, and the deep connection she has to food as a form of expression.
At Pass and Provision, Jamie develops recipes that balance flavor, health, and beauty, meals that don’t just satisfy your appetite but speak to your curiosity.