
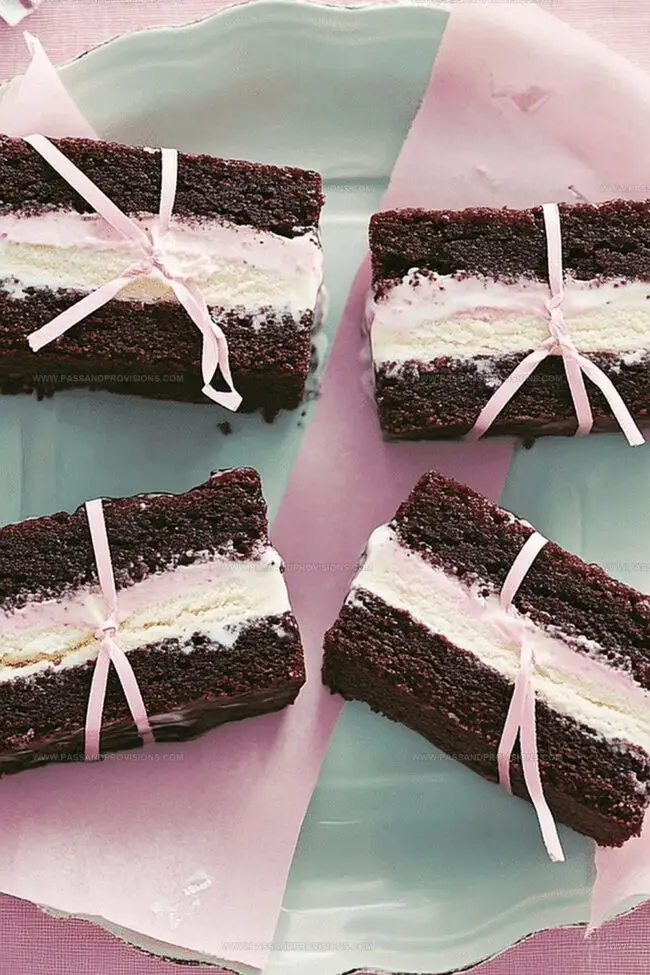
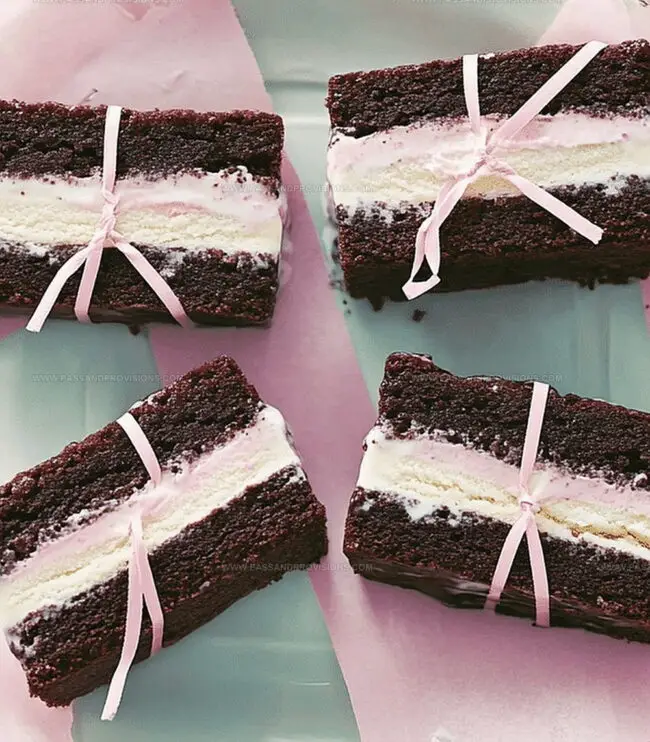
Perfect Chewy Brownie Ice Cream Sandwiches Recipe for Sweet Joy
My recent obsession with chewy brownie ice cream sandwiches sparked a delightful kitchen adventure that changed dessert expectations forever.
Chocolate dreams merged with creamy possibilities on a lazy afternoon experiment.
Sweet memories of childhood treats danced through my mind as ingredients began calling.
Soft, rich brownies promised the perfect canvas for cool, dreamy filling.
Rich chocolate layers would sandwich velvety ice cream between decadent, fudgy panels.
Unexpected texture contrasts make these treats irresistibly fun and playful.
You’ll want to grab your mixing bowl and dive into this delicious creation right now.
Why Brownie Ice Cream Sandwiches Hit the Spot
What’s Inside These Chewy Ice Cream Treats
Main Ingredients:
Brownie Base:Ice Cream Filling:Optional Additions:How to Assemble Brownie Ice Cream Sandwiches
Step 1: Warm Up the Oven
Crank the oven to 350F (175C). Grab a square baking pan and line it with parchment paper, letting the edges hang over for easy lifting.
Step 2: Create Brownie Magic
In a mixing bowl, blend together:Whisk until silky smooth.
Crack in an egg and splash of vanilla extract. Mix thoroughly.
Fold in flour and salt, stirring just until combined. Keep it light and avoid overmixing.
Step 3: Bake the Brownie Base
Spread the batter evenly across the pan- it’ll look thin, but that’s perfect.
Slide into the oven and bake for 10-12 minutes. You want it set but still soft.
Let the brownie cool completely right in the pan.
Step 4: Shape the Brownie Layers
Lift the cooled brownie out using the parchment edges.
Slice the brownie precisely in half to create two matching layers.
Step 5: Layer with Creamy Goodness
Allow ice cream to soften for a few minutes at room temperature.
Spread the ice cream generously over one brownie layer.
Gently position the second brownie layer on top, pressing down lightly.
Step 6: Freeze and Set
Wrap the entire sandwich tightly in plastic wrap or foil.
Freeze for at least 2 hours until completely solid.
Step 7: Slice and Enjoy
Unwrap the frozen treat.
Use a sharp knife to cut into individual servings.
Serve immediately or keep stored in the freezer for a cool surprise later.
Tips for Freezing Without the Mess
Store Brownie Sandwiches
What to Pair with These Frozen Treats
Flavor Variations You’ll Want to Try
Brownie Ice Cream Sandwich FAQs
Yes, you can use a boxed brownie mix or your favorite homemade brownie recipe. Just ensure the brownie layer is thin and bakes quickly.
Classic flavors like vanilla, chocolate, or coffee work great. Feel free to experiment with more adventurous options like mint chocolate chip or salted caramel.
Work quickly and keep the ice cream cold. If it starts to melt, pop it back in the freezer for a few minutes to firm up before continuing.
Absolutely! Simply substitute the all-purpose flour with a gluten-free flour blend or almond flour to create a gluten-free version of these ice cream sandwiches.
Print
Chewy Brownie Ice Cream Sandwiches Recipe
- Total Time: 27 minutes
- Yield: 4 1x
Description
Indulgent chocolate magic happens when classic Chewy Brownie Ice Cream Sandwiches unite rich fudgy layers with creamy frozen delight. Cold sweetness meets warm nostalgia, promising delicious comfort in each perfectly crafted bite you’ll savor.
Ingredients
Main Ingredients (Brownie Layers):
- ¾ cup (150g) granulated sugar
- ½ cup (115g) unsalted butter, melted
- ⅓ cup (35g) cocoa powder (unsweetened)
- ½ cup (65g) all-purpose flour
- 1 large egg
Flavor Enhancers:
- 1 teaspoon vanilla extract
- ¼ teaspoon salt
Ice Cream:
- 1 pint (475 milliliters) of your favorite ice cream (vanilla, chocolate, or any flavor of choice)
Instructions
- Prepare the baking environment by heating the oven to 350F (175C) and lining a square pan with parchment paper, ensuring excess paper hangs over the edges for easy removal.
- Create a silky brownie base by combining melted butter, sugar, and cocoa powder in a mixing bowl, whisking until the mixture achieves a glossy, uniform consistency.
- Incorporate the egg and vanilla extract into the chocolate mixture, stirring vigorously to ensure complete integration of ingredients.
- Gently fold in flour and salt, mixing minimally to prevent toughening the batter – subtle incorporation is key.
- Distribute the batter evenly across the prepared pan, maintaining a thin, uniform layer that will create a delicate brownie foundation.
- Bake the brownie layer for 10-12 minutes, aiming for a soft, barely set texture that promises a chewy final product.
- Allow the brownie to cool completely within the pan, providing a stable base for the upcoming assembly.
- Carefully extract the cooled brownie using the parchment paper overhang and slice horizontally into two precise layers.
- Soften the ice cream briefly at room temperature to achieve a spreadable consistency without complete melting.
- Apply the softened ice cream across one brownie layer, using a spatula to create a smooth, even surface.
- Gently position the second brownie layer atop the ice cream, applying light pressure to secure the sandwich.
- Wrap the assembled treat tightly in protective covering and transfer to the freezer for minimum two hours of firming.
- When ready to serve, unwrap and slice into individual portions using a sharp knife, creating clean, appetizing segments.
Notes
- Softening ice cream at room temperature helps create a smooth, even layer without tearing the delicate brownie base.
- Use high-quality cocoa powder and vanilla extract for richer, more intense flavor in the brownies.
- Avoid overmixing the brownie batter to maintain a tender, chewy texture that doesn’t become tough.
- For dietary variations, swap regular ice cream with dairy-free alternatives like coconut or almond milk-based options to accommodate lactose-intolerant or vegan preferences.
- Prep Time: 15 minutes
- Cook Time: 12 minutes
- Category: Desserts, Snacks
- Method: Baking
- Cuisine: American
Nutrition
- Serving Size: 4
- Calories: 400
- Sugar: 28g
- Sodium: 150mg
- Fat: 20g
- Saturated Fat: 12g
- Unsaturated Fat: 8g
- Trans Fat: 0g
- Carbohydrates: 50g
- Fiber: 1g
- Protein: 4g
- Cholesterol: 60mg
Jamie Granger
Recipe Developer & Food Writer
Expertise
Education
Culinary Institute of America
Jamie Granger turns ingredients into memories. With her recipes, she brings a fusion-forward flair to every creation.
Her dishes reflect the places she’s explored, the chefs she’s learned from, and the deep connection she has to food as a form of expression.
At Pass and Provision, Jamie develops recipes that balance flavor, health, and beauty, meals that don’t just satisfy your appetite but speak to your curiosity.