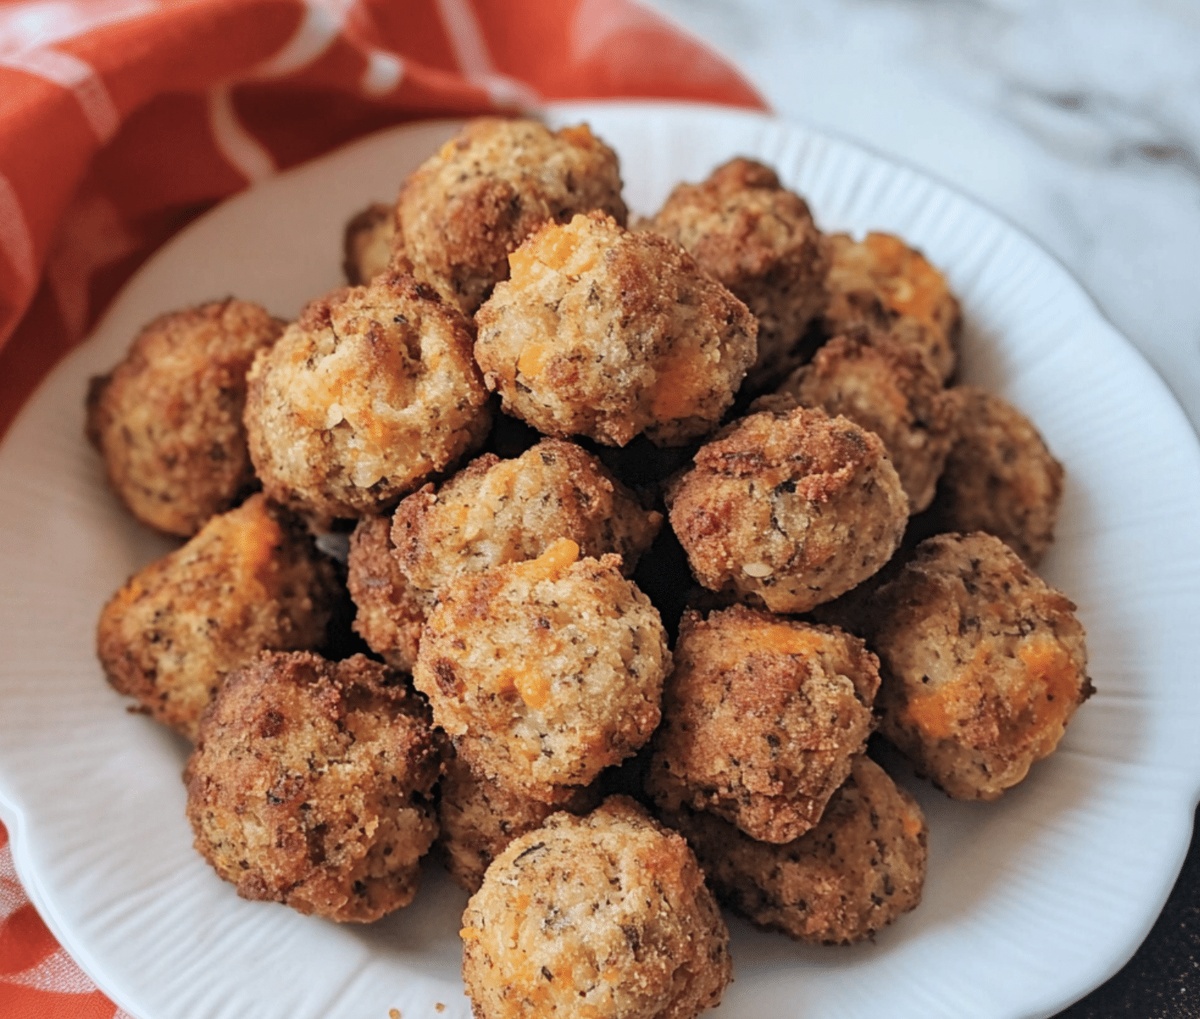
Cheddar Bay Sausage Balls Recipe for Savory Snacking
Crafting delectable cheddar bay sausage balls always brings a spark of culinary excitement to any gathering.
Cheesy delights packed with savory goodness promise to tantalize taste buds at first bite.
Hearty bites of pure comfort emerge from simple ingredients blended with care.
Rustic appetizers like these connect us to warm kitchen memories and shared laughter.
Southern-inspired snacks carry a magical ability to create instant smiles around the table.
Each morsel delivers a burst of flavor that beckons hungry guests for seconds.
You’ll want to savor every crispy, cheesy moment of this irresistible recipe.
Dive right in and let the deliciousness begin!
Why You’ll Crave These Cheddar Bay Sausage Balls Again
Cheddar Bay Sausage Balls Ingredient Essentials
Meat Protein:Cheese Component:Dry Mix Ingredients:Liquid Binders:Finishing Ingredients:Preparing Cheddar Bay Sausage Balls in Minutes
Step 1: Prep the Oven
Crank up the oven to 375°F. Grab a baking sheet and line it with parchment paper or a silicone mat.
Step 2: Mix the Base
In a large bowl, toss together:Use your hands or a sturdy spoon to blend everything thoroughly.
Step 3: Bind the Mixture
Pour in milk and continue mixing until the ingredients form a cohesive dough that sticks together easily.
Step 4: Shape the Bites
Roll the mixture into small balls, each about the size of a golf ball. Arrange them on the prepared baking sheet, leaving a small gap between each bite.
Step 5: Bake to Golden Perfection
Slide the baking sheet into the oven and bake for 18-20 minutes. Look for a beautiful golden-brown color and ensure the sausage is fully cooked.
Step 6: Create Flavor Boost
While the bites are baking, whisk melted butter with Old Bay seasoning for an extra kick of flavor.
Step 7: Final Touch
Once out of the oven, gently brush the hot bites with the seasoned butter to enhance their taste.
Step 8: Serve and Enjoy
Plate these delectable bites while they’re warm. Offer dipping sauces like ranch, honey mustard, or marinara for an extra treat.
Pro Tips for the Best Cheddar Bay Sausage Balls
Storage Hacks for Cheddar Bay Sausage Balls
What Matches Well With Cheddar Bay Sausage Balls
Fresh Takes on Cheddar Bay Sausage Balls
Cheddar Bay Sausage Balls Questions Covered
Yes, you can freeze these sausage balls before or after baking. Wrap them tightly in plastic wrap or store in an airtight container for up to 3 months. Thaw overnight in the refrigerator and reheat in the oven.
Absolutely! You can substitute the sausage with ground turkey, chicken, or even a spicy varieties like spicy Italian sausage to change up the flavor profile.
You can replace Bisquick with a gluten-free baking mix or a combination of gluten-free flour, baking powder, and salt to achieve a similar texture.
Use full-fat sausage and cheese, and don’t overmix the ingredients. The milk helps keep them moist, and avoid overbaking by checking them at the 18-minute mark.
Print
Cheddar Bay Sausage Balls Recipe
- Total Time: 30 minutes
- Yield: 24 1x
Description
Cheesy Cheddar Bay Sausage Balls bring Southern comfort to your party snack lineup with irresistible flavor. Packed with bold cheddar, zesty sausage, and herbal notes, you’ll crave these addictive bites that vanish quickly from any gathering.
Ingredients
Main Ingredients:
- 1 lb (450 g) breakfast sausage
- 2 cups (200 g) shredded sharp cheddar cheese
- 1 ¼ cups (150 g) Bisquick or another baking mix
- ¼ cup (60 ml) whole milk
- 2 tablespoons butter, melted
Seasoning Ingredients:
- 1 teaspoon garlic powder
- ½ teaspoon onion powder
- 1 teaspoon dried parsley
- ½ teaspoon Old Bay seasoning or another seafood seasoning (optional)
Instructions
- Prepare the oven environment by heating to 375F (190C) and lining a baking sheet with parchment paper or silicone mat.
- Combine sausage, cheddar cheese, Bisquick, garlic powder, onion powder, and parsley in a large mixing bowl, using hands or a robust utensil to thoroughly incorporate all ingredients.
- Gradually introduce milk to the mixture, blending until the components form a cohesive dough that maintains its structural integrity.
- Craft uniform spherical portions, approximately 1-inch in diameter, arranging them methodically on the prepared baking surface with minimal spacing between each morsel.
- Transfer the baking sheet to the preheated oven, allowing the sausage balls to transform into golden-hued delicacies over 18-20 minutes, ensuring complete internal cooking.
- Simultaneously, craft a complementary butter glaze by melding melted butter with Old Bay seasoning, creating a flavor-enhancing coating.
- Upon removal from the oven, delicately brush the piping-hot sausage balls with the seasoned butter, imparting an additional layer of culinary complexity.
- Present these savory spheres while warm, ideal as a versatile culinary offering accompanied by preferred dipping sauces like ranch dressing, honey mustard, or marinara.
Notes
- Swap out pork sausage for turkey or chicken sausage to create a lighter, leaner version that’s perfect for health-conscious eaters.
- Experiment with different cheese varieties like pepper jack or smoked gouda to add unique flavor profiles and keep the recipe exciting.
- Create a gluten-free option by substituting Bisquick with a gluten-free baking mix or almond flour for those with dietary restrictions.
- Make ahead and freeze uncooked sausage balls for up to a month, allowing you to have a quick appetizer ready anytime unexpected guests arrive.
- Prep Time: 10 minutes
- Cook Time: 20 minutes
- Category: Snacks, Appetizer
- Method: Baking
- Cuisine: American
Nutrition
- Serving Size: 24
- Calories: 150
- Sugar: 0 g
- Sodium: 420 mg
- Fat: 10 g
- Saturated Fat: 4 g
- Unsaturated Fat: 6 g
- Trans Fat: 0 g
- Carbohydrates: 8 g
- Fiber: 0 g
- Protein: 7 g
- Cholesterol: 30 mg
Jamie Granger
Recipe Developer & Food Writer
Expertise
Education
Culinary Institute of America
Jamie Granger turns ingredients into memories. With her recipes, she brings a fusion-forward flair to every creation.
Her dishes reflect the places she’s explored, the chefs she’s learned from, and the deep connection she has to food as a form of expression.
At Pass and Provision, Jamie develops recipes that balance flavor, health, and beauty, meals that don’t just satisfy your appetite but speak to your curiosity.