Sizzling Roadhouse Rattlesnake Bites Recipe: Bold Flavor Kicks!
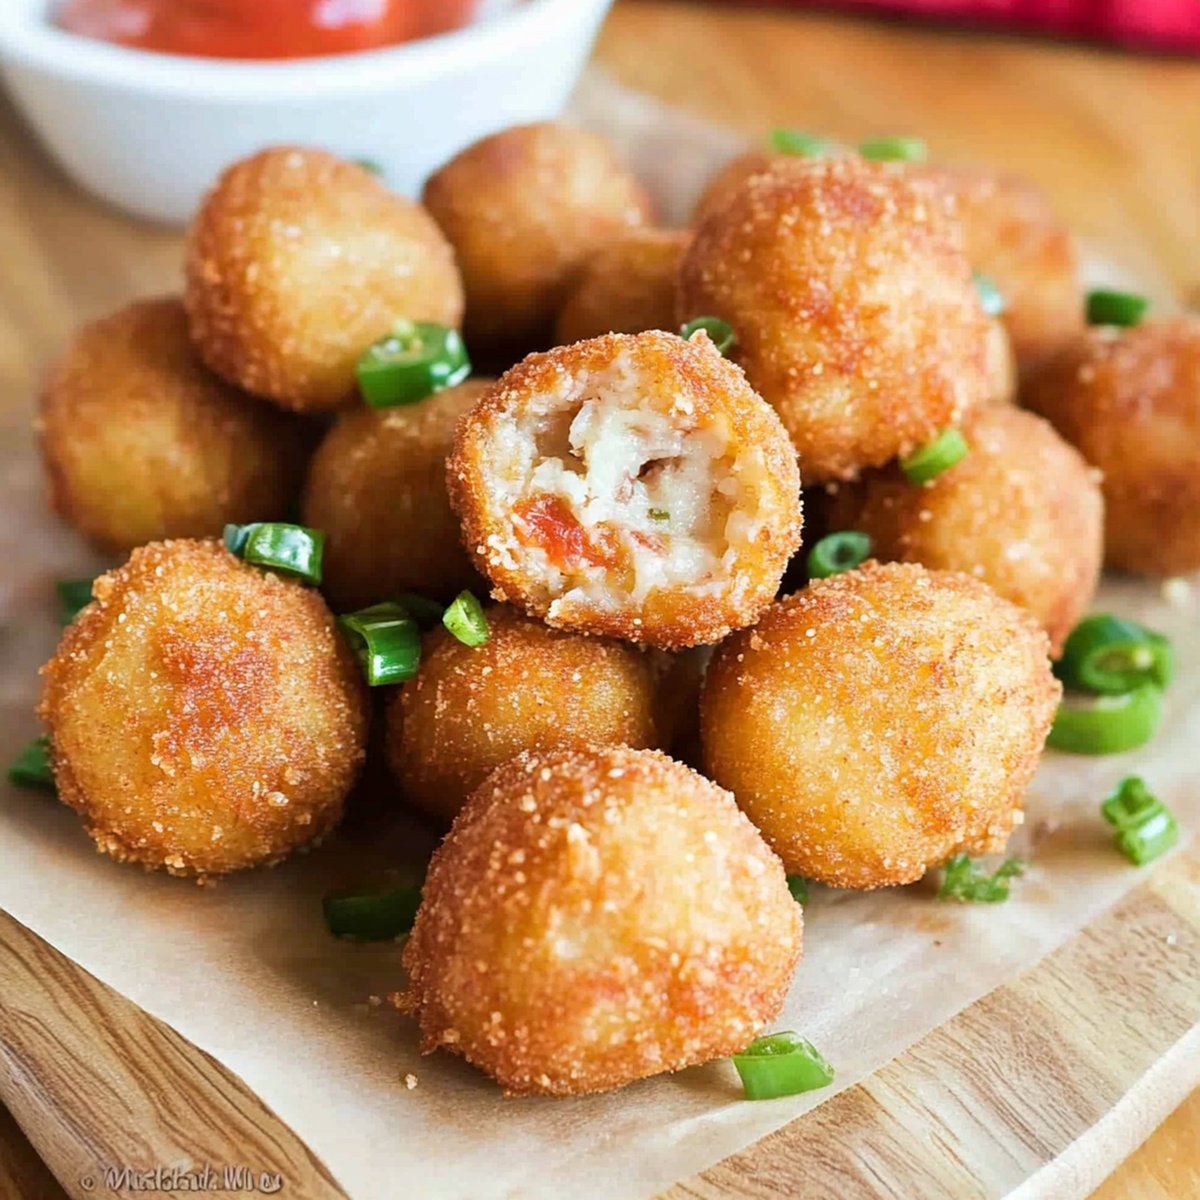
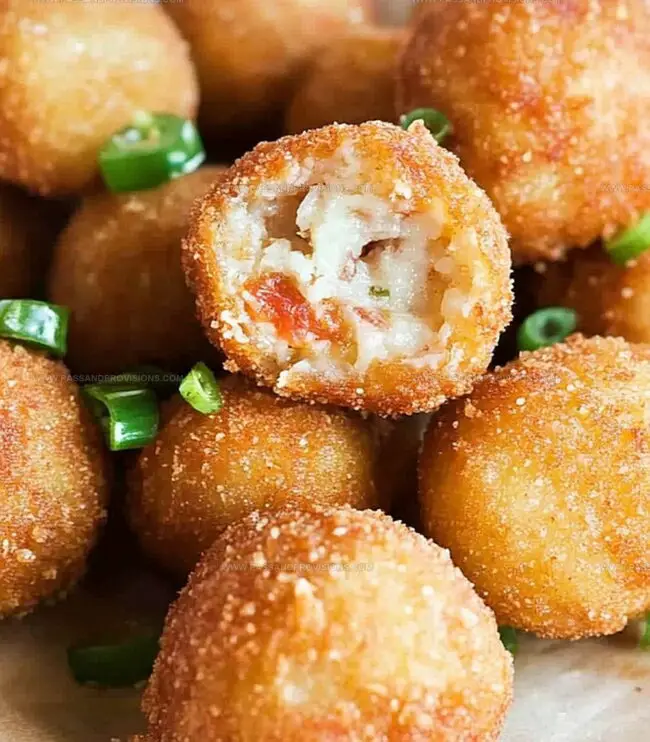
Crispy, golden-brown appetizers bursting with a zesty roadhouse rattlesnake bites flavor pack an incredible punch of heat and crunch.
These delectable morsels deliver a spicy kick that’ll make taste buds dance with excitement.
Jalapeños and cheese blend seamlessly inside a perfectly crisp exterior, creating an irresistible snack.
Each bite promises a delightful combination of textures and bold flavors that seriously impress.
The recipe transforms simple ingredients into an addictive treat guaranteed to wow guests at any gathering.
Casual or fancy, these roadhouse bites work magic as a crowd-pleasing starter that keeps everyone coming back for more.
Prepare to elevate your appetizer game with this mouthwatering crowd-pleaser.
Quick Recipe Overview

Ingredients in Texas Roadhouse Rattlesnake Bites
For Cheese Base:For Breading Components:For Frying and Serving:Kitchen Gear to Make Rattlesnake Bites Easy
How to Fry Up Copycat Rattlesnake Bites
Blend Monterey Jack and Cheddar cheeses with chopped jalapeños into small spheres. Quickly freeze to maintain shape during cooking.
Arrange three separate bowls with flour, whisked eggs and milk, and seasoned breadcrumbs for dredging.
Roll frozen cheese orbs through flour, egg wash, and breadcrumb mixture. Double-coat for extra crunch. Return to freezer briefly.
Heat oil in deep pan until shimmering. Carefully drop breaded bites and fry until deep golden brown, roughly 2-3 minutes.
Transfer crispy bites to paper towels to remove excess oil. Whisk ranch with hot sauce for zesty accompaniment.
Present hot, melty bites with spicy ranch on the side. Enjoy while cheese remains gooey and coating stays crunchy.
Pro Tip: For healthier version, bake at 400°F for 10-12 minutes. Consider adding crumbled bacon for extra flavor punch.
Add Some Heat or Cheese to the Mix
Serve Rattlesnake Bites as Bold Party Food
Storage Tips for Bites That Don’t Go Soggy
Print
Spicy Roadhouse Rattlesnake Bites Recipe
- Total Time: 1 hour 15 minutes
- Yield: 7 1x
Description
Spicy Texas Roadhouse Rattlesnake Bites deliver a crispy, cheesy jalapeño popper experience that ignites appetizer excitement. Crisp golden breading and melted pepper jack cheese create an irresistible snack perfect for game day or casual gatherings you’ll crave again and again.
Ingredients
- 1 cup Monterey Jack cheese, shredded
- 1 cup Cheddar cheese, shredded
- 23 jalapenos, finely chopped (remove seeds for less heat)
- 2 large eggs
- 1 cup all-purpose flour
- 1 cup breadcrumbs (Panko for extra crunch)
- 2 tbsps milk
- 1 tsp garlic powder
- 1 tsp paprika
- ½ tsp salt
- ½ tsp black pepper
- Vegetable oil, for frying
- ½ cup ranch dressing
- 1 tbsp hot sauce (optional, for extra heat)
Instructions
- Cheese Blend: Meticulously combine Monterey Jack and Cheddar cheeses with finely diced jalapeños, forming compact spherical morsels. Quick-freeze these cheese orbs to maintain structural integrity during cooking.
- Breading Technique: Establish three distinct coating zones – seasoned flour, whisked egg-milk fusion, and spiced breadcrumb mixture enhanced with garlic powder, paprika, salt, and black pepper. Systematically roll each cheese ball through these stations, ensuring comprehensive coverage.
- Double-Coating Method: Execute a precise double-dredging process, immersing cheese spheres first in egg mixture, then generously coating with seasoned breadcrumbs. Return breaded morsels to freezer for additional firming.
- Thermal Transformation: Submerge prepared bites into vegetable oil heated precisely to 175°C, maintaining consistent temperature. Fry until achieving a radiant golden-brown exterior, approximately 2-3 minutes per batch. Strategically drain excess oil using absorbent paper.
- Complementary Sauce: Craft a zesty accompaniment by blending ranch dressing with optional hot sauce, creating a dynamic flavor profile that elevates the crispy bites.
- Presentation: Serve immediately while cheese remains molten and exterior maintains optimal crispness. Optional alternative: Bake at 200°C for 10-12 minutes for a lighter preparation method.
Notes
- Chilling cheese balls before breading prevents them from melting during frying, ensuring a perfect crispy exterior and gooey cheese center.
- Repeat egg and breadcrumb coating for an extra thick, golden-brown crust that stays crisp longer and delivers maximum crunchiness.
- Maintain consistent 175°C (350°F) oil heat to prevent soggy or burnt bites; use a thermometer for precise temperature control.
- Prepare breaded cheese balls in advance and freeze, then fry directly from frozen for convenient entertaining or quick snacks.
- Prep Time: 15 minutes
- Cook Time: 1 hour
- Category: Appetizer, Snacks
- Method: Frying
- Cuisine: American
Nutrition
- Serving Size: 7
- Calories: 310
- Sugar: 2 g
- Sodium: 600 mg
- Fat: 20 g
- Saturated Fat: 8 g
- Unsaturated Fat: 10 g
- Trans Fat: 0 g
- Carbohydrates: 25 g
- Fiber: 1 g
- Protein: 10 g
- Cholesterol: 70 mg
William Hawkins
Founder & Culinary Director
Expertise
Education
Sullivan University, Louisville, KY
William Hawkins isn’t just a chef, he’s a storyteller through food. From his hometown of Louisville, KY, he’s spent years refining his craft, turning local ingredients into something extraordinary.
With classical training from Sullivan University and a career marked by innovation, mentorship, and Southern soul, William approaches every recipe with purpose. His kitchen is where old techniques meet fresh ideas, and where comfort food gets a thoughtful, modern twist.
When he’s not building dishes from the ground up, he’s out gathering inspiration from nature, markets, and the stories people share around the table.