
Velvety Dream: Silky Peanut Butter Cup Pie Recipe
Decadent chocolate and creamy peanut butter create magic in this silky peanut butter cup pie that melts hearts with every bite.
Rich layers of smooth filling promise pure indulgence for dessert enthusiasts.
The combination of chocolate and peanut butter delivers an irresistible flavor profile that beckons from the plate.
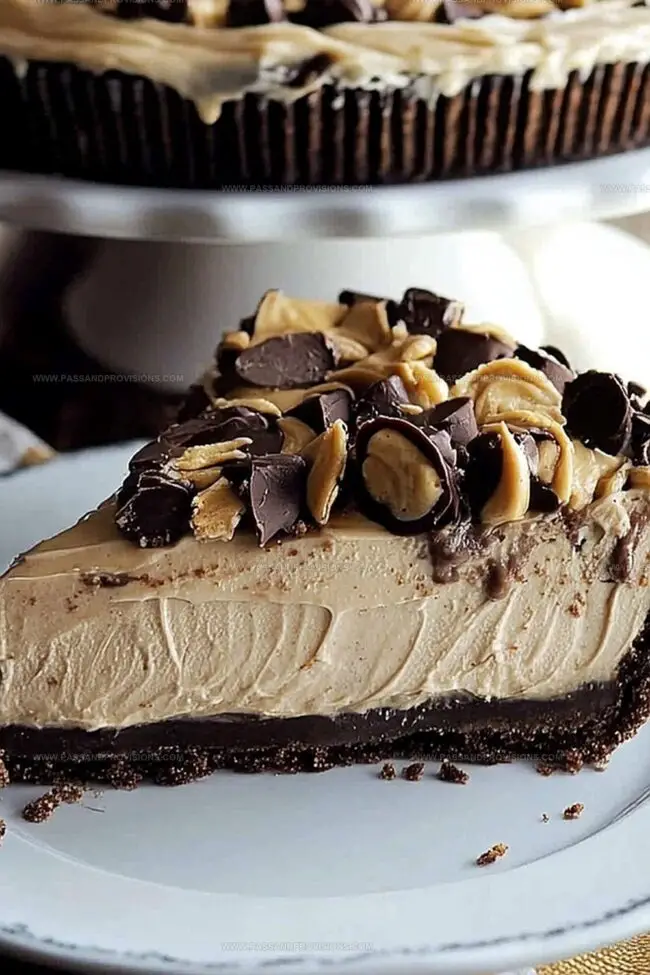
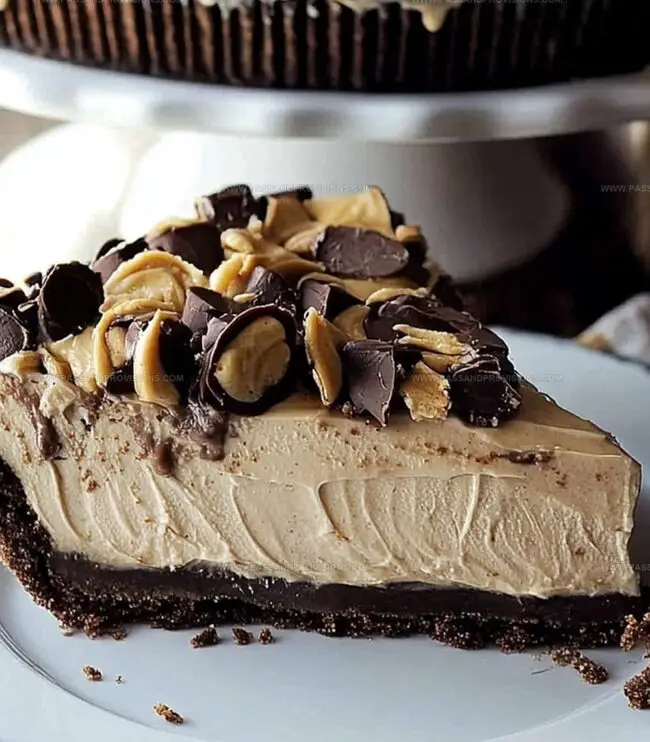
Chocolate cookie crust provides a delightful crunch beneath the velvety center.
Each slice reveals delicate swirls of chocolate and peanut butter, blending into a luxurious dessert experience.
Chocolate lovers and peanut butter fans will discover their ultimate sweet escape in this simple yet extraordinary pie.
Treat yourself to a slice of pure deliciousness that’s sure to become a cherished recipe.
Quick Recipe Overview
Ingredients in No-Bake Peanut Butter Cup Pie
For Crust:For Filling Base:For Topping and Garnish:Supplies Needed for No-Bake Peanut Butter Cup Pie
How to Assemble No-Bake Peanut Butter Cup Pie
Pulverize the cookies into fine crumbs using a food processor or rolling pin. Blend thoroughly with melted butter and press firmly into a pie dish, covering bottom and sides. Chill in refrigerator while preparing filling.
Blend peanut butter, cream cheese, powdered sugar, and vanilla until silky smooth. Separately whip heavy cream until peaks form. Gently fold whipped cream into peanut butter mixture creating a light, airy texture.
Transfer the fluffy filling into chilled crust, spreading evenly across surface. Sprinkle chopped peanut butter cups generously on top. Optional: Drizzle chocolate sauce for extra indulgence.
Refrigerate pie for minimum 4 hours, preferably overnight. This allows filling to firm and flavors to meld together completely.
Before serving, garnish with additional whipped cream and peanut butter cup pieces. Slice and savor each creamy, chocolatey bite.
Sweet Tips for No-Bake Peanut Butter Cup Pie Fans
Serving No-Bake Peanut Butter Cup Pie with Style
Keeping No-Bake Peanut Butter Cup Pie Fresh
Print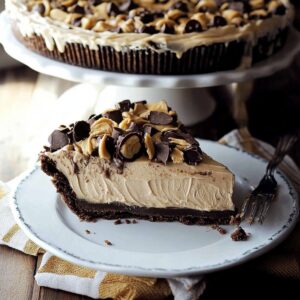
Silky Peanut Butter Cup Pie Recipe
- Total Time: 4 hours 20 minutes
- Yield: 9 1x
Description
Indulgent chocolate and peanut butter cup pie delivers a creamy, rich dessert without baking. Chocolate graham cracker crust and silky filling create a perfect balance of flavors you’ll savor to the last delicious bite.
Ingredients
- 24 Oreo cookies (or chocolate sandwich cookies), finely crushed
- 6 tbsps (90 ml) unsalted butter, melted
- 1 cup (250 g) creamy peanut butter
- 8 oz (225 g) cream cheese, softened
- 1 cup (120 g) powdered sugar
- 1 tsp (5 ml) vanilla extract
- 1 ½ cups (360 ml) whipped topping (like Cool Whip) or whipped cream
- 2 cups mini peanut butter cups, chopped (1 cup for filling, 1 cup for topping)
- ½ cup (90 g) chocolate chips, melted (optional drizzle)
- Whipped topping (optional for garnish)
Instructions
- Crust Preparation: Pulverize Oreo cookies into fine crumbs, blending them with melted butter to form a cohesive mixture. Press the crumb blend uniformly across the bottom and edges of a 9-inch pie dish, creating a compact base.
- Chill Foundation: Refrigerate the prepared crust while assembling the filling, allowing it to set and firm up.
- Filling Fusion: In a mixing bowl, cream peanut butter, cream cheese, powdered sugar, and vanilla extract until achieving a luxuriously smooth consistency. Separately whip heavy cream to stiff peaks, then gently fold into the peanut butter mixture to maintain its airy texture.
- Assembly and Decoration: Pour the creamy filling into the chilled crust, spreading it evenly. Adorn the surface with chopped peanut butter cups, creating an enticing visual layer.
- Finishing Touches: Optionally drizzle chocolate syrup or melted chocolate across the pie for added decadence. Refrigerate for a minimum of 4 hours, or ideally overnight, to allow complete setting and flavor development.
- Serving Presentation: Before serving, garnish with an additional dollop of whipped cream and scattered peanut butter cup fragments to elevate the indulgence factor.
Notes
- Master Cookie Crumbling: Ensure Oreo cookies are finely ground for a uniform, compact crust that holds together perfectly without crumbling.
- Prevent Filling Deflation: Fold whipped cream gently into peanut butter mixture to maintain maximum airiness and prevent density.
- Chill for Perfection: Allow pie to set minimum 4 hours or overnight for optimal texture and flavor development, helping ingredients bind smoothly.
- Dairy-Free Adaptation: Substitute cream cheese with coconut cream and use vegan peanut butter cups for a plant-based version of this decadent dessert.
- Prep Time: 20 minutes
- Cook Time: 4 hours
- Category: Desserts, Snacks
- Method: None
- Cuisine: American
Nutrition
- Serving Size: 9
- Calories: 440
- Sugar: 28 g
- Sodium: 360 mg
- Fat: 27 g
- Saturated Fat: 12 g
- Unsaturated Fat: 15 g
- Trans Fat: 0 g
- Carbohydrates: 43 g
- Fiber: 2 g
- Protein: 7 g
- Cholesterol: 30 mg
William Hawkins
Founder & Culinary Director
Expertise
Education
Sullivan University, Louisville, KY
William Hawkins isn’t just a chef, he’s a storyteller through food. From his hometown of Louisville, KY, he’s spent years refining his craft, turning local ingredients into something extraordinary.
With classical training from Sullivan University and a career marked by innovation, mentorship, and Southern soul, William approaches every recipe with purpose. His kitchen is where old techniques meet fresh ideas, and where comfort food gets a thoughtful, modern twist.
When he’s not building dishes from the ground up, he’s out gathering inspiration from nature, markets, and the stories people share around the table.