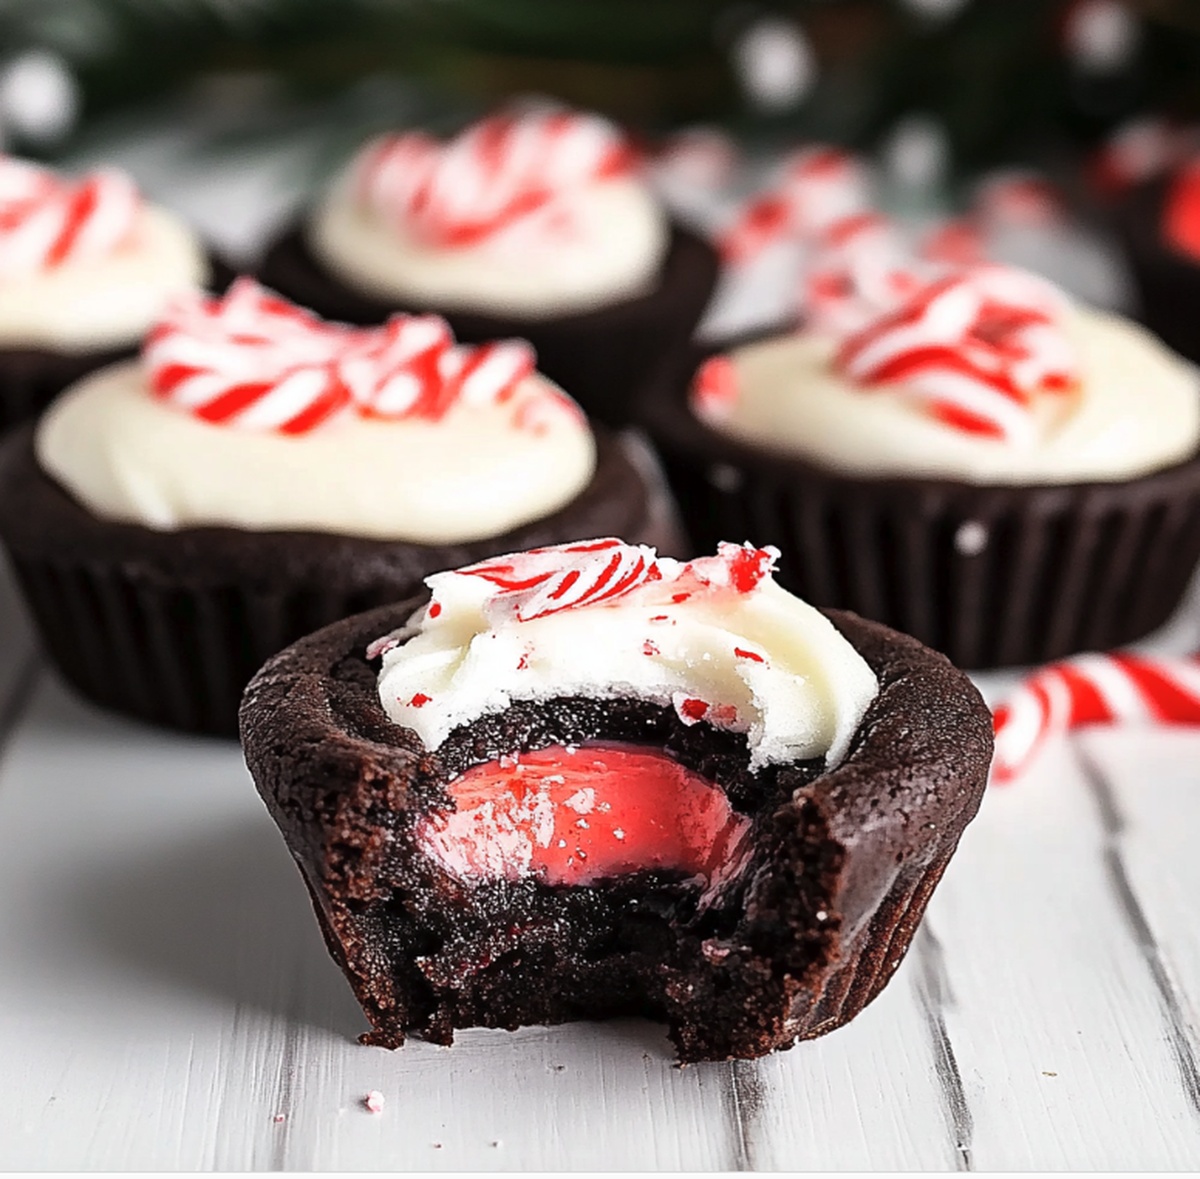
Joyful Chocolate Peppermint Cookie Cups Recipe for the Holidays
Decadent holiday treats always spark joy during the season, and these chocolate peppermint cookie cups bring pure magic to your dessert table.
Sweet memories dance through rich chocolate and cool peppermint flavors that blend perfectly in every bite.
Delicate cookie shells cradle a creamy filling that melts on your tongue with festive cheer.
Each batch creates a delightful experience of texture and taste that celebrates winter’s most beloved flavor combination.
Peppermint adds a refreshing twist to classic chocolate, making these cookie cups an irresistible centerpiece for any gathering.
The combination of crisp cookies and smooth chocolate promises a delectable experience you won’t want to miss.
Prepare to wow everyone with these elegant, crowd-pleasing holiday delights.
Quick Recipe Overview
What You’ll Need for Peppermint Cookie Cups
For Base:For Sweeteners and Moisture:For Flavor and Filling:Tools That Help Shape and Bake Cookie Cups
How to Make Peppermint Cookie Cups at Home
Crank the oven to a toasty 350F. Give your mini muffin tin a quick spray of nonstick magic.
Blend butter and sugars until they’re cloud-like and fluffy. Splash in egg and flavor extracts, stirring until perfectly combined. Gently fold in dry ingredients, creating a rich chocolate dough.
Roll dough into bite-sized balls, nestling each into muffin wells. Pop in the oven for 8-10 minutes until edges look set.
Fresh out of the oven, use a spoon to gently press centers, forming adorable little cups. Let them rest briefly before moving to a cooling rack.
Melt chocolate and cream together in short bursts, stirring until silky smooth. Add a hint of peppermint for extra pizzazz.
Drizzle molten chocolate into each cookie cup. Sprinkle crushed candy canes on top while still warm for a festive touch.
Let chocolate set at room temperature or speed things up in the fridge. Serve these delightful treats and watch everyone smile.
Flavor Combos That Work With Chocolate and Mint
Serve Cookie Cups for a Festive Gathering
Keep Your Cookie Cups Crisp on the Outside
Print
Festive Chocolate Peppermint Cookie Cups Recipe
- Total Time: 30 minutes
- Yield: 25 1x
Description
Sweet holiday magic shines through chocolate peppermint cookie cups, nestled with creamy peppermint filling and dark chocolate drizzle. Festive dessert lovers will savor each rich, minty bite of this delightful seasonal treat.
Ingredients
- ½ oz semi-sweet or dark chocolate chips
- ¼ cup (60 ml) heavy cream
- ½ teaspoon peppermint extract
- 1 ¼ cups (156 g) all-purpose flour
- ⅓ cup (40 g) unsweetened cocoa powder
- ½ cup (113 g) unsalted butter, softened
- ½ cup (100 g) granulated sugar
- ¼ cup (50 g) brown sugar
- 1 large egg
- 1 teaspoon vanilla extract
- ½ teaspoon peppermint extract
- ½ teaspoon baking soda
- ¼ teaspoon salt
- Crushed candy canes or peppermint candies
Instructions
- Preparation: Warm the oven to 350F (175C) and coat a mini muffin tin with nonstick spray.
- Cookie Dough Creation: Blend butter, sugars until fluffy. Incorporate egg and extracts. Fold in dry ingredients gradually, forming a cohesive dough.
- Shaping and Initial Baking: Form dough into small spheres, nestling each into muffin wells. Bake until edges firm, approximately 8-10 minutes.
- Well Formation: Immediately after removing from oven, gently press a small indentation into each warm cookie using a teaspoon. Allow to cool briefly in the pan before transferring to a cooling rack.
- Chocolate Filling Preparation: Melt chocolate chips with cream in microwave, stirring between short intervals. Integrate peppermint extract into the smooth mixture.
- Final Assembly: Carefully fill each cookie cup’s center with the chocolate mixture. Sprinkle crushed candy canes over the warm filling for decorative crunch.
- Setting and Serving: Let cookie cups rest at room temperature or expedite setting by chilling for 15-20 minutes before presenting.
Notes
- Ensure cookie dough isn’t too soft or sticky by chilling it briefly if it feels warm, which helps maintain perfect shape during baking.
- Use a cookie scoop or tablespoon to create uniform-sized balls, guaranteeing consistent baking and professional-looking cookie cups.
- Gently press the centers while cookies are warm but not scorching hot, preventing cracking and creating smooth, perfect wells for filling.
- Stir chocolate mixture thoroughly between microwave intervals to prevent burning and achieve silky-smooth filling consistency.
- Prep Time: 10 minutes
- Cook Time: 20 minutes
- Category: Desserts, Snacks
- Method: Baking
- Cuisine: American
Nutrition
- Serving Size: 25
- Calories: 150
- Sugar: 12 g
- Sodium: 100 mg
- Fat: 7 g
- Saturated Fat: 4 g
- Unsaturated Fat: 3 g
- Trans Fat: 0 g
- Carbohydrates: 20 g
- Fiber: 1 g
- Protein: 2 g
- Cholesterol: 25 mg
William Hawkins
Founder & Culinary Director
Expertise
Education
Sullivan University, Louisville, KY
William Hawkins isn’t just a chef, he’s a storyteller through food. From his hometown of Louisville, KY, he’s spent years refining his craft, turning local ingredients into something extraordinary.
With classical training from Sullivan University and a career marked by innovation, mentorship, and Southern soul, William approaches every recipe with purpose. His kitchen is where old techniques meet fresh ideas, and where comfort food gets a thoughtful, modern twist.
When he’s not building dishes from the ground up, he’s out gathering inspiration from nature, markets, and the stories people share around the table.