Magical Peanut Butter Truffles Recipe: Sweet Bites of Bliss
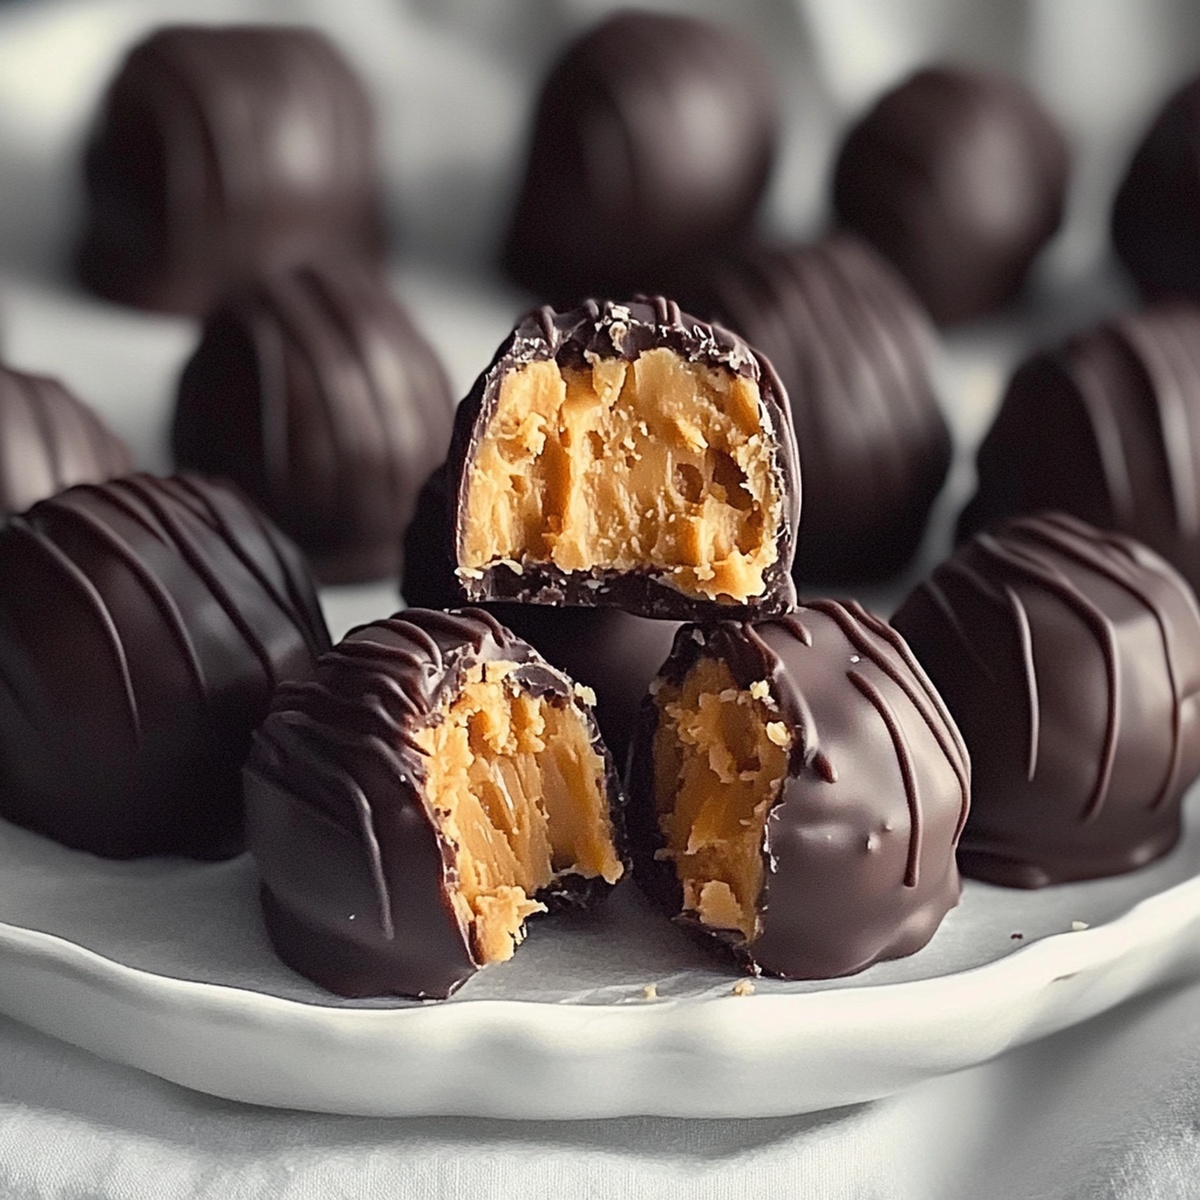
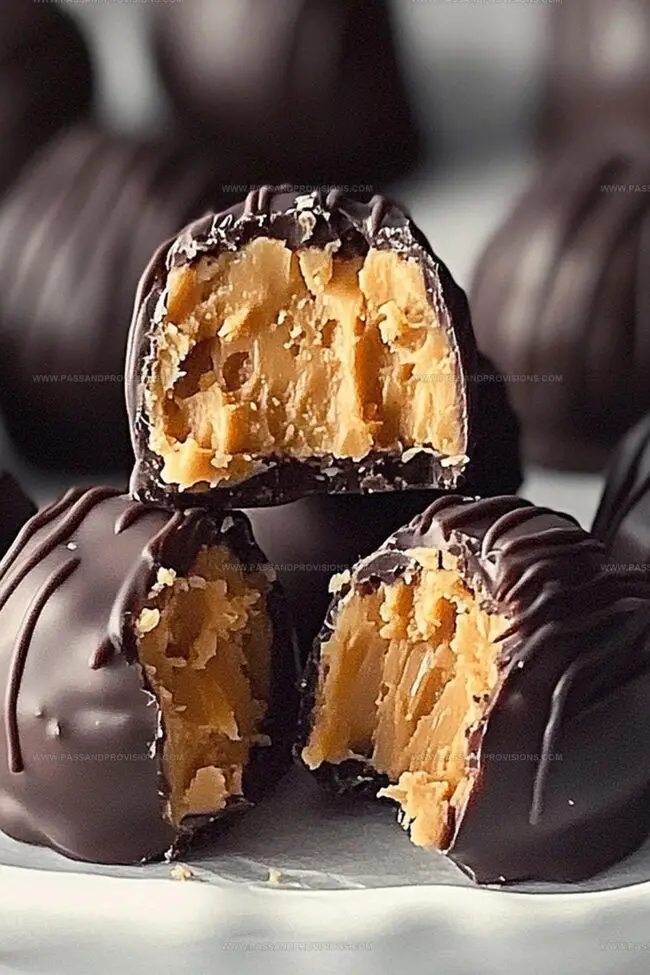
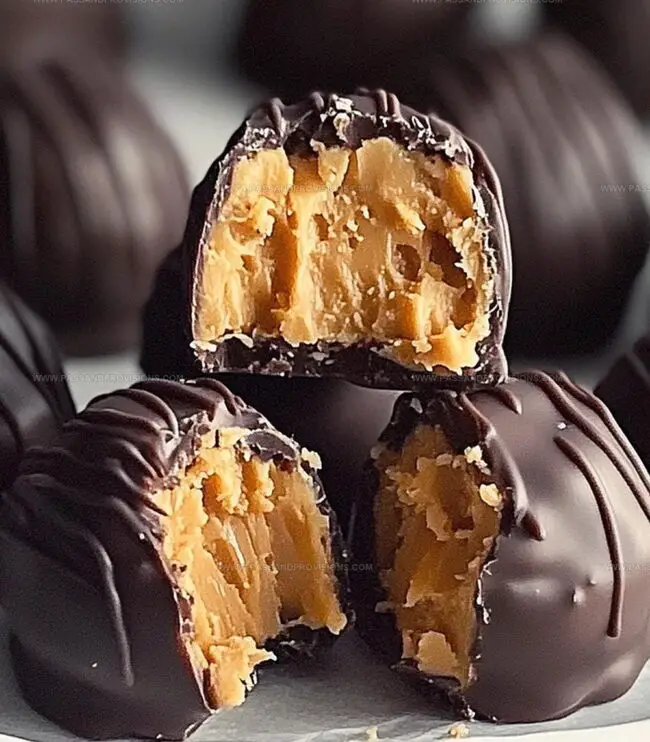
Chocolate lovers swoon over these irresistible peanut butter truffles that blend creamy richness with decadent chocolate.
These delightful little morsels burst with smooth peanut butter truffles that melt effortlessly on your tongue.
Each truffle combines simple ingredients for maximum flavor and minimal effort.
No baking required means you can whip up these treats in minutes.
The combination of chocolate and peanut butter creates a classic flavor profile that never disappoints.
These truffles make an impressive dessert for any occasion, from casual gatherings to elegant parties.
Treat yourself to a bite of pure indulgence that’s sure to satisfy your sweetest cravings.
Quick Recipe Overview
Ingredients That Form Peanut Butter Truffles
For Truffle Filling:For Chocolate Coating:For Garnish and Decoration:Equipment for Rolling and Dipping Truffles Easily
Steps to Make Smooth, Creamy Peanut Butter Truffles
Grab a mixing bowl and blend peanut butter, softened butter, and vanilla until silky smooth. The mixture should look creamy and inviting.
Slowly incorporate powdered sugar, stirring until a thick, moldable dough forms. Work the mixture until it feels firm and holds together perfectly.
Roll the dough into small, uniform balls using your palms. Place these tempting treats on a parchment-lined tray, ensuring they’re not touching.
Pop the tray into the freezer for half an hour. This helps the truffles firm up and makes the next step easier.
Melt chocolate with a touch of coconut oil in short microwave bursts, stirring between each interval. The goal is a smooth, glossy chocolate coating.
Carefully dunk each chilled truffle into the melted chocolate. Use a fork to help drain excess chocolate, creating a perfect, even shell.
Sprinkle with crushed peanuts or a pinch of sea salt for extra pizzazz. Let the truffles set in the refrigerator until the chocolate hardens.
Serve these decadent treats chilled or at room temperature. Keep in an airtight container in the refrigerator for up to two weeks or freeze for longer storage.
Variations for Coatings and Fillings to Switch Up Flavor
Serving These Truffles on Platters or Gift Trays
Storing Truffles in the Fridge or Freezer
Print
Dreamy Peanut Butter Truffles Recipe
- Total Time: 1 hour 15 minutes
- Yield: 25 1x
Description
Indulgent chocolate-dipped peanut butter truffles deliver smooth, rich flavor in each delectable bite. Creamy centers wrapped in silky chocolate make these irresistible treats perfect for satisfying sweet cravings you’ll savor.
Ingredients
- 8 oz (226 g) semi-sweet or dark chocolate, chopped
- 1 cup (240 ml) creamy peanut butter
- 1 ½ cups (180 g) powdered sugar
- 4 tbsps (56 g) unsalted butter, softened
- 1 tsp (5 ml) coconut oil or vegetable shortening (for a smoother coating)
- ½ tsp (2.5 ml) vanilla extract
- ¼ cup (30 g) crushed peanuts
- Drizzle of melted white chocolate
- Sea salt flakes
Instructions
- Prepare Filling: Cream peanut butter, butter, and vanilla until silky smooth in a mixing bowl, gradually incorporating powdered sugar to create a dense, cohesive dough.
- Shape Truffles: Craft uniform 1-inch spheres from the mixture, arranging them on a parchment-lined tray, then transfer to the freezer for approximately half an hour to solidify.
- Chocolate Coating: Melt chocolate and coconut oil in a microwave-safe vessel, stirring between brief intervals until achieving a glossy, uniform consistency.
- Enrobe Truffles: Delicately immerse each chilled truffle into the molten chocolate using a fork or toothpick, allowing excess to cascade back into the bowl before repositioning on the tray.
- Embellish & Stabilize: Enhance the truffles by sprinkling crushed peanuts, sea salt, or drizzling white chocolate, then refrigerate for 30 minutes to ensure complete chocolate setting.
- Serving & Preservation: Serve at room temperature or chilled, storing in a sealed container within the refrigerator for up to two weeks, or preserve in the freezer for three months.
Notes
- Freezing the peanut butter balls for 30 minutes ensures they’re firm and won’t fall apart when dipping in chocolate, creating a clean, professional-looking truffle.
- Melt chocolate slowly and stir frequently to prevent burning, adding a touch of coconut oil helps create a smooth, glossy coating that easily covers the truffles.
- Adjust powdered sugar quantity to control dough firmness – less sugar makes a softer filling, more sugar creates a stiffer, easier-to-shape mixture.
- Swap regular butter for dairy-free alternatives, use dairy-free chocolate, and choose gluten-free powdered sugar to make these truffles suitable for various dietary needs.
- Prep Time: 15 minutes
- Cook Time: 1 hour
- Category: Desserts, Snacks
- Method: Blending
- Cuisine: American
Nutrition
- Serving Size: 25
- Calories: 150
- Sugar: 10 g
- Sodium: 50 mg
- Fat: 9 g
- Saturated Fat: 3 g
- Unsaturated Fat: 5 g
- Trans Fat: 0 g
- Carbohydrates: 15 g
- Fiber: 1 g
- Protein: 3 g
- Cholesterol: 5 mg
William Hawkins
Founder & Culinary Director
Expertise
Education
Sullivan University, Louisville, KY
William Hawkins isn’t just a chef, he’s a storyteller through food. From his hometown of Louisville, KY, he’s spent years refining his craft, turning local ingredients into something extraordinary.
With classical training from Sullivan University and a career marked by innovation, mentorship, and Southern soul, William approaches every recipe with purpose. His kitchen is where old techniques meet fresh ideas, and where comfort food gets a thoughtful, modern twist.
When he’s not building dishes from the ground up, he’s out gathering inspiration from nature, markets, and the stories people share around the table.